How To Make a Fabric Flower & Braided Leather Belt
Supplies:
*A small amount of faux leather fabric (I found mine at JoAnn with the costume fabrics)
*Rotary cutter and mat
*Fabric glue (I like Fabri-Tac)
*Fabrics for flowers (I used lace, cotton, and a faux version of Dupioni silk)
*Clips (alligator hair clips work well, I used mini bulldog clips)
*Beads or buttons for flower embellishment (optional)
*Large clip or clothespin
1. I bought 1/8 yard of "pleather" at the fabric store and had enough to make three belts! Start by folding the faux leather lengthwise a couple of times.
Cut three 1/2" strips.
2. Stack the three strips and use a bulldog clip or clothespin to hold them together.
Hold the clip between your knees (yes, those are my sweats--I'm still not dressed this morning). Carefully braid the three pleather strips. Braid loosely--if your braid is too tight the strips will twist and fold in half, which doesn't look nice when you're done.
3. When you get to the end, hold the middle strip out to the side.
Glue the top strip to the bottom strip with your fabric glue (it's fabric not leather, remember?)
Take the middle strip and wrap it around the other two strips, gluing on each side until you run out of strip.
Clip the other two strips so they're flush with the bottom of the piece you wrapped around. Voila!
Repeat on other end.
Now for the flowers. There are an endless number of fabric flowers you could make for your belt. I chose to create one from Jones Design Company (she even offers a printable pattern!). The only difference was that since I was using a satin fabric, I melted the edges of the flower petals with a candle flame so the wouldn't fray, like we did in this flower tutorial.
I also made one of our pretty rosettes from this flower tutorial,
and a few that I made with an awesome die cut from Sizzix. Let me show you how to make this pretty fabric flower. If you don't have a die cut machine, a simple hand-cut fabric circle would work, too.
My friends at Blue Moon Scrapbooking sent me the Sizzix BigZ 3-D Flower Die No.2, which makes three awesome flowers with one die! {P.S. It's on sale over at Blue Moon right now!}
To use this die, cut pieces of fabric (or paper!) about 4" x 4".
Run it through the Sizzix and unfold. This is the small scalloped circle.
This is the large scalloped flower.
I made about 10 scalloped circles (plain circles cut by hand would work, too). I also cut a couple of out lace.
Next, fold your flower in half and in half again.
Place a small bit of fabric glue in the center of the fold
and press closed for a few seconds.
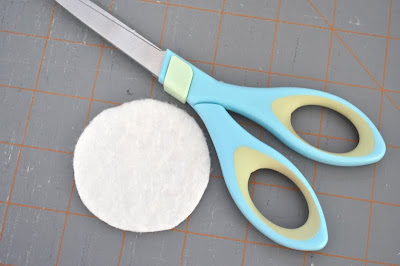
Cut a circle of felt smaller than your scalloped circles.
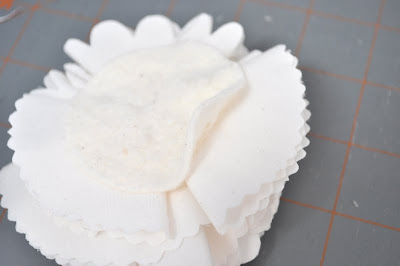
I tried this several different ways, and this was the way I felt made the fullest bloom. You could also use a needle and thread, but fabric glue is so much faster! Bunch all but three folded petals together, gluing one to the next. Be sure the alternate the direction of the fold on each petal so your flower is full.
Glue three or four of your folded petals to the center of the felt circle.
Put a little glue on the bottom of your bunch and glue it to the center of the petals on your felt circle.
Gorgeous, right?
To attach a clip, you can either use the instructions on the rosette tutorial if you're using an alligator clip, or follow these instructions if you have a mini bulldog clip like me. {I had these left over from this project, and my goal this year is to use what I have before running to the craft store!}
Lift up part of the felt circle and make a small slit with your scissors.
Insert one side of the bulldog clip into the slit. Glue the rest of the felt circle down to cover the clip.
Just to be safe, I glued down the back part of the clip to the felt circle with some E6000 glue.
Clip your flower (or two or three for a dressier look) to your belt. Tie your belt around your waist. You look adorable!
For those of you who've been asking for baby bump pics, here I am at 21 weeks. I love how this belt dresses up a maternity shirt and {hopefully} makes it look like I still have a waist!
I hope you love your new belt as much as I do! Watch for more flower variations in the future--I have a feeling I'm going to want to use this accessory to it's fullest!
share this on » |
{Facebook} | {Twitter} | {Pinterest} |


6 Responses to “fabric flower and braided leather belt {tutorial}”
cute, I love that the flowers could be interchangeable
xo
Something like this would be perfect with my wedding dress. Though I don't think I have enough time to make one anymore :-)
I did a braided belt too but your braided belt is very pretty :)
http://artistneelima.blogspot.com/2011/03/how-to-make-braided-belt.html
I love this! Since I am horrible at crafting though, I think I would just take the easy way out and buy a fake flower...(sorry) but a great idea either way! Maybe I'll make one for myself and my daughter.
Beautiful! Vry nice tutorial! I'm going to share it on my FB wall!
https://www.facebook.com/DiyGiftsStudio
...btw, such a cute belly bump! :)
I tried to follow the link to the first fabric flower, and it took me to the store for the bulldog clips. :(
Post a Comment