So if you were here yesterday, you are now obsessed with making fabric rosettes (if you weren't already). Today you're here to see how to turn them into a clippie, so you can clip them to things. Because you love them so much that you want to take them everywhere you go, right? You are not alone.
Fabric Rosette Clip Tutorial
*Fabric rosettes (from this tutorial)
*Hair clips (I like the little alligator clips from the beauty supply store)
*Felt for leaves and to hold clip
*Fabric glue (we like Fabri-Tac)
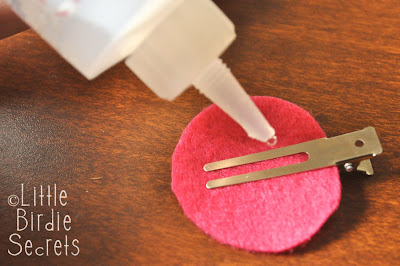
1. Cut a circle of coordinating felt to match the size of the bottom of your rosette. Clip your clip to it, flat side up.
2. Apply fabric glue to felt and clip.
3. Press felt to the bottom of your rosette.
4. Cut a small leaf from green felt. Glue it to the top of clip. This covers up the end of the clip on a small rosette.
Next, clip it to something! I love them on baby headbands.
I recently clipped these to a church lesson handout. They made the handout cute, and then the girls had something to wear that would remind them of the things they learned in class.
Or, you clip them to a piece of jewelry, like a necklace or a couple of beaded bracelets.


I made this large rosette for my mother-in-law for Mother's Day.
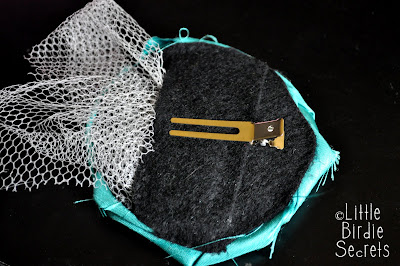
To make the clip work on a larger rosette, glue a strip of felt in the middle of the flower with the clip glued on as shown above.
I clipped it to a card and sent it in a padded envelope with a note to remove the flower and wear it. She wears it on a pretty scarf or her purse. Just FYI, the paper I used is from the DELOVELY line by Cosmo Cricket. Love it.
What are you going to clip your rosettes on?
share this on » |
{Facebook} | {Twitter} | {Pinterest} |


18 Responses to “how to make a fabric rosette clip”
I love the fabric rosettes. I am definately going to make some of these, they look so simple but so effective.
Thanks for a great tutorial.
This is definitely fun! THanks so much for the tutorial.
Cynthia Schelzig
Hi,
I like your blog, is beautifull!!!!
Visit my blog, please.
Congratulacions from Brazil.
Judite/jud-artes
Oh, I can't wait to get clipping!
I love it!!! Also I featured you!!
http://dragonflyfeathers.blogspot.com/2010/09/what-i-am-loving-this-week-1.html
already bought all my fabric- cant wait to get started- are you going to tell us how you made the necklaces with bunches of the flowers? I am dying to make one-
nice!!
hugs from Chile
c@
this is something I must try! love them with the beads inside too.... awesome obsession!
I've been making these for a while but I love how you turned the clips upside down so the flat side is against the flat back of the clip, I'll definitely be doing that from now on! And I love your ruffly knit headband, I want to make one for my baby girl right now!
Marisa in Maple Valley
Another adorable project. I love this fabric rosette, so pretty and so perfect to use as hair accessories. Thanks for the tutorial. I'm totally saving this for future reference.
Yes! So excited to try this one out. I've been looking for a tutorial for this exact thing for ages and I know you guys always make the best tutorials. Thanks so much;)
I'm loving your rosette series! I'll be linking.
I love these. Thank you for the tutorial.
I am making some of these as hostess gifts for my baby shower this weekend, but am having trouble making the clips stick to the felt with fabric glue. Any suggestions?? Thanks! I love these rosettes!
Love these rosettes! Can't make some to go on singlets with my fabric yo yos!!
I linked to you on:
http://justfordaisy.blogspot.com/2011/03/fabulous-fabric-flower-tutorials.html
Thanks for the tutorial!
Soooooo creative! Thank you for your inspiration! Found you through "Skip to my Lou" teacher appreciation ideas. Going to make one of the cute bookmarks for my son's teacher, thank you.
Thanks soooo much for showing how to make these! Ive seen them alot lately and had no idea how to start. I think me and my sis n law will make these ALL the time now
I have been making these rosettes. I love the one you did with pearls in the center. May I ask where you found those and what you used to adhere them?
Post a Comment