Archive for June 2010

Wednesday, June 30, 2010

painting with Jello - reader submission

I had 5 bored kids at my house today, so we pulled out this little gem of an idea "scent" by our reader Lisa of Rainy Tuesday Mornings. Have you ever thought of adding powdered gelatin to your artwork? The colors are vibrant and the kids love smelling their paintings! I had stocked up on Jello when it was on sale the other day, and we had all the colors we needed for a "sweet" art project. I followed Lisa's instructions with the following changes: we used plain paper, Mod Podge (instead of Elmer's glue), and wide foam brushes. And I definitely agree with the idea of making this an outdoor activity. Oh, and I should mention, it's probably best for an adult to be the one adding the "color." My kids didn't seem to mind--it gave them a chance to sneak tastes of the excess Jello when I wasn't looking! Here are the creations of James, Adam, Meg, and Riley--budding artists with great "taste" in color!

o


And now for this week's reader submission:
Art In the Park (with Jell-o)

Finished Project!

My friend Natalie hosted an amazing "Art in the Park" activity for all our friends and kids. She brought all the supplies to make a great smelling piece of art using Jell-O and glue.

Supplies Needed:
  1. Fruit Bowl (click to download)
  2. Jell-O in these flavors: Strawberry, Pineapple, Grape, Raspberry, Lime, Lemon, Orange, Cherry & Banana
  3. Elmers Glue (or generic brand)
  4. Paintbrush for each child
  5. Paper cups or other similar item to hold each flavor of Jell-O
  6. Paper cup or other similar item to hold the glue

Directions:

  1. Print out your Fruit Bowl (one for each child) and have them color the bowl any color they want.
  2. Color the stems & leaves of the fruit green.
  3. Pour some glue in a paper cup
  4. Pour each flavor of Jell-O in it's own paper cup (NOT with the glue and don't mix the flavors). Label your cups! Many of the Jell-O's are the same color, but not the same scent.
  5. Take your paintbrush and dip it in the glue cup.
  6. Paint ONE fruit at a time (for the orange you can paint both). After the entire fruit is covered with glue, pour the matching scent of Jell-O onto your fruit. Pour any excess back into the cup.
  7. Repeat with each fruit until it's covered.
  8. Smell and enjoy!
Thanks, Lisa!

share this on »
{Facebook} {Twitter} {Pinterest}
12 Comments

Tuesday, June 29, 2010

patio furniture makeover


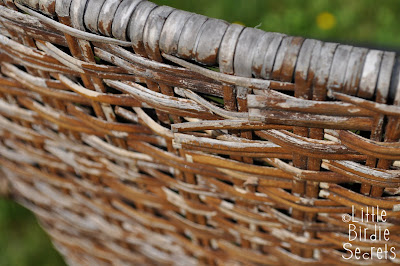
It's almost warm enough for a BBQ here in Western Washington--hooray! Okay, I'm only kind of kidding. We BBQ in the pouring rain if we have to. But as the weather's been perking up, I've been thinking about hosting a backyard dinner with some friends. Until I remembered that my patio furniture was pretty much done. I'd left the wicker chairs out uncovered and the wicker rotted, and at last year's party someone sat on one and went right through the seat! Yikes! The other chairs are okay, but they are pretty weathered. And since patio furniture is on the "wants" list and not the "needs" list, I had to get creative.

Here's one of the chairs before. It used to be a nice, golden brown color. The rain took care of that. This calls for a little outdoor spray paint!


The first step before painting anything is to prep. That means cleaning and taping, and those two steps always seem to take longer than the actual painting! For wicker, use a spray bottle to lightly mist the piece,


then use a soft cloth to wipe off dirt. Or get your kids to do it because a spray bottle always screams "FUN!"


Next, be sure to repair any broken pieces of wicker. I glued some of the longer ones down with wood glue, and trimmed the shorter ones.


If you're spray painting an outdoor wicker piece, be sure to choose an indoor/outdoor spray paint. Tape off any metal parts you don't want to be painted, then spray from left to right in even sweeps. I did two coats on my set (chairs and table).


For my broken chair, I cut the wicker seat off completely. Now this part is kind of laughable, and not at all professional, but it totally worked! I cut long strips of commercial grade upholstery fabric (because a friend gave it to me for free--you could also use upholstery webbing, available at fabric stores like JoAnn, or even Walmart). Then I sewed them together end-to-end to create a very long strip. Then I tied one end to my starting point. Wrapping them around the bars of the original seat, I essentially created a basket weave seat to replace my broken one.


Don't worry--this is not going to be seen. I added a coat of paint just to make it less noticeable.


Now for the great cover-up. I found cushy chair pads at Walmart for $10. Once they're on, you don't even see my ugly basket weave job! And it's sturdy enough that we won't have to worry about another comic event at this year's BBQ. Party at my house, everyone!

share this on »
{Facebook} {Twitter} {Pinterest}
5 Comments

Monday, June 28, 2010

back from vacation with a t-shirt refashion

Lots of driving, lots of food, lots of family, lots of hiking, a little bit of crafting. That was our trip to Utah. It was amazing. But it's good to be home and off the sugar high, and to get back to lots of crafting.


My little bit of crafting was t-shirt refashioning with my mom and sis. Here we are when I first got there--I loved that we were all wearing essentially the same outfit. Jeans, a white shirt, and a bright cardi. No, we didn't call each other. It must be genetic.


My mom always claims that she's not crafty or creative, but don't let her fool you--she knows style. This is her ruffle and flower t-shirt she made with a little ribbon and some beads. Gorgeous, right? She used our gathered ribbon flower tutorial to make the flower, then stitched the ribbon down to create random ruffles and added a few accent beads.


So my sister and I picked up t-shirts at Forever 21 (mine was only $2.50!), plus some ribbon and beads at JoAnn. Here are our versions.


My best tip for stitching ribbon to a t-shirt is to use a transparent thread. I use a lightweight, "clear" quilting thread that I also found at JoAnn. You don't see the stitches, and you can use it for lots of different colored shirts, so it's economical.

I also had a little time to create some jewelry with inexpensive bracelets I also picked up at Forever 21. Tutorial coming soon--I'm still unpacking and catching up on laundry!


(Loving the awkward self-portrait. Too lazy to turn on the timer.)

share this on »
{Facebook} {Twitter} {Pinterest}
33 Comments

Thursday, June 24, 2010

restyled dresser handles

When my husband was in high school he made a beautiful oak dresser. We still have it and I love it. It is very sturdy and looks great. The only problem is that I have always disliked the gold coated handles on it. They just seemed so out of date.

I recently asked my husband if I could spray paint the handles to give them a new look and much to my delight he was all for it! I picked up some hammered-finish black spray paint to match the wrought iron trim on my bed and about five minutes later I had new dresser handles. It was so simple to unscrew all the handles and spray them in my garage. After they were dry I screwed them back onto the dresser. Don't they look so much better? It is such a simple, inexpensive way to update any handles you might have!

share this on »
{Facebook} {Twitter} {Pinterest}
15 Comments

Tuesday, June 22, 2010

how to crochet a butterfly


My schedule has been too hectic to finish any real projects lately, so I've been getting my crochet fix by whipping up these tiny little butterflies in every color. The trick? Use embroidery floss. It comes in every shade imaginable, it's the perfect thickness for little accessories, and it's cheap. They're perfect for cards, scrapbook pages, hair clips, they'd even be cute on the front of a baby onesie or beanie.

Below are my original patterns for how to crochet a butterfly. If you're comfortable with a crochet hook, these will take you about 3 minutes to make. If you're a beginner, watch our How To Crochet A Flower and How To Crochet A Heart videos. The butterfly is basically a four-petaled flower using some of the same stitches as the heart. The only stitch not shown is the dtr (double treble) used in the medium pattern, which you can see on this site. Here are patterns for five different sizes of butterflies, which measure from about 1 inch to 4 inches in size, although the size of your materials and your gauge may change the sizes slightly.

To create the abdomen and antennae, cut a coordinating piece of thread or yarn about four to six inches long (depending on your butterfly's size). Leaving a short tail, wrap the piece around the middle of the butterfly twice. Tie ends in a double knot. Trim antennae.


Teeny Tiny Butterfly Crochet Pattern

Supplies:
*Embroidery floss
*Size 6 crochet hook

Ch 4. Sl st into first st to form a ring.

*Ch 2. 3dc into ring. Ch 2. Sl st into ring.* Repeat once.

*Ch 1. 3dc into ring. Ch 1. Sl st into ring.* Repeat once.

Fasten off. Create abdomen and antennae.


Small Butterfly Crochet Pattern

Supplies:
*Embroidery floss
*Size 6 hook

Ch 4. Sl st into first ch to form a ring.

*Ch 4. 3tr (treble stitch) into ring. Ch 3, sl st into ring.* Repeat once.

*Ch 3. 3dc into ring. Ch 3, sl st into ring.* Repeat once.

Fasten off. Create abdomen and antennae.

This card uses the small pattern.


Medium Butterfly Crochet Pattern

Supplies:
*Embroidery floss
*Size C hook

Ch 4. Sl st into first ch to form a ring.

*Ch 4. Work 3 dtr (double treble stitch) into ring. Ch 4, sl st into ring.* Repeat once.

*Ch 3, work 3tr into ring. Ch 3, sl st into ring.* Repeat once.

Fasten off. Create abdomen and antennae.


Large Butterfly Crochet Pattern

Supplies:
*Sport weight yarn
*Size C hook

Ch 4. Sl st into first ch to form a ring.

*Ch 4. 3tr (treble stitch) into ring. Ch 3, sl st into ring.* Repeat once.

*Ch 3. 3dc into ring. Ch 3, sl st into ring.* Repeat once.

Fasten off. Create abdomen and antennae.


Extra Large Butterfly Crochet Pattern

Supplies:
*Sport weight yarn
*Size G hook

Ch 4. Sl st into first ch to form a ring.

*Ch 4. Work 3 dtr (double treble stitch) into ring. Ch 4, sl st into ring.* Repeat once.

*Ch 3, work 3tr into ring. Ch 3, sl st into ring.* Repeat once.

Fasten off. Create abdomen and antennae.


I've mostly been making the small butterflies. Love them!


share this on »
{Facebook} {Twitter} {Pinterest}
86 Comments

Monday, June 21, 2010

reader submission: how to make an iPad case

I'm out of town visiting the sun (and my family), so I've loved being able to post great reader submissions while I'm gone! Today's guest tutorial from Made By Heidi is brilliant--it's a hard case/cover for an iPad, but it could easily be adapted for a laptop or netbook. It's not just functional, it's beautiful! Thanks so much, Heidi!


iPad Case Tutorial

My husband and I are Mac fanatics, so when the iPad first made its appearance I knew it was only a matter of time before it made its way into our home. The only problem... the cases are not my style. So I decided to make my own.


What you need:
2 pieces of 9 1/2 X 12 1/2 inch outer fabric
2 pieces of 10 X 13 inch batting
2 pieces of 12 1/2 X 20 inch inner fabric
11 1/2 inch zipper
Sewing machine
Needle & thread
1 binder

Directions:
Cut the binder as shown.


Cut the binder pieces to 8 1/2 X 11.


Place outer fabric with right sides together. Add batting on top and bottom of outer fabric.


Pin the pieces together.

Start 1/2 inch from the top of the outer fabric (shown), you will need the extra space for to attach the zipper at the top. Sew 1/4 inch (remember to backstitch) from the edge of the outer fabric. You will need to lift the batting as you sew, to make sure you are still sewing the outer fabric. Sew down one side, across the bottom, and up the other side. Leave 1/2 inch at top. Backstitch.


Do not remove the excess material around the stitches. It will provide padding for the edges of your ipad case.


Cut off the corners.


Turn inside out. Use pin to pull corners out.


Sew along the outer edge of the case.
Attach the zipper as shown. Sew down the middle of the zipper (where the pins are located in my picture). Remember to backstitch.

Turn right-side out. Sew below zipper on the outer-fabric.

Take inner fabric and wrap around the binder piece. Sew the two edges of the inner fabric about 1/8 of an inch from where the binder ends. Repeat for the other piece.

Take the two pieces pin & sew together. End product should look like this. Don't remove the excess fabric. It will help protect the ipad.


Insert lining into outer shell. Using a needle and thread sew lining to the outer fabric or zipper. Do not push all of the way through the outer fabric, you don't want your stitches to show.


Add any accessories and voila! A very cute case for your iPad.

share this on »
{Facebook} {Twitter} {Pinterest}
19 Comments
LinkWithin Related Stories Widget for Blogs