Archive for August 2012

Monday, August 27, 2012

end of summer pasta {recipe}

Last week I happened on this recipe in another congregation's newsletter left behind on a chair at church. I have no idea who to credit this recipe to--I just know it's a new family favorite! My dad has zucchini coming out of his ears these days and we had a few red onions from my grandpa's garden, so this end-of-summer pasta recipe was perfect for Sunday dinner. Even if you don't make this pasta dish, you NEED to try the marinade for chicken breasts on the grill before the weather turns. I am not kidding--it is the best chicken marinade I have ever tasted. Ever. Ever. We loved this dish warm, but my mom had cold leftovers the next day for lunch and said it was just as delish!


 Ingredients:

1 c. olive oil, divided
1/3 c. reduced-sodium soy sauce (I used regular and it was fine!)
1/4 c. balsamic vinegar
3 Tbsp. Dijon mustard
6 cloves garlic, peeled and minced
1 1/2 lbs. skinless, boneless chicken breasts, rinsed
1 lb. zucchini
2 red bell peppers
2 portabella mushroom caps
1 red onion
1 lb. dried penne pasta
1 1/2 c. freshly grated parmesan cheese
Salt and pepper
1/2 c. fresh basil leaves, slivered

Directions:

In a bowl, whisk together 2/3 c. olive oil, soy sauce, vinegar, mustard, and garlic. Reserve 1/2 c. marinade for basting vegetables; pour remaining marinade into a 1-gallon Ziploc plastic bag. Cut chicken lengthwise into 1-inch-wide strips and add to bag. Seal bag and turn to coat chicken. Chill about 45 minutes.

Meanwhile, cut vegetables. Slice zucchini into 1/4-inch-thick strips; stem and seed bell peppers, quarter lengthwise; peel onion and slice crosswise into 1/4-inch-thick rounds. Brush vegetables with reserved marinade.

Cooking in batches if necessary, lay vegetables and chicken (discard marinade) on a gas grill over medium-high heat; close grill lid. Cook, turning once, until vegetables are slightly charred and chicken is no longer pink in center, 6-10 minutes. Let cool a few minutes, then chop veggies and chicken into 1-inch pieces.

Cook pasta in boiling water until barely tender to bite, about 9-13 minutes. Drain.

In a large bowl, mix pasta with remaining 1/3 c. olive oil, parmesan cheese, half the chopped vegetables and chicken, and salt and pepper to taste. Top with remaining vegetables and chicken. Garnish with sliced basil. Serve warm or cold.

Speaking of the end of summer, my kiddos went back to school today, we moved the rest of our belongings to Utah from Seattle, and our house-hunt is finally over (woo hoo!), so let the crafting resume! I can't believe it's been almost a month since my last post! Sad, but I love that I can take a break when it's best for my family and come back to all your wonderful readers when it works for me. Anyway, look for a fun giveaway this week for these darling wood signs. I turned mine into chalkboards for photo props. LOVE! 

share this on »
{Facebook} {Twitter} {Pinterest}
5 Comments

Sunday, August 26, 2012

rubbermaid bento box and topper giveaway

We are very excited to introduce Rubbermaid Bento Boxes and Toppers that help you divide and conquer your clutter. These are perfect for craft rooms and supplies because they organize items for easy access rather than simply containing them.


Bento’s Flex Dividers allow users to customize the inside of the box, creating organization solutions that are perfect for a variety of needs. Flex Dividers pop open when needed, and simply pop back when not. Each Flex Divider can be opened or closed separately of the others to create a home for supplies.

Bento Toppers™ can be used in two distinctive ways. One way it can be used is as a tray to contain items you frequently use, such as scissors or tape. The second way to use Bento Toppers is as a lid for the Bento Box by simply flipping over the Topper. This way you can hide things (such as ongoing projects) that you do not want everyone to see but are needed for easy access.


Bento Boxes and Toppers come in a variety of fabric designs and colors to compliment any home décor. The boxes were designed to hold common household items such as Crafting Supplies, Office Supplies, Magazines, File Folders, Mail, Toys, Hair Care Accessories, DVD & Video Games, Audio &Video Accessories and Board Games. Bento Boxes are stackable to make the most out of your space. Covered with polyester, the boxes are durable, yet easy to clean with a damp cloth.

Bento Boxes and Toppers are now available at Jo-Ann's Fabric and Craft stores

I received a set of Bento Boxes and Toppers and I absolutely love it! It is such a fabulous way to organize all of my craft supplies without losing track of anything. I received the set in the paprika color. Love it!
Today, one lucky reader will have the chance to win this same set! The value of the set is $215.93. This is the price it sells for at Jo-Ann’s! (Prices at retail will vary and are controlled by the retailer) So all you folks looking to organize a few things....here's what you need to to do enter. Leave a comment telling us what your favorite feature about Bento Boxes and Toppers. Simple as that! Do it by Saturday, September 1st at 11:59 pm PT when this giveaway will end.

My Sample was provided free of charge by Jo-Ann Stores, Inc. and Rubbermaid®

share this on »
{Facebook} {Twitter} {Pinterest}
143 Comments

Friday, August 24, 2012

blueberry pie cookies

I saw these cookies on Building Buttercream the other day and I knew I had to make some! They are so adorable! I love that they look just like little pies. How can you go wrong with blueberry pie in a cookie? Such a genius idea!

photo credit: Building Buttercream


Blueberry Pie Cookies
Makes approximately 32 3-inch pie cookies.

Ingredients for Pie Crust
2 ½ cups flour (whole wheat pastry or all-purpose)
6 tablespoons sugar
1 teaspoon salt
2 ½ sticks cold unsalted butter
~½ cup ice water

Ingredients for Filling
2 ½ cups blueberries
½ cup sugar (my blueberries were a little sour, lower this if yours are riper)
juice and zest from ½ lemon
1 tablespoon melted butter
1 tablespoon cornstarch

Method
  1. Mix the flour, sugar, and salt together with a fork.
  2. Cube the butter and "cut" it into the flour mixture with a pastry cutter until there are no butter bits that are bigger than a pea.  Make sure you don't go smaller than this, however, since you'll start to lose flakiness if the butter is too small.
  3. Add the ice water, a tablespoon or two at a time and use a fork to wet the flour/butter mixture. 
  4. Keep adding until the dough just starts to hold together.  You don't want the dough too wet, and you don't want to mix in the water too much.  I find it useful to just use my hands to mix at this point.
  5. Divide the dough in two, cover each half with plastic wrap, and refrigerate for a couple hours at least (overnight is best).  This is especially important with the whole wheat pastry flour since it makes the dough a little easier to work with.
  6. Toss the blueberries, sugar, lemon juice and zest, butter, and cornstarch in a medium bowl.  Set aside.
  7. Preheat your oven to 350° F.
  8. Line the bottom of a cookie sheet with parchment paper.
  9. Remove one of the covered dough halves from the refrigerator.  Divide this in half and roll out on a floured board.
  10. Using a 3-inch round cutter, cut eight circles out of the pie dough.  Place these on the parchment paper, evenly spaced.
  11. Spoon a small amount (5-6 blueberries and a little sauce) into the center or each pie circle.
  12. Cut eight more circles out of the pie dough (you may have to gather the scraps and re-roll it out).  Place each circle on top of the blueberry-topped bottom circles.  Press down the edges with something thin (the top of a paintbrush or pen would work).  Brush with egg yolk and sprinkle with sugar.  Cut some small slits in the top.
  13. Bake for 10-14 minutes, or until the filling is bubbly.  Cool on a wire rack.  Repeat in three more batches with the rest of the pie crust and filling.
 photo credit: Building Buttercream

share this on »
{Facebook} {Twitter} {Pinterest}
6 Comments

Sunday, August 5, 2012

a "wild" dinner party {and world market sweepstakes}

Have you seen the new Kingdom Animalia collection at Cost Plus World Market? It's no secret that I love this store and when I went in the other day, I was thrilled to see animal prints! I love animal prints and of course Cost Plus World Market had such great items. They had the perfect items to create a "wild" dinner party with friends!


Here is one of the Kingdom Animalia displays. Look at those fun prints! I absolutely love the wooden serving dishes in different animal prints. You could really get a whole wild table going on with those.

Take a peak at the fabulous items I found to use on my table...


Lovely, right? Take a closer look...


I love the snake skin place mats! So fun and I especially loved the pattern on the mugs. These could be used for so many occasions. The set of napkins came in several different colors, but I chose yellow to tie it all together. Plus, this mustard color is one of my absolute favorites. Each pack of napkins came with a couple patterns. Love!!


I also bought pre-made pizza crusts and pizza sauce at Cost Plus World Market too. It was so delicious (and inexpensive!). I will be buying it again for sure. One of my favorite things about this store is that you really can buy everything you need for a get together in one store. It was a fun "wild" night in!

Cost Plus World Market is giving away an African Safari Adventure for two, inspired by the new Kingdom Animalia Collection. Grand Prize package includes: A trip for two to Africa (5 day Trip for 2 to Africa- includes airfare, accommodations and excursions) plus a $1,000 World Market gift card!


** There will also be 3 runner up prize winners that will each receive a $500 World Market gift card!
**If you share the sweepstakes with 5 of your friends (via FB share or email) you can receive 5 additional bonus entries. Be sure you enter daily through August 17th!

Make sure you follow Cost Plus World Market on Facebook, Twitter, and youtube to stay up to date on the latest promotions and sweepstakes!

This shop has been compensated by Cost Plus World Market and Pollinate Media Group, but all my opinions are my own.

share this on »
{Facebook} {Twitter} {Pinterest}
4 Comments

Wednesday, August 1, 2012

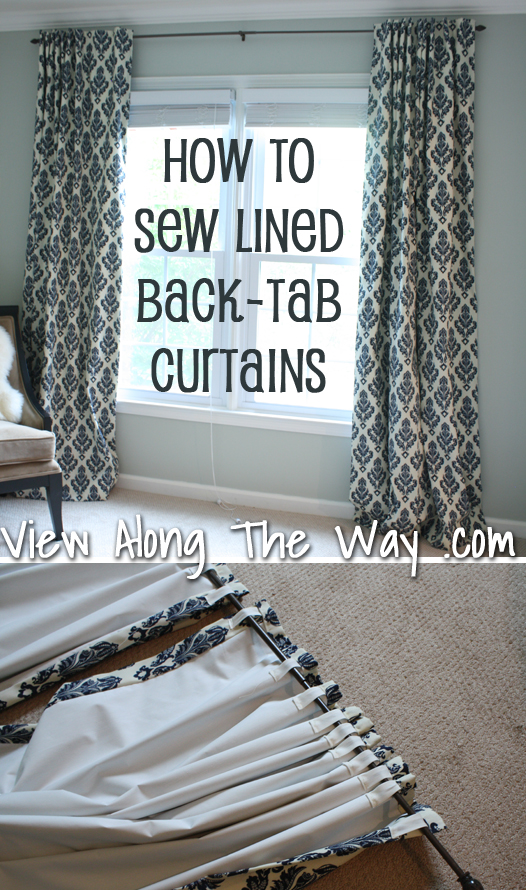
how to sew tab-back curtains {guest tutorial}

READ THE REST OF THIS POST -->>>» |

I'm heading back to Seattle tomorrow to pack up the furniture and craft supplies in our storage unit and haul them back to Utah. Well, PODS is hauling them back, but we're making a little vacay out of it. So we have a fabulous guest post this week showing how to make gorgeous and "tres professional" tabbed drape panels from our new bloggy friend Kelly. You will love her! Even if you don't intend on making any tab-back curtain panels soon, if you sew you should read this tutorial. She is hilarious. Enjoy!

Hi! I'm Kelly from View Along the Way. My husband and I are fixing up our crusty ol' foreclosure on a teeny little budget and blogging about the starts - and stops! - along the way. This is how I (finally) created some curtains for our master bedroom, even as a VERY novice seamstress. Let's just get this out of the way: I don't know whether to call these "curtains" or "drapes." Or "drapery panels." Or "window dressings." Skivvies for your wall orifices? I also never know whether to say "armoire" or "armuaaaaahh." Or "vase" or "vahhhze." Also unfortunately, my sewing skills are about on-par with my decor-pronunciation (in)abilities. Sorry about that. Hopefully I can still explain this clearly enough for you to go forth and sew your own curtains-drapes-window pants. 
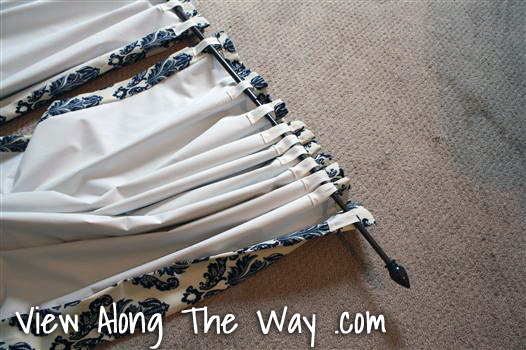
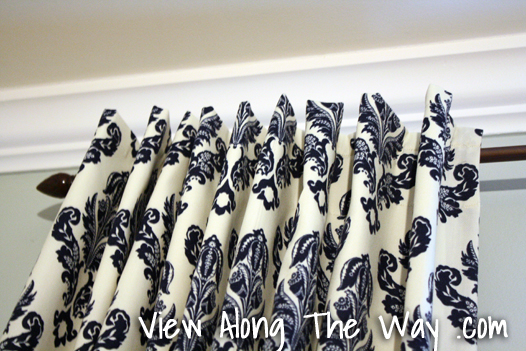
Tutorial: How to sew lined back-tab curtain panels, drapery panels, drapes 

This process is not hard. It's just long, with lots of steps. Best completed accompanied by wine and a mom who can sew. This is the method I used to make the drapes in my master bedroom... 
Bedroom with Upholstered Bed and Navy Damask Curtains/Drapery Panels 
And in my nursery
Girl Nursery Summer Totem Curtains 
I leaned pretty heavily on this great tutorial at Midwest Magnolia, but I improvised my own back-tab system because I love how the back-tabs look hanging up: DIY back-tab curtain drapery panelsBack-Tab Curtain Panels Drapery 
So here's how it all goes down! 

share this on »
{Facebook} {Twitter} {Pinterest}
15 Comments

summer movie night {kids review}

One of our favorite things to do as a family is having movie night! With Summer vacation in full swing, our boys have been enjoying some later than normal bedtimes. We love to watch movies together and my boys bring a bunch of blankets and pillows downstairs to watch and we often have some movie snacks on hand.

Recently, we rented the movie Space Dogs from Redbox. It was a hit! The boys loved it and we let them give their own movie review. Here is what they had to say...


They loved it and were glued to the screen which is great since sometimes they get distracted and don't finish movies. We had a great time and can't wait for the next movie night!

Rent movies like Space Dogs and many other family fun titles this summer for a chance to win a family trip to the Kennedy Space Center! Official Sweepstakes Rules

3 Easy ways to enter!
1. Rent a participating movie or game at a Redbox kiosk before 8/27 and enter your email at checkout. Click here for a complete list of participating titles
2. Reserve a Summer Family Fun movie or game online before 8/27
3. Go here to find out how to enter without renting

This is a sponsored conversation written by me on behalf of Redbox. The opinions and text are all mine.

share this on »
{Facebook} {Twitter} {Pinterest}
LinkWithin Related Stories Widget for Blogs