


My husband and I just celebrated 13 years of marriage last month, and our entire life together has been completely focused on a long road of school and training. That is all we've known. This month he completes his training and will start his first real job. I am almost afraid to say that out loud--it doesn't seem real! I am so proud of him for all the hours of hard work and the dedication he has put into his education. He is so amazing, and I am so in love with him! So when I made this simple burlap wedding banner for a dear friend, all I could think about was how lucky I am to be living my own "Happily Ever After" with my sweetheart!
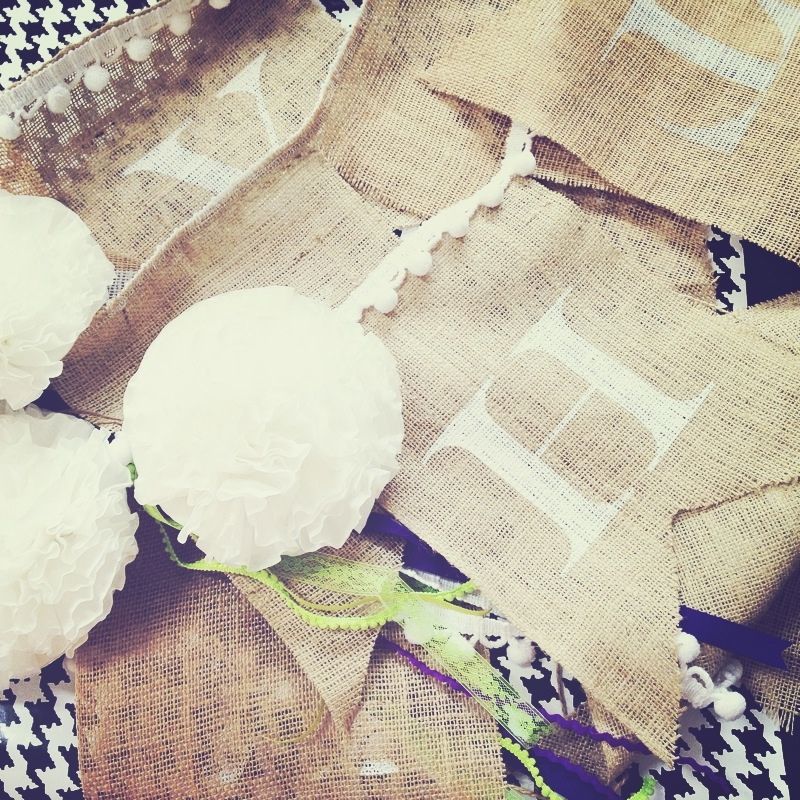

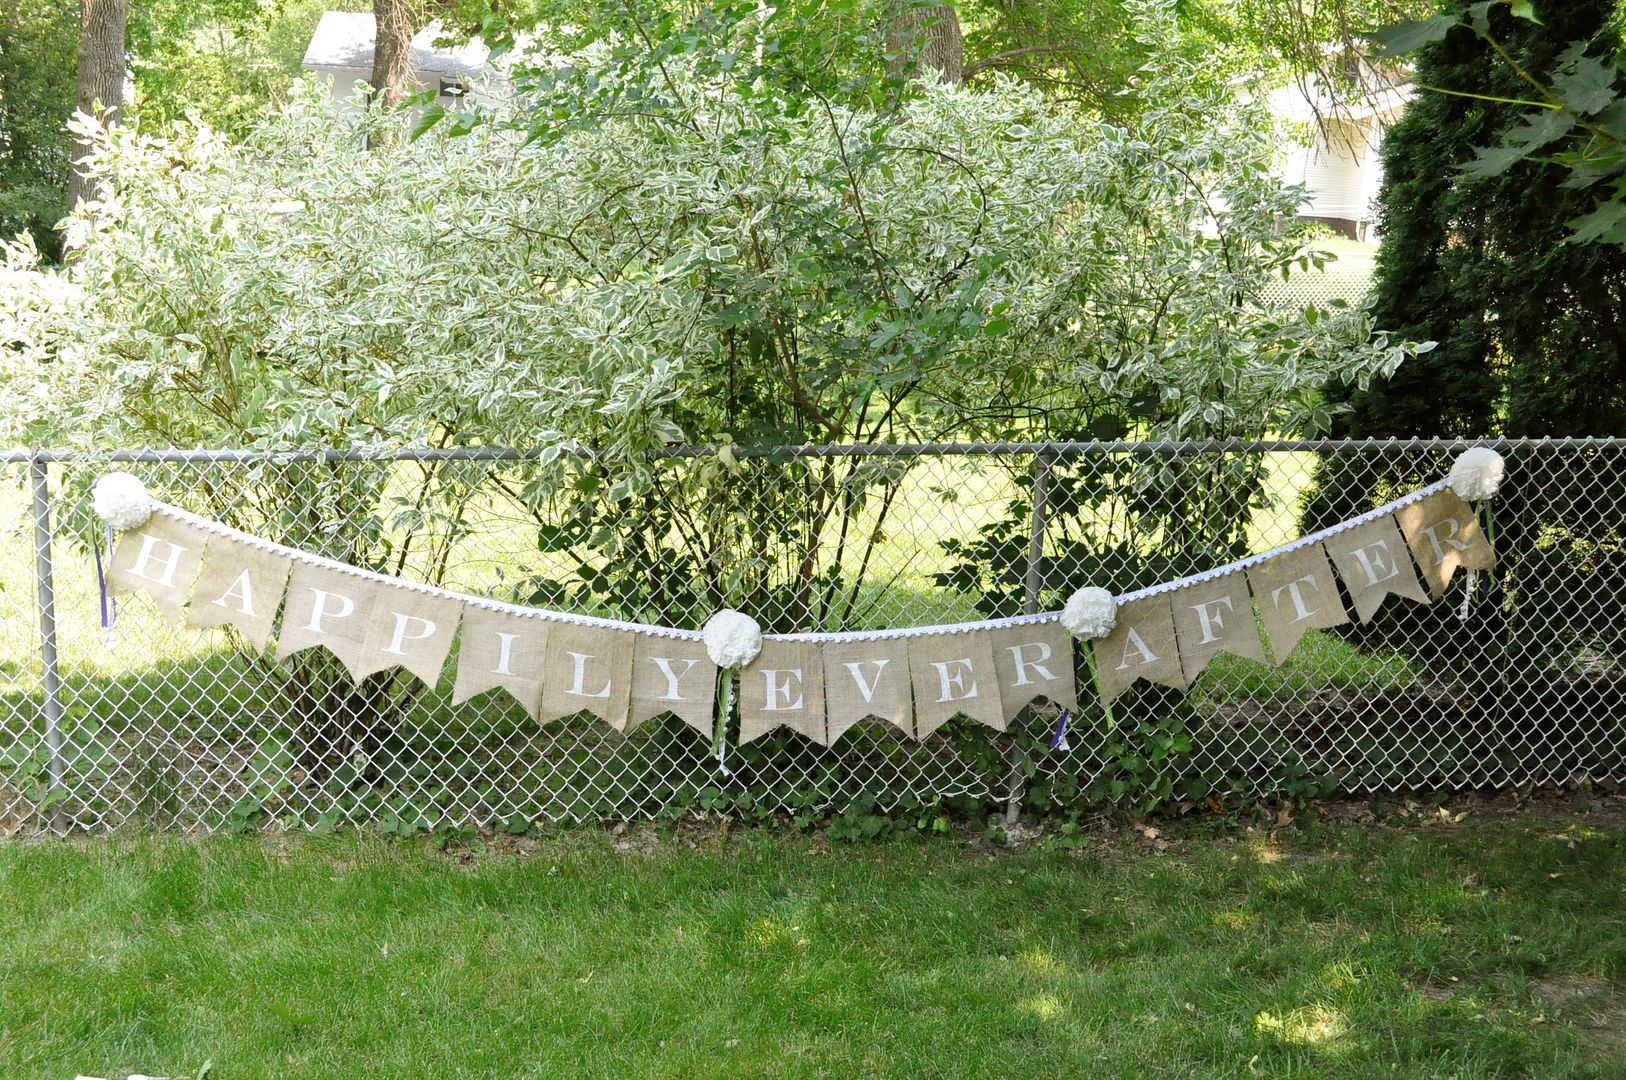
Wow, that was a fair bit of cheese. Sorry. I do have a burlap wedding bunting tutorial for you. I was asked to make a very large burlap banner and two paper banners for the cutest girl's wedding reception. This burlap bunting reads "Happily Ever After," and I used large coffee filter flowers and ribbon in the bride's colors to separate the words.

How To Make a Burlap Wedding Banner
Supplies:
*Burlap (I used 2 yards to create this extra large banner)
*Scissors
*Freezer paper
*White acrylic paint (I used Martha Stewart's satin finish craft paint in Wedding Cake)
*Coffee filters
*Ribbon
*Pom pom decorator trim
*Sewing machine & hot glue
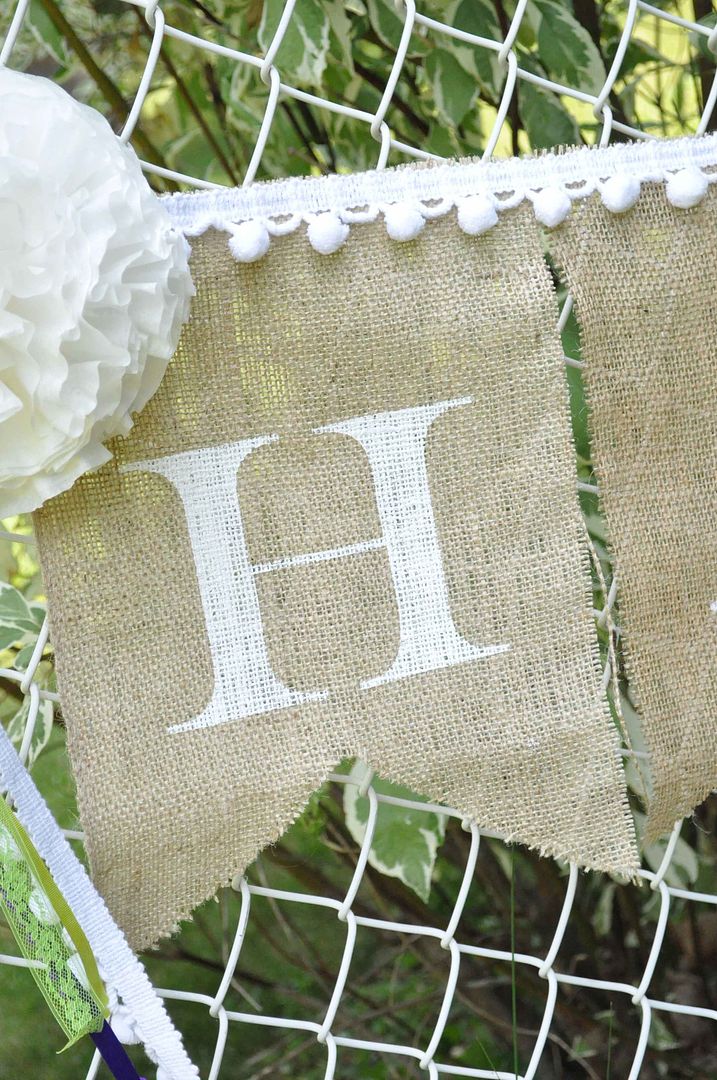
To create the pennants, I started with natural burlap from the fabric store (about 2 yards) and cut it into pieces about 10" wide by 13" long. But be sure to measure your space first to see how long the finished banner needs to be, then calculate the width of your pennants. To make the "v" in the center, I folded the pennant in half and cut on a diagonal toward the center (make one and use it as a template for the rest of your pennants). For a great tip for how to cut burlap straight, see this post.
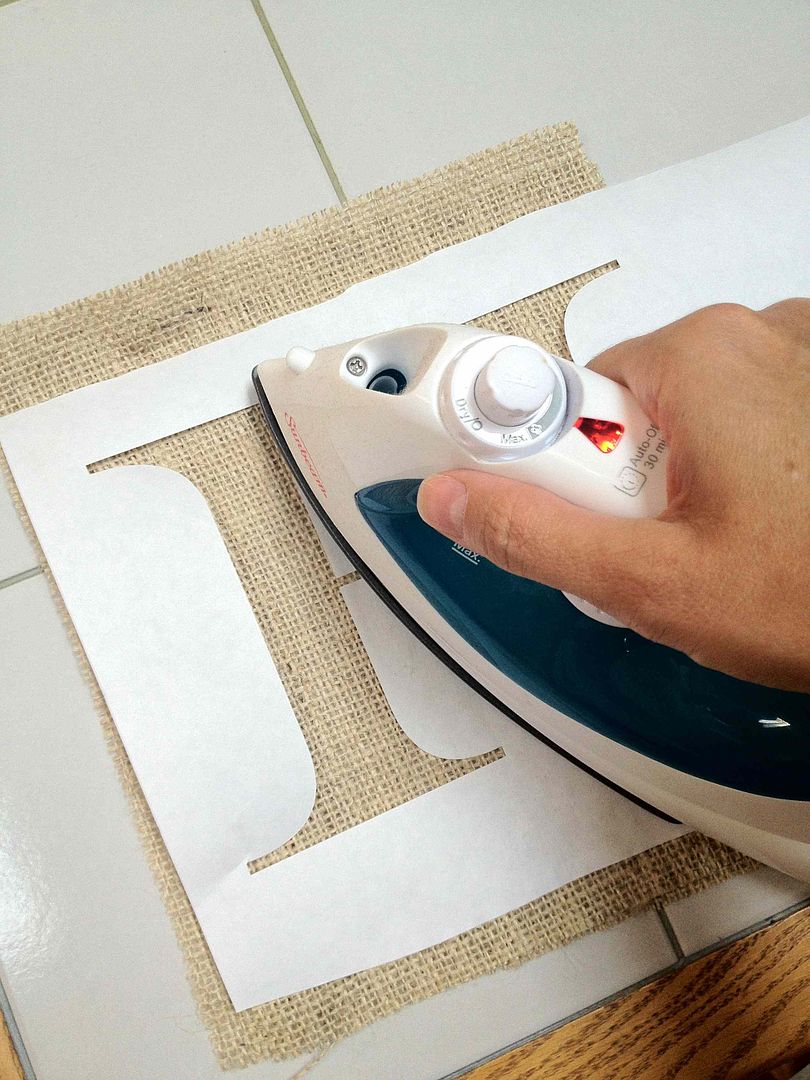
I cut my templates out of freezer paper using my Silhouette machine, but you could also print them on the freezer paper and cut them out with an Exacto knife. But sure to print/cut with the non-shiny side as your front.
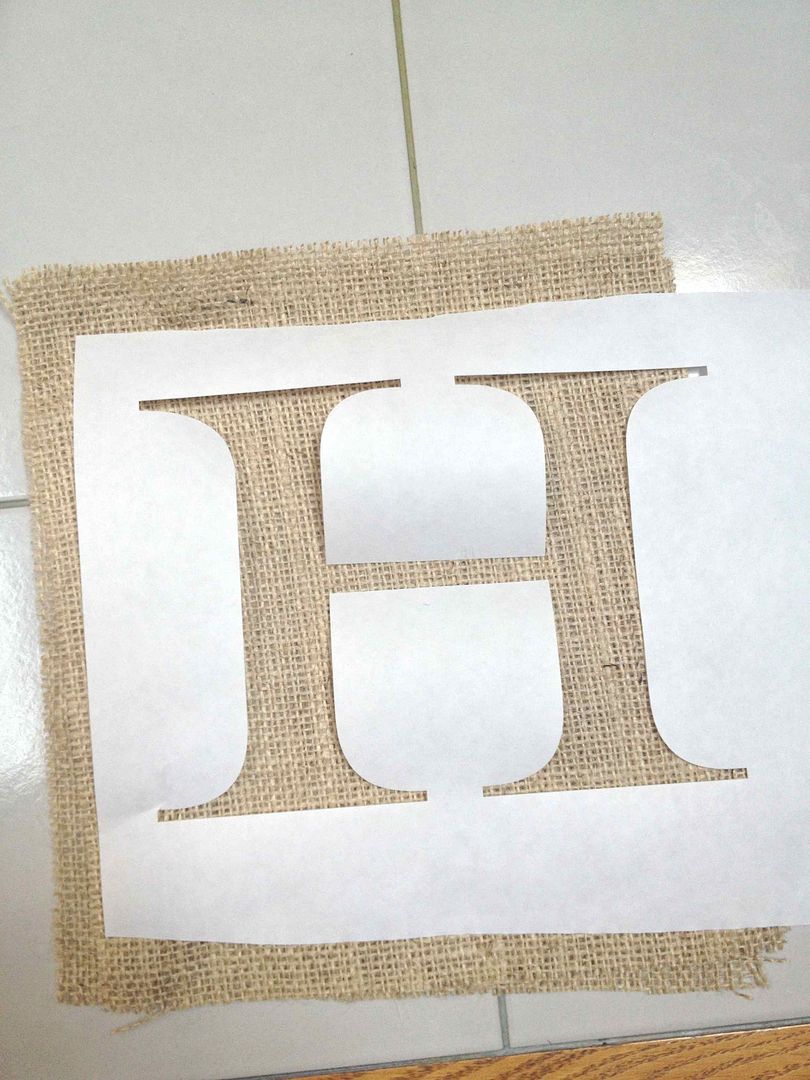
With an iron on a low setting, iron the freezer paper in place--just a quick pass with the iron will be sufficient (see more uses for freezer paper in this tutorial).
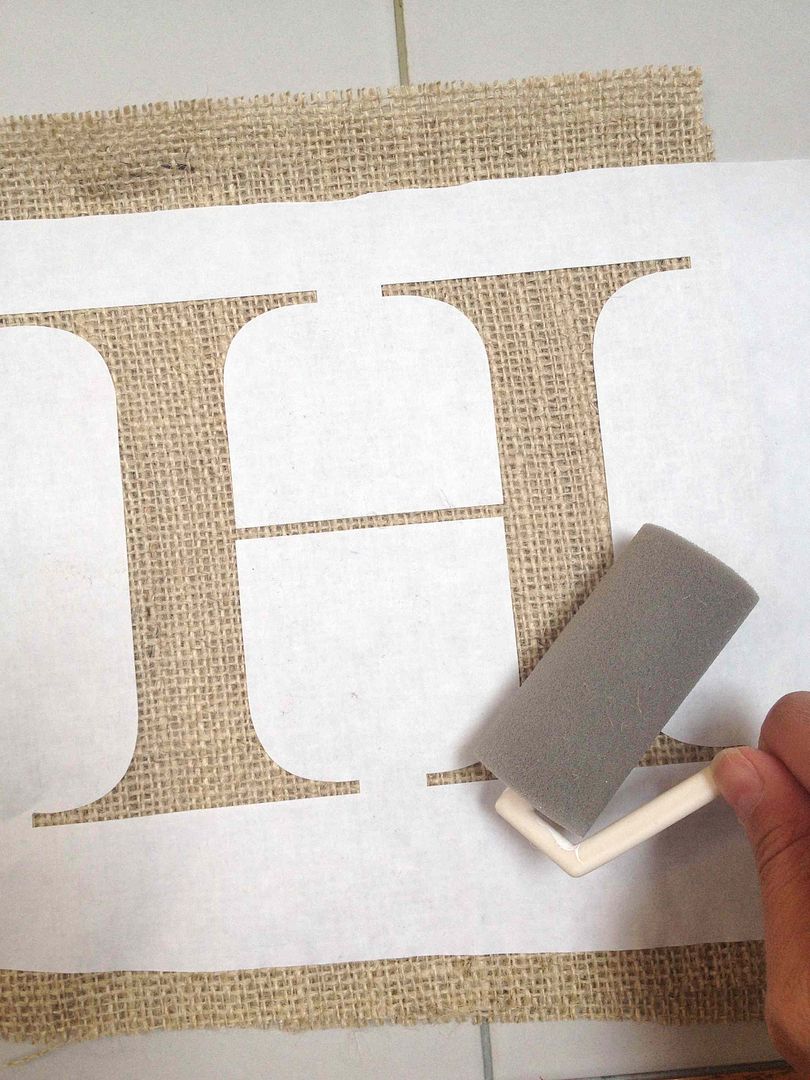
Then use a roller brush to paint your letters with acrylic paint. I like Martha Stewart's rolling sponge brush and Wedding Cake craft paint in satin finish. (Yes, I realize there is no paint being used in this picture--I forgot to take a picture when I was making the banner and by this time my paint was all packed!) Carefully peel the freezer paper stencil off the burlap.
Voila!
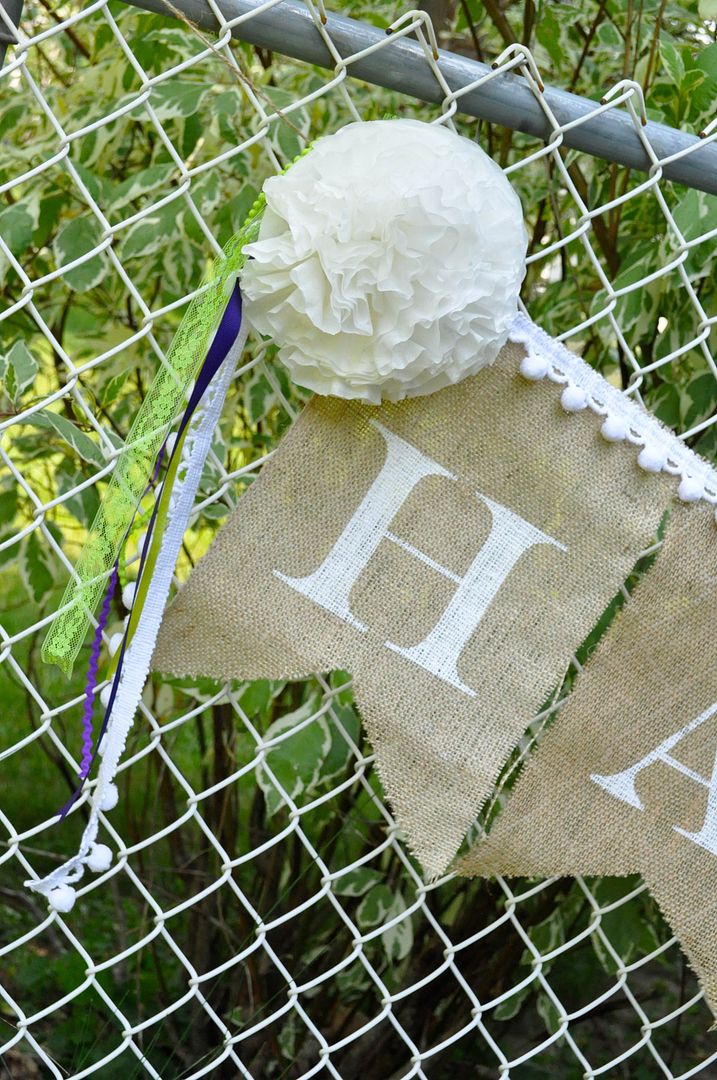
The painting of the stenciled letters was a lot easier than I expected it to be. And the bunting really was much more beautiful in person!
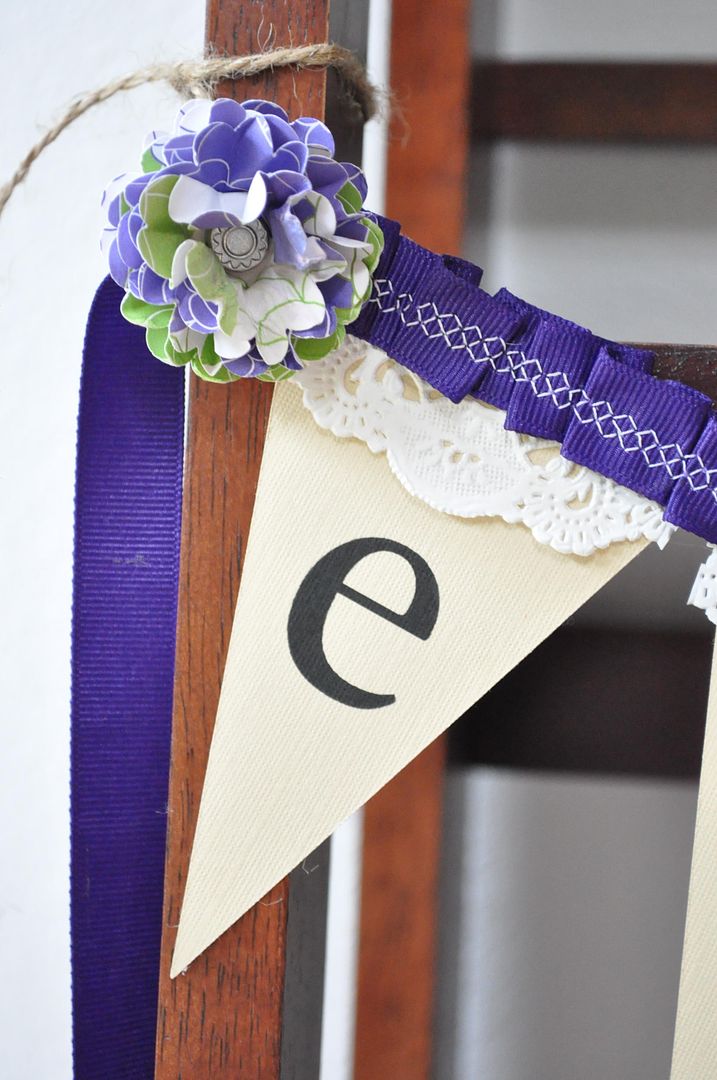
She also asked for a small paper banner reading "Eternity." I used Silhouette's print-and-cut feature to center each letter on the card stock, print it, then cut a triangle pennant shape around it. That really is the easiest way to do it, but you could also print your letters and then use a template to center the pennant around the letter and trace and cut.
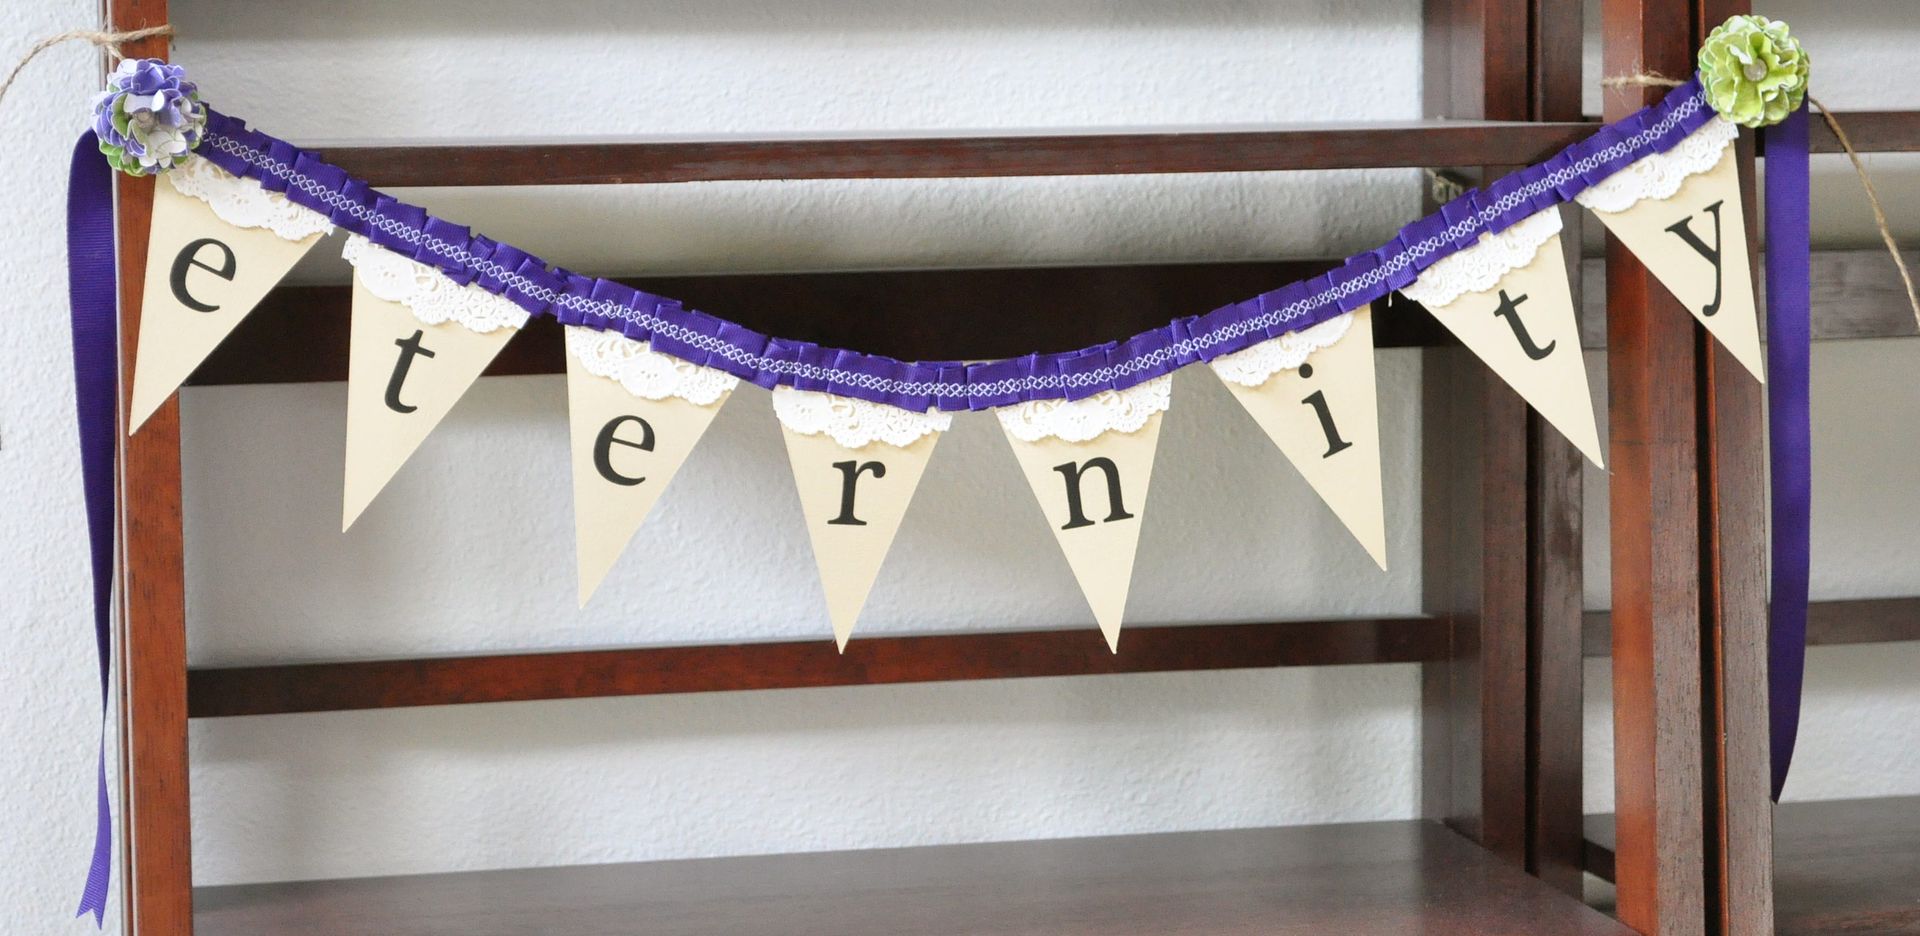
I folded a small paper doily over the top of each pennant, then added some pretty stitched ruffled ribbon (tutorial here) and glue it in place. Actually, I used Scor-Tape, my favorite double-sided tape. Then I added a little layered paper flower with a flower brad in the center.
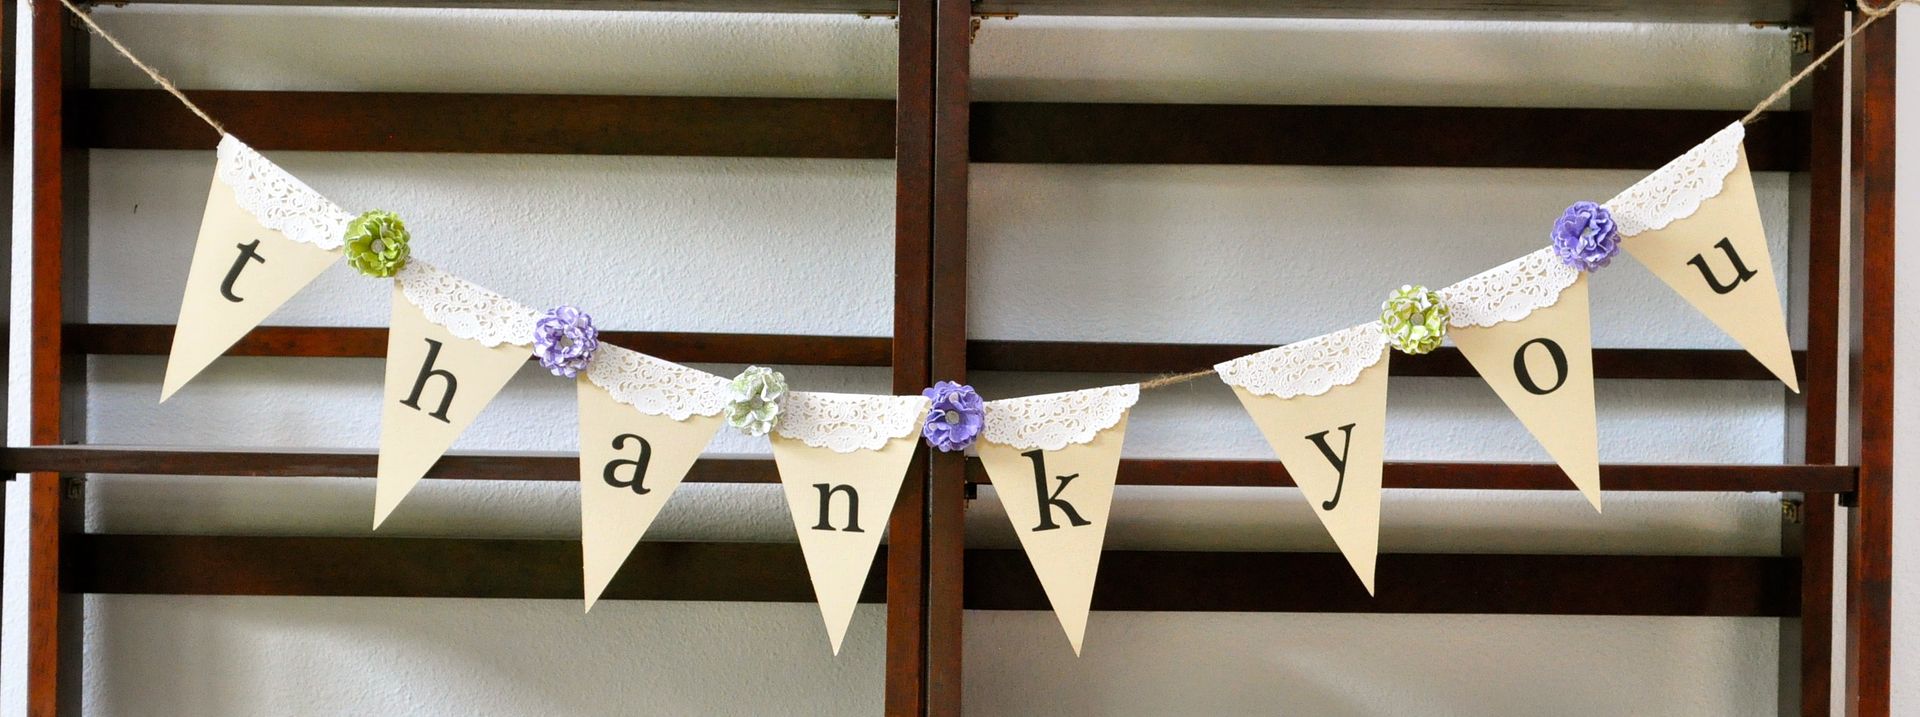
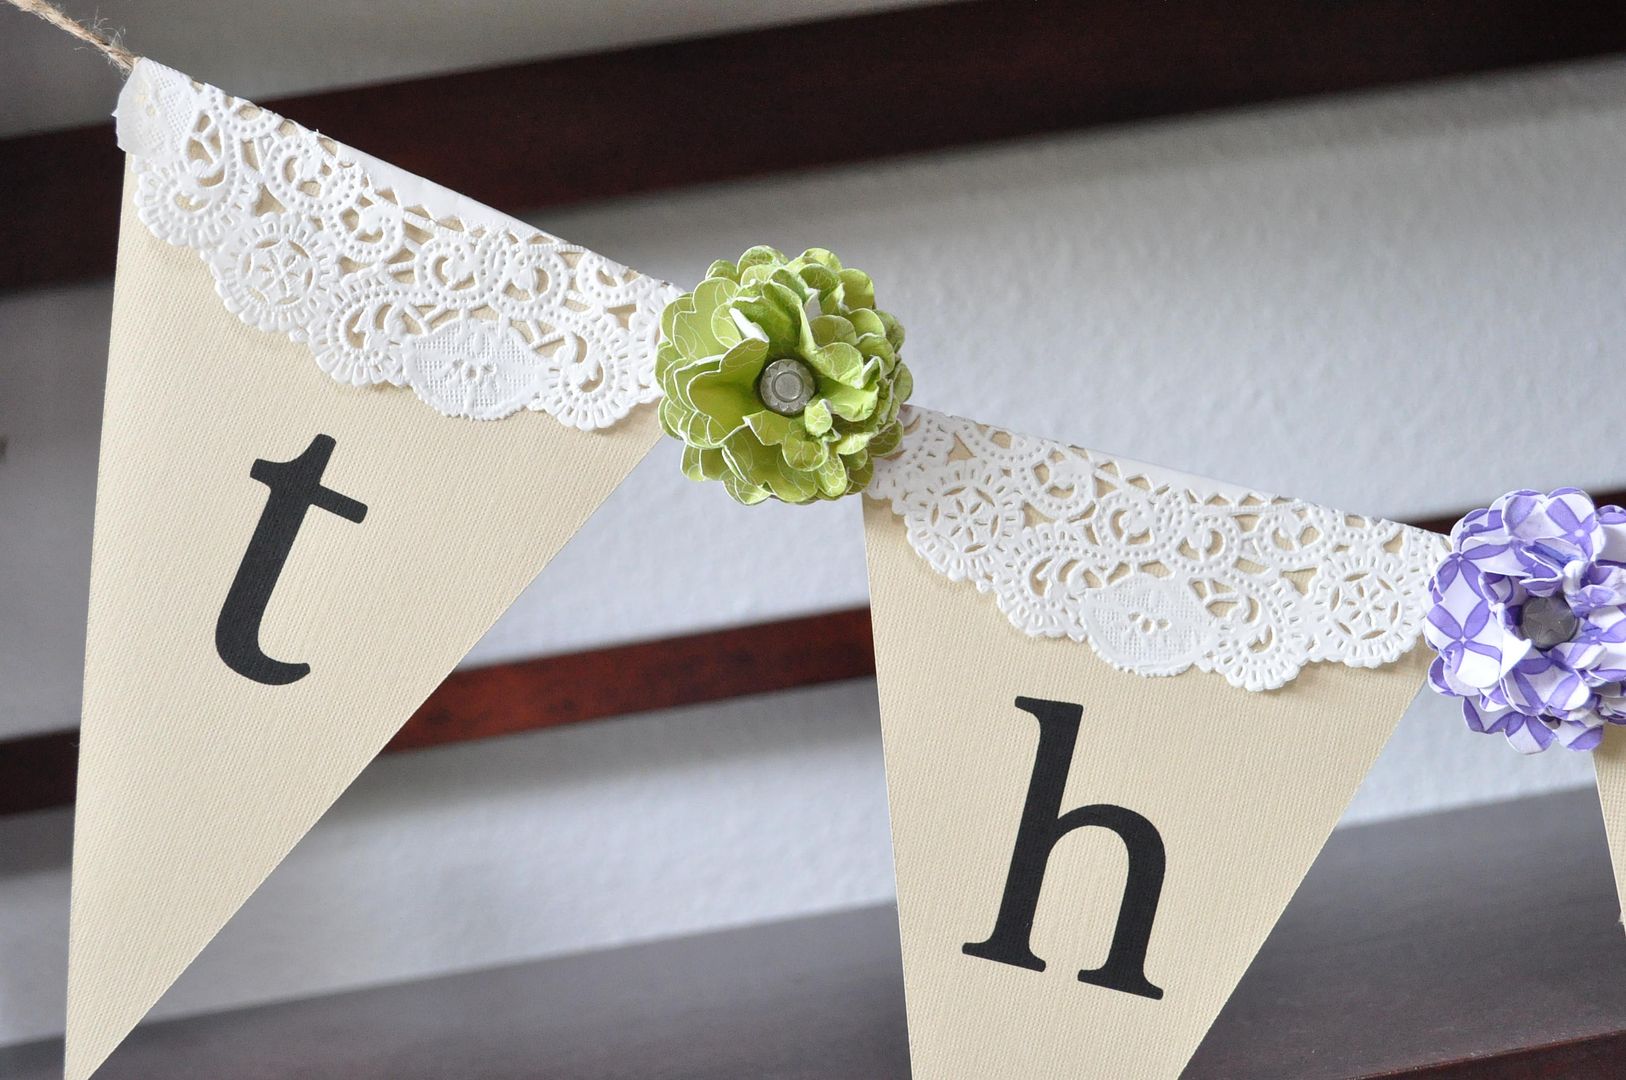
This "Thank You" banner hung over the gift table. It was made the same way as the "Eternity" banner minus the ribbon. I added the same flowers between each letter.
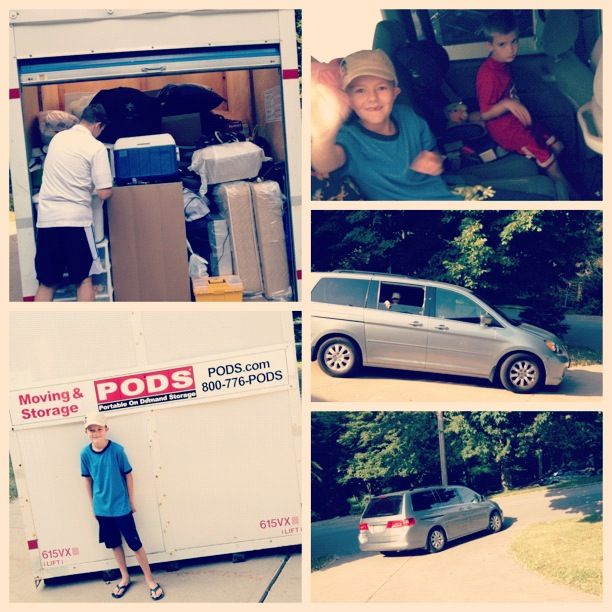
I wish I could've been at that beautiful wedding! I made it just before the final push to get all the packing done. Which reminds me, I have to mention WE MADE IT TO UTAH!!
We packed all our belongings (or at least the few things we had dragged
to Iowa) in a storage pod, then my husband loaded up the boys in the van
and took off on a two-day boys trip to Salt Lake. The baby and I stayed
behind to finishing cleaning the house for the next tenants, then
headed out on a plane the next day. Can I just say that cleaning and
packing in 103-degree weather with 90% humidity is no fun! But we got
'er done.
In
addition to all that packing and cleaning, I've been working on the
newest crochet pattern for my shop. It's been in the works for months,
but I've had to put everything on hold to get this move out of the way.
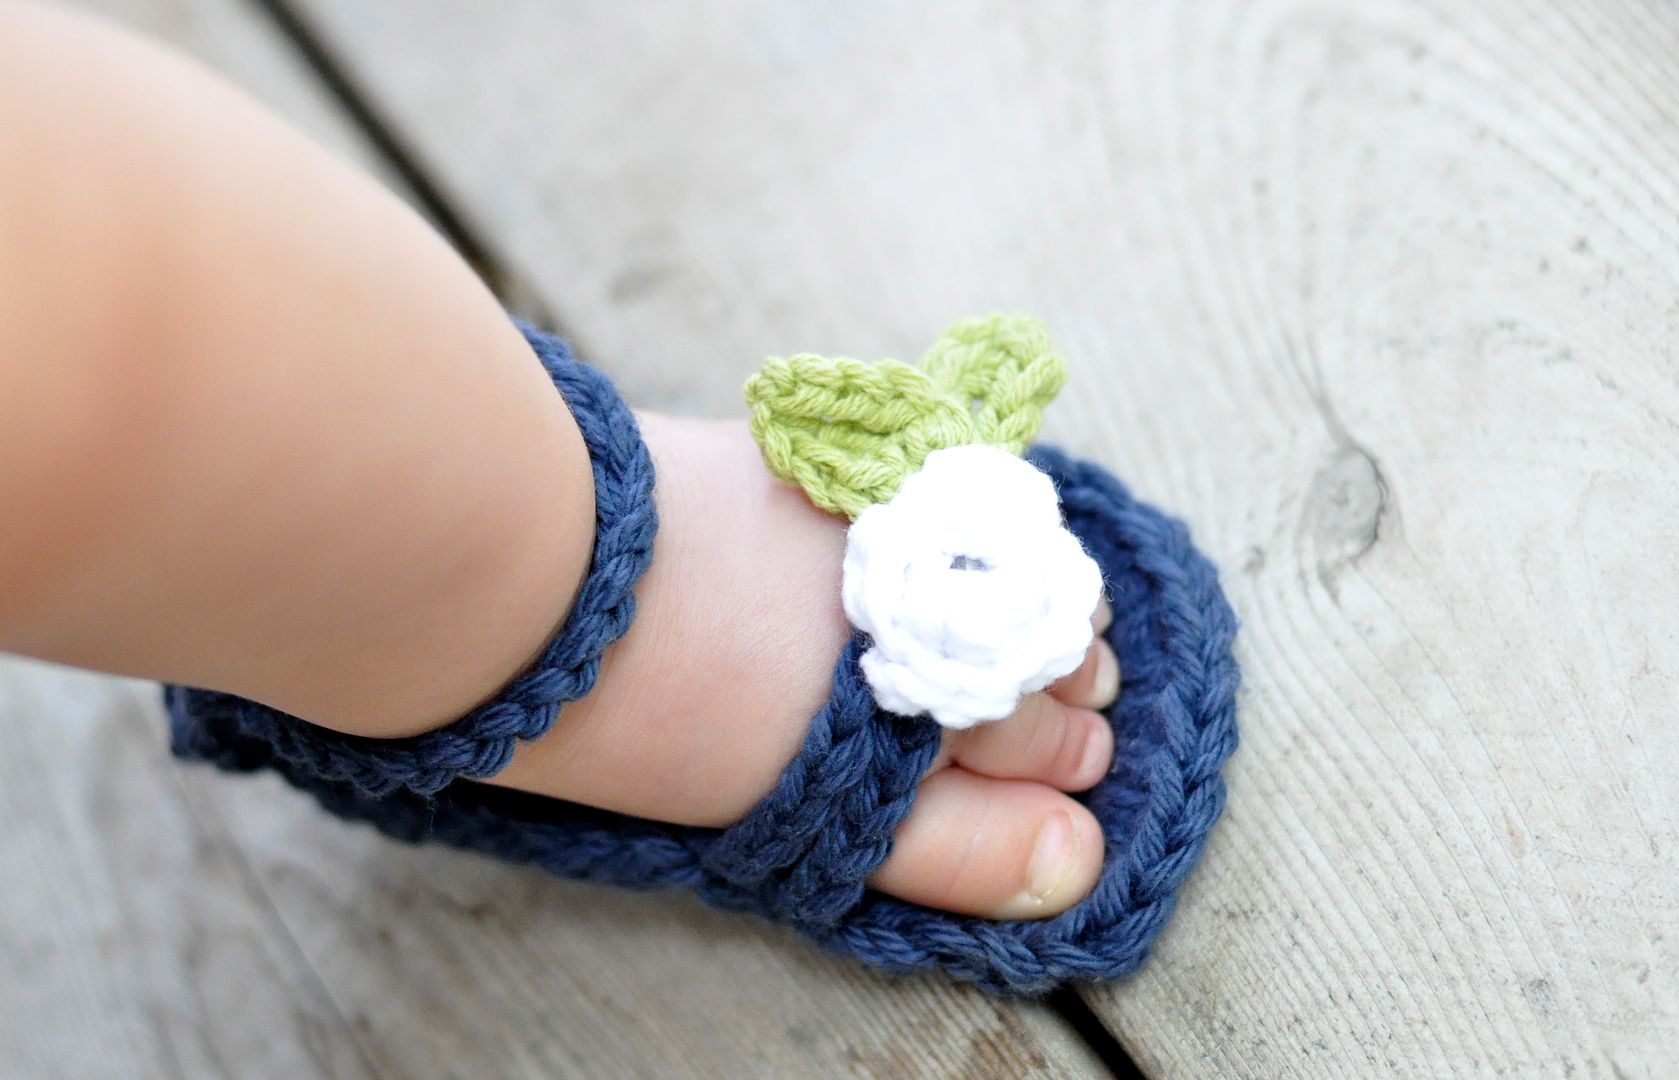
Now that it is, you should see this adorable sandal pattern in the shop
soon!
Thanks for sticking with us during all these life changes that have slowed my posting down a bit. And thank you so much to my partner Jessica for all the great posts she's been giving you while I made this next transition. Hopefully we'll find a house and be able to get settled soon so the real crafting can resume!
share this on » |
{Facebook} | {Twitter} | {Pinterest} |


12 Responses to “burlap and paper wedding banners {tutorial}”
I love the burlap banner. So elegant and chic.
Thanks for the tutorial.
The doilies add such a beautiful touch to the paper banner.
Those little toes in the sandal are so adorbs.
What an amazing gift for a friend. Thanks for posting all the details. Your tutorial is great.
Love that burlap banner! I'm hosting a linky party "One Creative Weekend" at OneCreativeMommy.com. I'd love for you to visit and link up this idea and/or anything else you'd like to share.
I've been browsing your Christmas ideas, and I am your newest follower! I want to sign up for emails, but I can't get it to work. I can put in my email address, but there's no place to submit.
I love your ideas!!!
Love your blog! Feeling creative once again :D
New follower would love a follow back
Mucho Smiles,
bb, xoxo
http://ispythroughthekeyhole.blogspot.co.uk/
Love this banner! Do you know the name of that font?
This is so sweet! Adding this one to my engagement party musts.
Thanks for sharing!
This is gorgeous!
I'm definitely going to give this banner a try! Quick question - do you need fabric paint for painting on the letters, or could regular wall paint do the trick? Thanks!
Gorgeous!!!
Really cute! I just saw this on Pinterest! We are in Utah also! Hope the move was easy.
First time crafter.. Do you have to use freezer paper? I have just regular stencils I was going to use.
Post a Comment