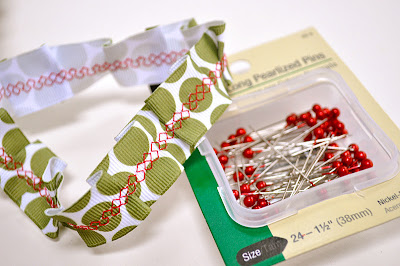
Foam Cone Holiday Tree Tutorial - Ruffled Ribbon & Pins
Supplies:
*Foam cone
*At least 3 yards 1" ribbon, or enough to cover your size cone (amount may change depending on how big your ruffles are)
*Pearlized head pins (I chose red, but they also come in white and multi-colored)
*Sewing machine and coordinating thread
*Candlestick holder
*Ribbon for base (optional)
*Hot glue gun
*Star topper (optional)
1. First, ruffle your ribbon. See how I made mine in this tutorial. I used a smocking stitch instead of a straight stitch to give it a little more flair.
2. Starting at the bottom, wrap your ribbon all the way around the base. For the next wrap, slightly overlap the first wrap and move up in a spiral.
Place a pin where the first and second wraps overlap to hold them in place.
3. Continue wrapping and pinning around and around the cone.
4. Go back and push in more pins, spaced to look like well-placed ornaments.
5. Glue your cone to a candlestick, like this brass one I spray painted white (see the first tree tutorial). Add a festive ribbon to the candlestick for extra cuteness.
6. Add a star topper like I did in the this tutorial. For this topper I used a smaller, flat star, glittered with superfine silver glitter.
Add your tree to your little forest! To see how I made the other trees, check out this paper-covered tree tutorial and this fabric-covered tree tutorial here!

share this on » |
{Facebook} | {Twitter} | {Pinterest} |


4 Responses to “foam christmas tree tutorial {ribbon covered}”
Could these trees be any cuter?! Thanks for sharing, I love them!
these are so cute! I love how the pins hold it together and are the ornaments! {clever}
Love your ruffle christmas tree (my favorite is the green one with red pins :o) Cute!
Warm wishes from Russia
***Merry Christmas***
Natasha
These are adorable! I featured them in my blog post today. Can't wait to try some of your other tutorials!
http://screwdriversandstethoscopes.blogspot.com/
Post a Comment