Showing posts with label Seattle. Show all posts

Wednesday, April 6, 2011

the pink kalli crystal necklace {for the cure}

I have the cutest friend named Kalli. This is us when she was visiting us in Seattle a while back (maybe that's why I'm holding the Starbucks cup like it's a prop? I don't know.). Anyway. . .

I love this girl. She is funny, sweet, smart, and creative. She is inspirational, hard working, gracious. She's an amazing mother, a loyal friend, a fabulous crafter, and a fighter--the definition of strength. And she is a breast cancer survivor.

Few people can handle that kind of pressure with grace and humor, but she has. That's why I'm so excited to share her gorgeous "Pink Kalli" Crystal Necklace. You might recognize Stacy's design from this post. But this one is even more dear to my heart. 100% of the proceeds from the sale of this necklace will go to the Komen Foundation for breast cancer research. Wouldn't it make a beautiful Mother's Day gift? Yes it would. But I'll let Kalli tell you more:

I was diagnosed with breast cancer at age 31. The news came as a complete shock, I felt as if I had so much life to live, and I wanted to raise my two young children, so I searched for a way I could join in the fight against cancer. Annually my family and I participate in Susan G. Komen’s Race for the Cure. The race is held all over the country every Mother’s Day weekend to honor all the women and families affected by breast cancer and to raise money for breast cancer research. It is inspiring. I wanted to give more, so this year, I have designed the Pink Kalli Crystal. 100% of the proceeds from sale of the crystal necklace will be given to the Komen Foundation in honor of Megan Lloyd, a dear friend fighting breast cancer for the second time. If I am not able to see a cure for breast cancer in my lifetime, I am proud to say that I have given to the cause and research in finding that cure through the sale of these handmade necklaces. Please support the many women and men who have been affected by breast cancer and purchase the Pink Kalli Crystal Necklace.

To order the necklace, send an e-mail to info@shopsistersecrets.com and she will send you a PayPal link to pay for it. It's perfect for Mother's Day! Kalli also has a team for the Salt Lake City Race for the Cure coming up in May. If you would like to join her team or donate, go here. And while you're at it, check out her crafting kit shop, Sister Secrets. It's a great place to get complete kits for some of the very tutorials you've seen here!

Thank you so much for helping me support Kalli and her amazing efforts to fight breast cancer!

share this on »
{Facebook} {Twitter} {Pinterest}
5 Comments

Monday, April 4, 2011

how to make a rouched pillow {guest post|

We're so excited to have a fabulous guest post today from our new friends at iCandy handmade! Enjoy this darling ruched pillow sewing tutorial!

Hey!
I'm Autie from over at the new blog iCandy handmade. My friend Jen and I have had so much fun starting up our new craft blog, and we wanted to share some of our fun projects with you!
I've always had a little kinship to Little Birdie Secrets, because I grew up in the Great Northwest, and when I read their blog, I'd see pics of something that looks like home. When I talked to the girls behind the secrets, and found out that they live in the little town next to my little home town, I loved them even more!
So, from a Woodinville, Wa girl, here's a fun tutorial for you!

I hope you try it and come check out our blog, too!


the ruched throw pillow tut:


To make this pillow, I actually just used my left over scraps from the binding on her quilt. After I finished quilting Ivy’s bed quilt, I realized that I had grossly over-estimated the binding. I used strips of random pieces of the It’s a Hoot Line by Moda (a piece and scrap here, and a strip and a chunk there and just pieced them together, and sewed it around). Anyway, because I had so much left over, I tried to think of something fun to do with them…waste not, want not, right?


Here's What You Do:

Cut:
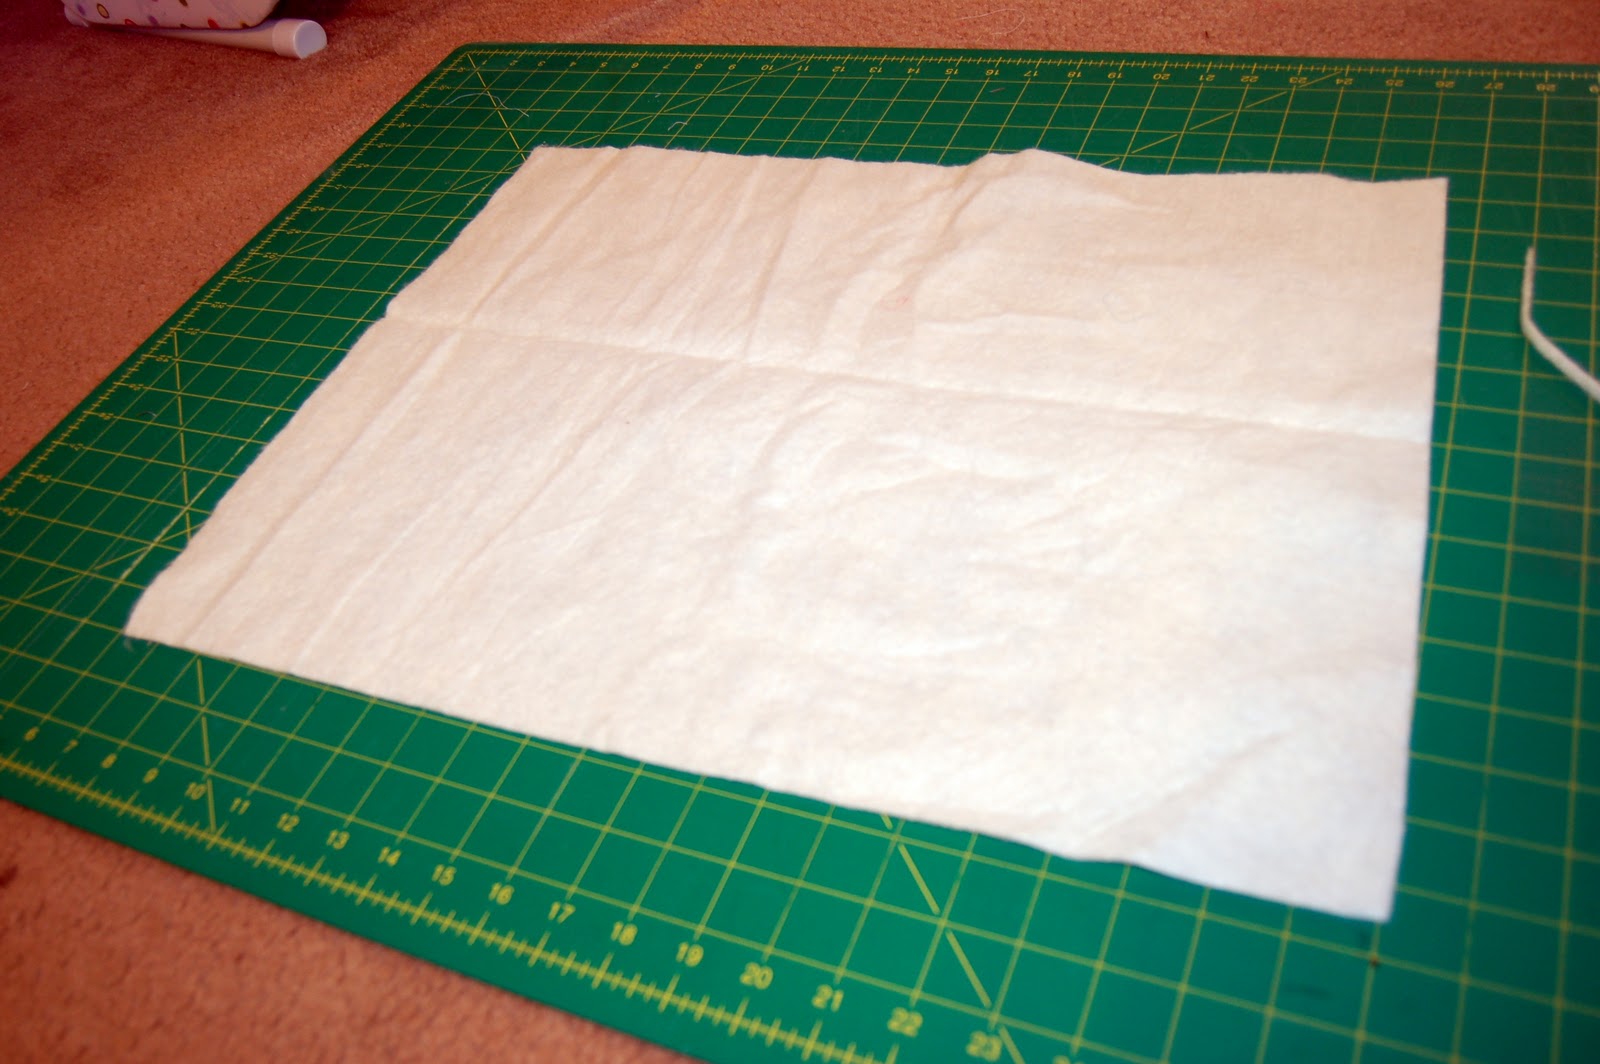
1 piece 21 x 16 (the back of the pillow)

1 piece of batting 21 x 16 ( to stabilize the front of pillow)

7 strips of binding (which I always cut at 2 ¼ inches) at approximately 32 “ (twice that of the width of the pillow)

2 pieces of fabric that will make up the front of the pillow{on either side of the ruching} 4 ¼ x 16**


** after sewing the 7 strips together with a ¼ inch seam allowance, that gave me a 12 ½ x 32” chunk of fabric {you’ll see later with the pics}

Knowing that my binding section (which will be placed in the middle of the pillow was 12 ½ inches wide, I subtracted the length of the pillow (in my case, 21” by 12 ½…You should be able to adapt this to any size pillow, or amount of binding strips…and then divide it in half (one for each side of the binding chunk) see pic

[(Length of the pillow )- (width of binding strip chunk)]/2

[(21} – {12 ½)] = 8 ½ /2 = 4.25

1.) Sew the 7 binding strips together. Here's my 12 1/2 x 32" chunk of fabric I spoke about above!


2.) And I don't know about any of you, but most of the time when I sew...regardless of how awesomely perfect I cut, the stretch in the fabric makes it so my ends don't match. In this case it doesn't matter, just square off both ends with your rotary cutter.


3.) Using just a basting stitch (where you open up your stitch length to the longest you can make it sew down the ditch of one of the first binding strips in your chunk.

DO NOT tack or backstitch on either end of the strip.


Make sure to leave your ends super long {'the more to gather with, my dear'}


4.) Using the bottom thread only, carefully gather from both ends of the strips until it shrinks up to be approximately the same size as your pillow width (in my case 16 inches)


5.) Pin the ruffled binding strips to one of the 4 ¼ x 16” pieces of fabric.


6.) Sew the ruffled side of you binding strip to one of the 4 ¼ x 16” pieces of fabric.


7.) Do the same thing to the opposite side of the binding section.

Carefully gather and then sew to other piece of front fabric.

Here's what you should have:

So far you've only gathered 2 of the 6 seams


8.) After you have all three of the front pieces successfully sewn together, you can ruffle the remaining binding strips in the binding section. Gather carefully and slowly so as not to break your threads. If you do, just pull out you gathering stitch and do it again.


9.)After all the strips have been gathered, lay that piece onto your cut piece of batting. Mathematics say that it should fit exactly. You may have to adjust the tightness of your “ruffles” to stretch them out a bit and make it the same length. After it’s as close to the same size as your batting (and your backing fabric) Iron it down. YUM!


10.) In order to stabilize the front, I decided to ‘quilt’ it to the batting before making it into the pillow. So I secured the two sections together with a basting gun…but quilting pins would work, too.


11.) I didn’t sew down each seam, just most of them…you can see my pattern from looking at the batting side.


12.) I removed the basting tacks, sandwiched my pieces with right-sides-together and sewed around the perimeter leaving a space on the side large enough for my hand to fit in…to stuff!


and you know this trick, right? carefully snip just the tips of your corners off while the pillow is still inside out, so when you do flip it, your pillow has a chance to have perfect corners. It allows the two sides to bunch up without the extra corner fabric and batting getting in the way. (just don't snip where you sewed!!)


13.) Turn your piece of awesomness right-side out and get excited!


Stuff it, whip it shut...and enjoy!

(no drooling on my pillow! hurry, go make your own!)


share this on »
{Facebook} {Twitter} {Pinterest}
18 Comments

Wednesday, June 2, 2010

card inspiration: seattle greetings


Recently, my mom, sister and sister-in-laws visited me for a girls weekend in Seattle. All I have to say is...F-U-N! We ate way too much, laughed way too much, and shopped way too much. After they all went home, I missed them and felt the need to send a little card their way to thank them for the great time we had. Since the memories were made in Seattle, I just had to pull out my little space needle stamp that I NEEDED for myself after Stacy featured it here.


Hopefully the gals enjoyed this little tribute and I hope you can use it as inspiration for a card of your own. Stay tuned for more about the girls trip. We made adorable necklaces that I will be sharing with you sometime next week!

share this on »
{Facebook} {Twitter} {Pinterest}
8 Comments

Saturday, April 24, 2010

Oh! Chocolate


Meet our new BFFs. Seriously, these two brothers, Nick and Chris, have the best job in the world and are seriously two of the funniest guys in the Seattle area. They own Oh! Chocolate AKA our new favorite place ever to exist.

A few months ago we booked a chocolate class and patiently waited for our special chocolate day. Um, it was worth the wait because this class is AMAZING!! Seriously, it is "died and gone to heaven" amazing.

When we arrived they served us the best hot chocolate we've ever had. It tasted like melted chocolate with whipped cream on top. Nick shared his hot chocolate secret with us and let's just say we vowed to hit the treadmill or put in our favorite workout DVD in the morning. The hot chocolate alone is worth a trip to their stores.

They then served us a plate full of chocolate for the taste testing portion of the class. Look at this. We each got our OWN plate. They shared with us how chocolate is made, what the differences are and we had so much fun taste testing them all. It was all very entertaining and we were laughing as much as we were eating.


We were interested to know that their bittersweet and their semi-sweet are vegan. They did not contain any milk at all and they were DELISH.


Once we finished up tasting all of the different kinds of chocolate we moved on to the chocolate tempering part of the class. They taught us the best way to dip goodies in chocolate, brought out pitchers of chocolate and then let us go. (Yes, you read it right--PITCHERS of chocolate!!!)


We experimented with different items and had a lot of fun. I think the most unusual combo is the chocolate potato chip.


Store rules say you have to lick your fingers clean when you are done because chocolate clogs up the drain. Of course, we were good little birdies and did as we were told. They didn't have to ask us twice to eat more chocolate.


At the end of the night we were sent home with a heavy box of chocolate dipped goodies. I think we have enough to last us a good month or so.

Well, what do you think? Did we make you want to go to Oh! Chocolate too? Seriously, if you are ever in the vicinity of an Oh! Chocolate RUN do not walk to the nearest store and see what it is all about. Take a class if you can. If you happen to bump into Nick or Chris make sure you tell them, "Hello!" and tell them a little birdie sent you.


share this on »
{Facebook} {Twitter} {Pinterest}
12 Comments

Wednesday, April 21, 2010

stamped twill tape


Here is a simple way you can personalize any gift, card or scrapbook page. You can use any stamp, ink pad, and twill tape to make a cute ribbon that will add a special touch to your gift.


We've used pigment and dye inks, and both work well. Staz-On is also an option. You can even use re-inkers to dye your twill a different color!

To personalize your twill tape, just cut it to the size you need, select your stamp and ink, and stamp away. Try repeating an image over and over, or using alphabet stamps to write a message. You can buy twill tape in various widths and colors, so the options are endless.

(In case you are wondering...here are the links to my stamps: Cupcake and Wish Big, Seattle Space Needle, Paris). Our friend Anne Beale also sells a collection of three sizes of twill tape on one card--a great way to test this technique out. Enjoy!

share this on »
{Facebook} {Twitter} {Pinterest}
17 Comments

Thursday, April 15, 2010

Seattle Cupcake Camp 2010


I packed up the kids and headed to Seattle this weekend to check out Seattle's first ever Cupcake Camp. YUMMO! I was completely blown away by all the cupcake talent we have in this area. This event was amazing and jam packed full of the best cupcakes ever made and they were free for tasting. I was in cupcake heaven!!

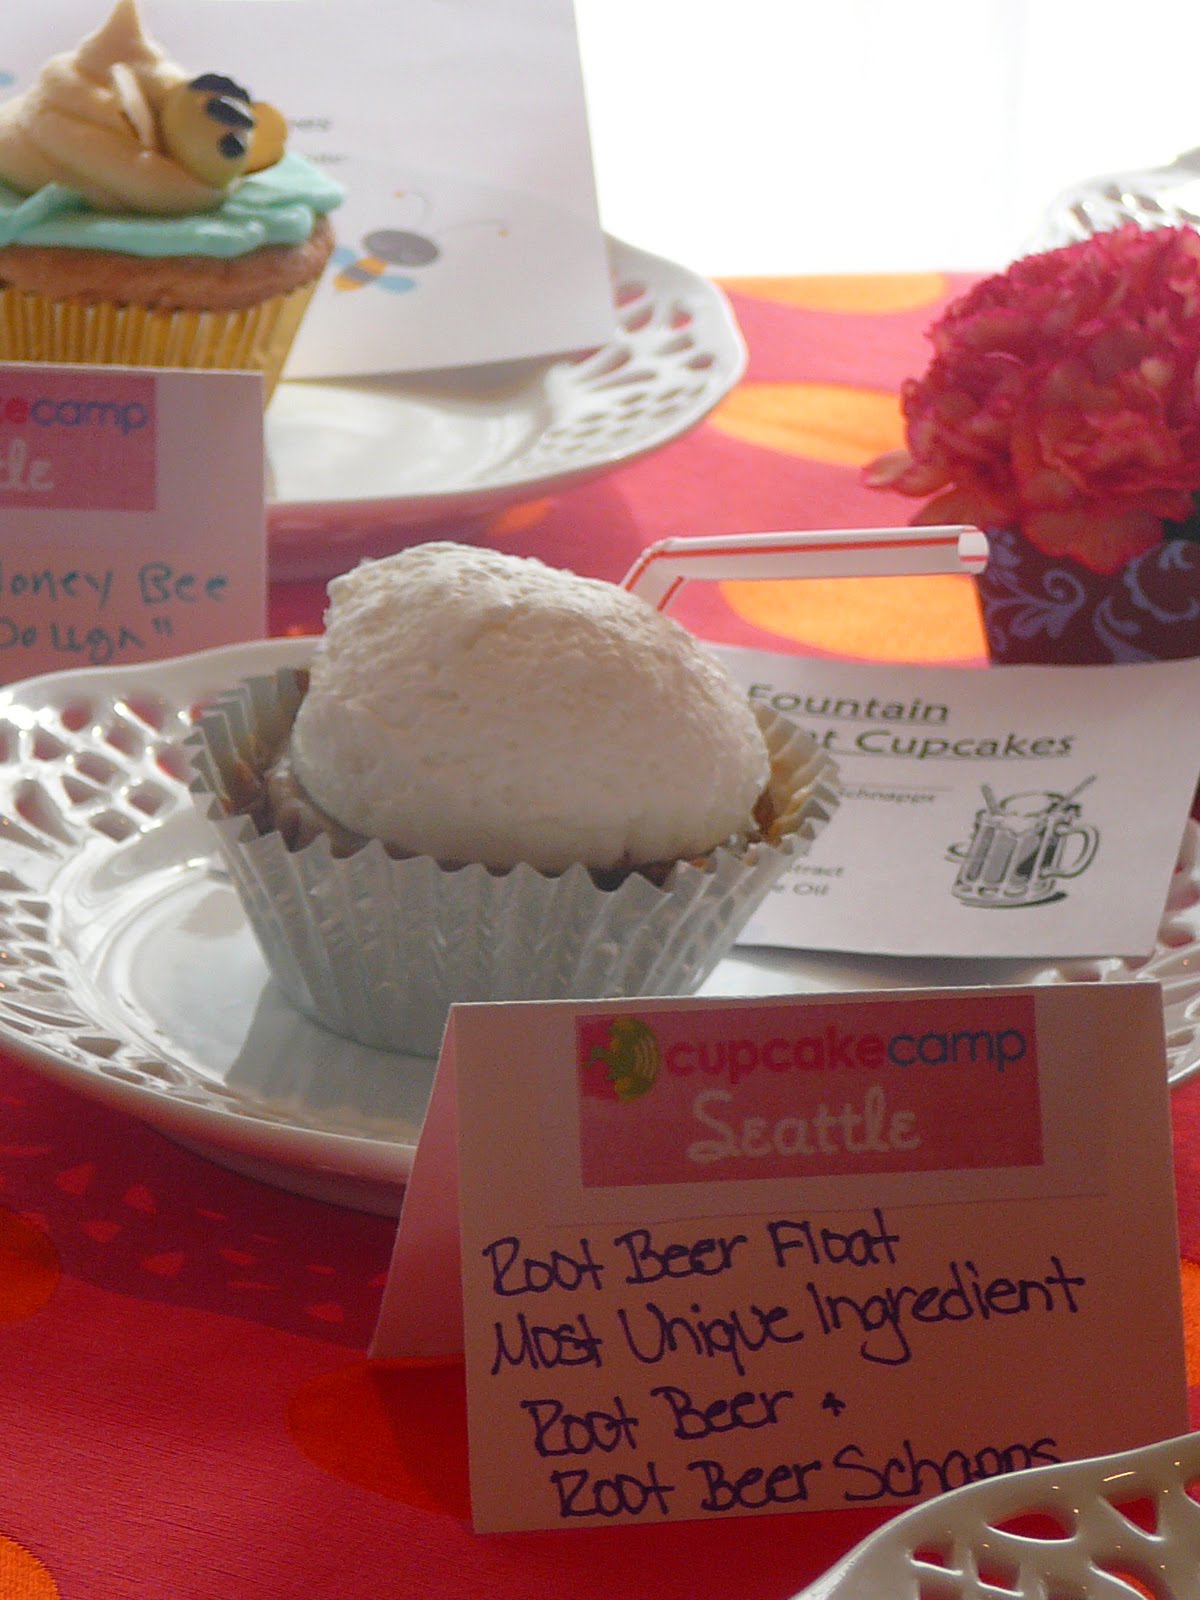
Here are a few shots of the competition table. Aren't these adorable? I wanted to try a few of these, but they were for the judges.


After checking out the competition cupcakes, we headed into the main room where we were able to taste any and all cupcakes. I discovered some new local bakeries that I will have to visit again soon.


Check out this cupcake spread.


I have to say that I was most excited about these bacon cupcakes. I've been wanting to try them out and see what all the fuss is about. Now, I know why they are making the news. They are yummy. Now that I've checked bacon cupcake off my list I am going to head over to Frost to pick up the bacon donut.


There were a few gluten free and vegan cupcakes and they were a huge hit. They were almost all gone by the time I got there and I was there when the event opened.


Look at this darling woman in a cupcake dress. She was so sweet and gracious. Everyone was snapping pictures of her and oohing and ahhing over her outfit. She just smiled and chatted with us.


Here are a few cute cupcakes that were hand delivered to our table. We were sitting down enjoying our feast of cupcakes and this sweet gal came over and insisted we didn't have enough. She shared her chocolate mint with us and boy am I glad she did. My mouth is watering just thinking about it. The lemon cupcakes were cute with little ribbon spirals on them.


I loved every minute of this event and I am crossing my fingers that they do it again next year. If you are lucky enough to have a cupcake camp in your city I recommend you go. Your tummy will thank you.

Tomorrow I restart my diet.

share this on »
{Facebook} {Twitter} {Pinterest}
29 Comments
LinkWithin Related Stories Widget for Blogs