The Halloween Phantom visited our house this week, bringing sweet treats from a secret friend. Today we passed on the fun to three of our neighbors with spooky Halloween cupcakes. I told you I had spiders on the brain!
Spider Web Cupcakes Tutorial
Supplies:
*Frosted cupcakes
*Decorating gel (I used Wilton's Sparkle Gel in black)
*Toothpick
*Halloween cupcake wrapper cut out (optional) - mine is from the Silhouette store
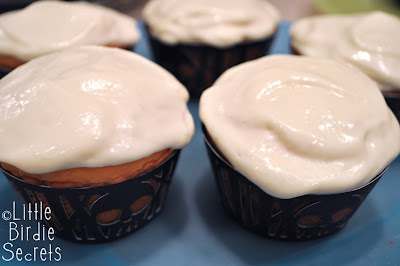
1. Frost your cupcakes. I used a simple cream cheese frosting. Just a note--I added a little red and yellow food coloring to my cake batter to make the cupcakes orange!
2. Using your decorating gel (I found my sparkle gel on sale at Joann this week!), draw concentric circles on the top of your cupcake. Three to four circles are plenty. Don't worry if they're not perfect--you're going to mess them up in the next step!
3. Drag the end of a toothpick from the center to the edge of the cupcake, about six times around the circle. This will create a "web."
4. I cut the bottom off a plastic spider ring and stuck it on top. You could also leave the ring on it and press the ring down into the cupcake so the recipient would have a little Halloween favor. To make your spider sparkly like it's web, paint a little orange or black Stickles glitter glue on top and let it dry completely.
5. I cut Halloween cupcake wrappers with my Silhouette machine and slipped each cupcake into one. Love this scull design!
These must be the creepiest cupcakes in town!
share this on » |
{Facebook} | {Twitter} | {Pinterest} |


12 Responses to “halloween spider web cupcakes”
They look great!!
I am going to make these for our senior class for Halloween! Thank you for this great idea.
P.S. I mentioned this post in my Saturday Hodge Podge post and linked back to your blog! Hope you don't mind.
beautifull!!
I am sure these will go down a treat at any halloween party
MJAM!!!!
:-) Janna
So stinking cute! Now I need to make some!
These look so quick and easy! I really wanted to make something fun for Halloween but I have limited time- this looks perfect! :)
wowwwww good job!
So cute! And I really appreciate the photo ""how to". - Deena
www.lifebeyondthebleachers.blogspot.com
VERY cute!!!
These are great. The web is so effective. Awesome tutorial :-)
These are cute going to make for my daughter's birthday treats for her class thanks for sharing
Post a Comment