Monday, November 21, 2011

jessica's photography giveaway


 Today we would love to introduce you to a fabulous photographer, Jessica Smith. Jessica's Photography is just beautiful. Here is what Jessica has to say about her photography. "I have been a professional photographer for 7 years. I have loved every minute of it! I get excited about every photo shoot and can’t wait to create something new and original for each client. My images have a unique style; with vibrant colors and amazing angles. I want to make your special day something you will remember forever."


Jessica has been a wedding photographer for 7 years and now she is trying to start a new clientele of children. She recently built a new studio with fun backdrops and props. Look at these gorgeous pictures she recently took.

I love chevron. I cannot get enough chevron. I wish I lived closer to Jessica's studio so I could get my boys in front of this chevron.

And I love the pendants in this background. These girls are just gorgeous!

I die for this chair. And for that little girl's hair.
As you can see, Jessica is a wonderful photographer and lucky for some of you readers, she is offering a wonderful giveaway! Jessica's Photography is offering one of our readers the chance to win a Children's Photo Shoot (valued at $115!). It includes: 50 edited images on a CD and a free 8x10.  In studio for Northern Utah and Southern Idaho. All you have to do to enter is like Jessica's Photography on Facebook and then come back and leave a comment telling us you did it! This giveaway will end on Friday, November 25, 2011 at 11:59pm PT.

share this on »
{Facebook} {Twitter} {Pinterest}
21 Comments

Friday, November 18, 2011

zucchini cupcakes with caramel frosting

We harvested plenty of zucchini from our garden this year and although our absolute favorite thing to make with it is traditional zucchini bread, I also wanted to try a few new recipes this year. I found this zucchini cupcake recipe from Taste of Home and had to try it. It has caramel frosting and knowing that my husband, Kevin loves caramel almost as much as me, I figured it would be a winner. We all loved them and Kevin and my boys licked the frosting bowl clean before I could even finish frosting the cupcakes!


Zucchini Cupcakes with Caramel Frosting

Ingredients

  • 3 eggs
  • 1-1/3 cups sugar
  • 1/2 cup canola oil
  • 1/2 cup orange juice
  • 1 teaspoon almond extract
  • 2-1/2 cups all-purpose flour
  • 2 teaspoons ground cinnamon
  • 2 teaspoons baking powder
  • 1 teaspoon baking soda
  • 1 teaspoon salt
  • 1/2 teaspoon ground cloves
  • 1-1/2 cups shredded zucchini

  • CARAMEL FROSTING:
  • 1 cup packed brown sugar
  • 1/2 cup butter, cubed
  • 1/4 cup 2% milk
  • 1 teaspoon Spice Islands® pure vanilla extract
  • 1-1/2 to 2 cups confectioners' sugar

Directions

  • In a large bowl, beat the eggs, sugar, oil, orange juice and extract. Combine dry ingredients; gradually add to egg mixture and mix well. Stir in zucchini.
  • Fill paper-lined muffin cups two-thirds full. Bake at 350° for 20-25 minutes or until toothpick inserted near the center comes out clean. Cool for 10 minutes before removing to a wire rack.
  • For frosting, combine the brown sugar, butter and milk in a saucepan. Bring to a boil over medium heat; cook and stir for 2 minutes or until thickened. Remove from the heat; stir in vanilla. Cool to lukewarm.
  • Gradually beat in confectioners' sugar until frosting reaches spreading consistency. Frost cupcakes. Yield: 1-1/2 to 2 dozen.

share this on »
{Facebook} {Twitter} {Pinterest}
8 Comments

Thursday, November 17, 2011

easy lds scripture cover pattern {review}

Remember those scripture covers from our Baby Blvd. giveaway a few weeks ago? I decided to try my hand at the pattern for my son's baptism gift, and Baby Blvd. was sweet to let me review the Bible and triple combination pattern. Check out how cute they turned out!


If you sew at all you can do these patterns. They're very clear, with both written descriptions and awesome diagrams. The best part is that I can easily make my son new covers when he outgrows the robots! Or take them off and wash them when they get grimy (he's 8--it's bound to happen, right?).

These would make a cute and easy Christmas gift for someone on your list (my mom would probably love these in a pretty quilting fabric--she loves all the prints but doesn't quilt, so we're always looking for ways to use cute fabric!). Check out the Baby Blvd. shop for patterns for almost all sizes of LDS scriptures, both covers and cute totes. And if you don't sew, remember they have finished covers and totes for sale, too! In lots of cute fabrics to boot. Ooh, and right now Baby Blvd. is offering any pattern for only $5.95 through November 22nd--up to 35% off the regular price--so you can't go wrong. Check out the special sale listings in the shop!

share this on »
{Facebook} {Twitter} {Pinterest}
1 Comment

fall wreath thanksgiving placecard and napkin ring {tutorial}

Remember those leaves from my "Give Thanks" Thanksgiving banner and bunting yesterday? I used my leftover supplies (burlap, too!) to finish off my Thanksgiving table place settings with easy place cards and napkin rings. I mean really easy. Here's how to throw together a few before your Thanksgiving dinner!


Thanksgiving Wreath Place Cards & Napkin Ring Tutorial
 Supplies:
 
*Simple leaves cut from patterned paper (by hand or with your Silhouette machine--see below)
*Coordinating buttons
*3" circle wreath cut from card stock
*Kraft card stock for place cards
*Paper cutter
*Glue Dots or other strong glue
*Pop-up adhesive dots
*Sewing machine and coordinating thread (optional)
*Scraps of burlap or other fabric
*Hemp twine or linen thread

1. Gather your favorite fall patterned papers and cut simple leaf shapes out. I used about 20-25 per place card. You can definitely cut these by hand, but to make it faster I used my Silhouette cutting machine. To do this I made a sheet in Photoshop with a strip of some of my favorite digital papers and printed it. Then I drew a very simple leaf shape in the Silhouette software.
I duplicated the leaves in the software and arranged them on the strips of paper. Then I cut them out. Easy peasy, not to mention fast and cheap! 
I cut several sheets worth (and used many of them for the fall leaves bunting in this post), then used the leftovers for my place cards.

2. Fold leaves in half lengthwise to give them depth. I also sewed down the center of a few of them with my sewing machine for some interest.
 
3. Start building your wreath by attaching a left to your paper circle with Glue Dots or other adhesive.
 
 Overlap leaves so none of the paper wreath is showing.
 
Occasionally pop up a leaf with a pop-up adhesive dot.
 
 
Continue around the wreath until full.


4. Adhere a few coordinating buttons around the wreath using Glue Dots. 
 

5. Print your guests' names on card stock. Cut place cards to 3" x 5.25", with the name showing in the center between 3" and 4" down. I used the CK Woodbine Swashes font for the names, and the Damask Dings1 font for the leaf (just to keep it simple and in line with my fall wreath).
 
 Fold the cards in half. The name will be toward the top of the card.
 

6. Add a couple of pop-up adhesive dots to the bottom half of the wreath.
 
 Attach to the card so the name is showing through the center of the wreath.
 

Arrange place cards on table or plates for a splash of color. You can also use the inside for guests to write something they're thankful for--I love when projects do double duty.

Now for the napkin ring. I used the burlap scraps from the Thanksgiving banner, a button, and some hemp twine. Wrap a 3" strip around your napkin, tie with a piece of hemp twine, and tie a button on top. I know, seriously easy. And you use up scraps. And it coordinates with your banner and place cards! You're welcome. :)

Hope you all have a safe and happy Thanksgiving! Bring on the good eats!

share this on »
{Facebook} {Twitter} {Pinterest}
9 Comments

Wednesday, November 16, 2011

give thanks thanksgiving banner idea {tutorial}


I know how close it is to Thanksgiving, but I've been knocked down with the worst cold ever for the past week and I'm so behind! Luckily, my idea for my Thanksgiving banner was so super easy that I could get it done in just an hour (thanks to an awesome free printable). That means you still have time to make one before the big day! I'll show you in a few easy steps how to make a darling burlap and paper banner for fall and Thanksgiving. Plus, next year you'll be ready for Thanksgiving as soon as the Halloween candy is gone (which in my house is usually the next day)!

Give Thanks Thanksgiving Banner Tutorial


Supplies:
*Printable "Give Thanks" banner letters from Clairebella.com (they also have matching placecards, coasters, and more for free!)
*1/2 yard burlap fabric (available at fabric stores and even Walmart)
*Coordinating 3/4" or wider ribbon
*Leaves cut from coordinating patterned papers
*Coordinating buttons
*Hemp or linen thread and needle
*Sewing machine and coordinating thread

1. Print out "Give Thanks" letters from Clairebella.com. (I've had these on my Pinterest board for a while--so glad I was able to use them!) Lay them out on burlap and cut around them (don't be too picky--burlap is hard to cut!). Pull out a few threads from the bottom to create a fringe.


2. Sew letter cards to burlap with sewing machine. I just sewed around the edges (again, don't make it too perfect--it adds to the character!). Then sew ribbon along the top of each letter (in the right order, ahem), leaving a space between words.

3. Cut simple leaves out of patterned paper. Stitch two patterned-paper leaves and a button between letters with hemp or linen thread and a large needle.
 

4. I added a bow complete with button stitched to the center to go between the words, but this is totally optional. 
5. Hang and you're done!

I accented my banner with a simple leaf bunting that I stitched together with my sewing machine. More on these little leaves in tomorrow's project!

And here's where my banner really hangs across the windows in my kitchen (the photos just come out so much better outside!). I love looking at it and remembering to give thanks every day. I'm so thankful for this beautiful time of year!


This post was sponsored by My Cutie Pie Designs. Visit the Shop!

share this on »
{Facebook} {Twitter} {Pinterest}
10 Comments

Tuesday, November 15, 2011

jewelmint giveaway

We have an exciting giveaway for you today! Have you ever heard of JewelMint?


Fashion icon Kate Bosworth and Hollywood’s stylist of the year, Cher Coulter have teamed up to bring you the ultimate in affordable luxury with their member-only jewelry club. Top Styles are chosen for you based on your fashion personality profile and style. There are new personalized jewelry designs to check out every month and by becoming a member of JewelMint you can get personalized jewelry recommendations from Kate Bosworth and Award-Winning Stylist Cher Coulter!

Look at some of these gorgeous pieces.


Don't you just love them? And with JewelMint you can get pieces like this and latest jewelry trends by your favorite trendsetters for just $29.99 a piece! You can also take the fun style quiz and gain access to exclusive, handmade designer jewelry. Today, JewelMint is offering a fabulous giveaway to our readers! Go to JewelMint and find your favorite piece that is shown and then come back and tell us what it is in a comment. Then you will be entered to win an amazing gift package!


JewelMint is also offering our readers a special discount of 50% off the first item for first time JewelMint customers! Use promo code LBS50. The offer is good until 11/30/11. This would be a great time to snatch up a lovely gift for the holidays. This giveaway will end Sunday, November 20, 2001 at 11:59pm PT.

share this on »
{Facebook} {Twitter} {Pinterest}
67 Comments

Monday, November 14, 2011

thanksgiving autumn wreath idea {tutorial}

I've had to curb myself from putting up Christmas decorations already, so I decided to do some fall decorating to tide me over. I needed a fall wreath, and I didn't want to spend too much, so I threw together a really simple one with a grapevine wreath and a few fall picks. But it needed something. I loved the plaque hanging in the center of my Halloween wreath, so I decided to run with that idea. I love how it turned out, and how easy it was! If you need a quick, easy, and inexpensive fall or Thanksgiving wreath idea, this one's for you. . .

Fall Wreath With Frame Tutorial


Supplies:

*Grapevine wreath
*Fall floral picks (a lot of craft stores have these on 50-60% off in late summer or after Halloween!)
*Floral wire
*Wire cutters
*Wide ribbon
*Distressed frame (or thrift store frame you can distress yourself)
*Words or phrase cut from vinyl, or printed on patterned paper
*Coordinating scrapbook paper for frame

1. I started with my wreath. Arrange floral picks (fall leaves, pumpkins and squash, orange and yellow berries, etc.) along bottom corner of grapevine wreath. When it looks the way you want it, attach picks to wreath a piece of floral wire. Just wrap the wire through part of the wreath and around the pick and twist the two ends. Cut with wire cutters.


See--easy peasy!
 

2. Create your framed fall phrase. I started with this awesome frame from the thrift store (sorry, I forgot to take a real "before" photo!).

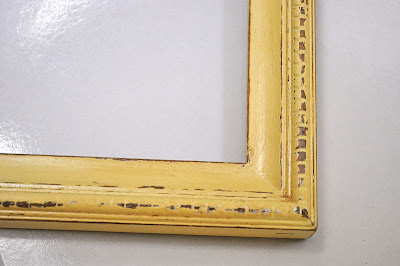
3. I used the idea from this tutorial on Lella Boutique to distress my frame. First I sprayed it with a white spray paint/primer. Then, using my Martha Stewart custom spray paint tool, I sprayed it with a yellow/tan acrylic paint.
 

The next step is to sand it to distress it and bring out some of the color underneath. See the white and the brown? I love it.

Then I applied a light coat of wood stain and let it sit for a few minutes. Then I wiped it off with a paper towel.

See how the brown parts are a little darker, and the entire frame is a bit more rustic looking? 

4. I cut the words "Give Thanks" with my Silhouette machine, along with a little leaf. (The font is from Creating Keepsakes and is called CK Woodbine Swashes, and the leaf came from the Damask Dings1 font). You could also use phrases like "Happy Fall," "Gather Together," "Friends Welcome Here", etc. Use transfer tape to transfer the letters to the glass. NOTE: if you don't have a vinyl cutter, you could always print the words on the patterned paper and put it behind the glass--it would look just as good!

Cut a piece of patterned paper to fit inside your frame and place it behind the glass.

5. My frame had a hanger on the back, so I inserted the ribbon through it to hang it from the wreath. If your frame is not equipped with a hanger on back, try threading the ribbon through the frame before you put the glass in!

Tie the ribbon to the top of the wreath. I added a double bow because my ribbon wasn't as wide as I would've liked it to be. I hung my wreath from a Command Hook (they're strong and removable!) that I added to my front door. Happy fall!
 

I can't believe Thanksgiving is only 10 days away!  If you're looking for last minute fall and Thanksgiving ideas, check out the collection of our past posts, found at the top of the page. Enjoy this fabulous season!

share this on »
{Facebook} {Twitter} {Pinterest}
6 Comments
LinkWithin Related Stories Widget for Blogs