Today we are featuring another lovely tutorial from my sweet friend, Erin. Visit her at Lovesome!
Okay, this tutorial sounds a lot fancier than it is. This is the easiest little
project and takes just minutes, but in the end you have a unique and fun
statement necklace. Does it get better than that?
I've seen a lot of necklaces made with these wooden beads floating
around Pinterest and stores, but I thought it would be fun to do a
little somethin'-somethin' to spruce those beads up a bit. Is anyone else obsessed with the 'dipped' phenomenon going on right now? I thought it would be cool to dip the beads in metallic gold paint (or
any paint, really. I'm just obsessed with gold). Well...minus the
dipping part. I decided to opt out of the dripping mess and long drying
time dipping would bring and instead went for a "fake dip."
all you need are these easy supplies:
+wooden craft beads (found at any craft store)
+some type of string/cord/leather to string the beads on (i used waxed-leather cord)
+paint
+paintbrush (unless you want to dip. if you do you are braver than me, so send me a link, i would love the see the results!)
+skewer
+painters/masking tape
+two objects of the same height to set the skewer on (i used little bowls, but cups or really anything will work. this is to keep the beads elevated to help with painting and drying.)
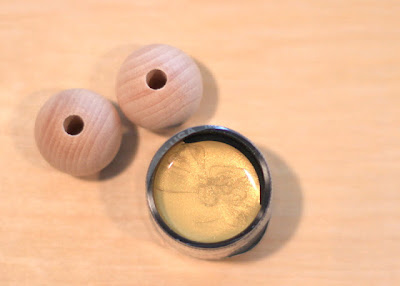
Here's a close up of the paint i used. i love how metallic and sparkly
it is. i think a bright color or anything that contrasts would look
great too: bright blue, white, red, coral, black....it's endless!
The first step is to tape around the beads. This does not have to be
perfect, the less perfect it is, the more interesting and "dipped" it
will look (or at least that's what i told myself :). After the beads are taped, string them on the skewer.
Then whip out the paint and paint those little babies. This is when the
skewer really comes in handy. I just had to hold the paintbrush and spin
the bead and bam! The painting took about a minute. For reals.
Then just let the beads dry on the skewer, string on your desired
string, and viola, you have yourself a one-of-a-kind "dipped" necklace.
I bought tiny gold beads to put in between each wooden bead but they
were too small, they went inside the holes of the wooden beads. fail.
but it could be another fun way to mix it up, just do your hole vs.
bead-size homework first :).
Enjoy!
share this on » |
{Facebook} | {Twitter} | {Pinterest} |


8 Responses to “gold-dipped necklace”
I love it! It would look great with different colors.
madebyniki.blogspot.com
Great necklace! It would work with many outfits!
What an idea, wanna try it soon. Tks for sharing ....
wow, beautiful necklace! So glad you are having fun - those colours of yarn are just amazing! abercrombie outlet and I will continue noticing your blog!
movie decorations are offered at cheap prices so that every person can plan their party on movie theme without thinking about their financial resources.
movie decorations
I love this! So did you use a special clasp or just knot the cord?
Just discovered your blog via Pinterest & haven't even had time to check everything out, because there is so much I'm interested in. I'm your newest follower, also following on Pinterest!
CAS
A great, simple necklace. It looks really pretty
Post a Comment