Showing posts with label baby. Show all posts

Friday, April 24, 2009

maisy daisy giveaway

Giveaway #10

Since we know so many of you are loving the baby girls' giveaways, we've got another one for you today. Lisa Steele of Maisy Daisy creates the sweetest baby girl accessories. And she's got so much to choose from! There are bows and clippies and clothes and hats--even diaper wipe cases for mommies. Such cute stuff!


Out of all her awesome selection, this Birthday Cupcake headband bow is our favorite! And Lisa is giving one reader their choice of one of her Decorative bows, which includes this cutie. Just leave us a comment stating your favorite product(s) from Maisy Daisy and you could win one! This giveaway ends Wednesday, April 29 at 11:59 pm PST, so do it now!

share this on »
{Facebook} {Twitter} {Pinterest}
208 Comments

Wednesday, April 22, 2009

doctrines and diapers baby sling giveaway

Giveaway #6

Jennifer Woodward of Doctrines and Diapers makes the prettiest baby slings, and she's going to give one lucky winner a custom sling of their choice! She sells them for $75 each, so this is a fabulous giveaway. Even if you don't have a baby to wear on your hip, you've got to have a baby shower in your near future, right? What a fabulous gift!


Her slings are all made from two layers of designer fabric so they're really durable. We love her little details, too, like ruffles and ribbons. And the slings are adjustable to accommodate babies from newborn to toddler.


Jennifer lets you pick your own fabric from a site she has listed on her blog sidebar. Check out her blog then leave us a comment to be entered to win a custom baby sling! Comments must be left by Wednesday, April 29 to be eligible. Good luck!

share this on »
{Facebook} {Twitter} {Pinterest}
376 Comments

Wednesday, January 28, 2009

hospital essentials gift basket

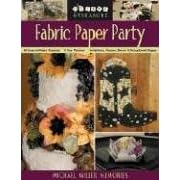
The birdies looooove babies. I think we’ve mentioned that a few times in the past. We get so excited when a friend or family member tells us they are expecting. We love to spend our time crafting away in anticipation of a new little one. One of our friends is due soon and we’ve been busy making tons of cute baby items to welcome this adorable bundle of joy. But, wait! We didn’t forget mama (poor mama--once baby is here people tend to forget about her). So, we're putting together a little hospital basket to help her short stay a little more comfortable. Items that will go in this basket will be lip balm, lotion, facial towelettes, a favorite novel or magazine, gum, and mints. Oh, and of course we couldn’t complete a gift basket without one handcrafted item. House slippers! These were inspired by the travel slipper pattern in Michael Miller's book, Fabric Paper Party.


We whipped up our own little birdie version. We used some fabric scraps some extra-firm stabilizer for the foot base. These are perfect for wearing around the hospital room. I know I dislike those ugly gray socks they give you, and if you're already feeling less than pretty, the last thing you want to put on is bulky man-socks. We made sure that we used puff paint to paint designs on the bottom so the slippers would be non-slip. Hopefully we can make our friend’s hospital stay a little more stylish. These slippers are also a great idea for those of you going on long airplane trips.


Want a few more ideas for hospital gift baskets?

If you don't have time to sew slippers, how about this cute version of the hospital sock from Homemade by Jill?


Who wants to worry about doing their hair in the hospital? We love this pretty fabric headband from Heather Bailey. She has a free pattern for it! How fun would it be to give matching slippers and headband?

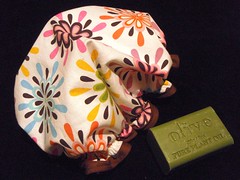
And for short stays, it would be nice to have a cute shower cap, so they can take a shower without having to wash and dry their hair. Hoppo Bumpo has a free pattern for an adorable cap.


Make up a cute hospital kit like this, and you'll be one visitor who'll be allowed to stay past visiting hours!

share this on »
{Facebook} {Twitter} {Pinterest}
12 Comments

Tuesday, January 20, 2009

fabric-covered night lights

My kids love it when I use my crafting skills to make them something. I can hardly get through the fabric store without a dozen requests from my boys for something made out of "that cool skull fabric!" So this was an easy way to satisfy them while using up some scraps! It's also an awesome way to coordinate in a child's bedroom with any bedding you may have made (I've escaped that request so far). Or make one to match the baby quilt you're making a friend for a fab shower gift. They're super easy!


We found our self-adhesive night light kit at Michael's, but you can also check out these babies from Sunshine Discount Crafts. They're only $3.99 each! Although the shipping is a little steep, so go in on an order with a friend.

The package includes a template that you can trace onto your fabric. Then you simply cut it out (leaving a 1/2" seam allowance) and attach it with the handy self-adhesive in the kit (watch out--not all the kits on this site have a self-adhesive option). Fold the fabric over on each side. You can be done like we were, or add ribbon, beads, etc. with craft glue. Voila! These aren't just for kids' rooms, either. I'm thinking a pretty one in my bathroom would be nice.


Martha gives us an easy tutorial on making your own shade out of paper, fabric, or wallpaper.


Or try this one from The Spoon Sisters. Stick a photograph or any other paper item between the clear plastic. You'll never trip on the way to the bathroom in the middle of the night again!

share this on »
{Facebook} {Twitter} {Pinterest}
6 Comments

Wednesday, January 14, 2009

sponsor feature - alphabulous!

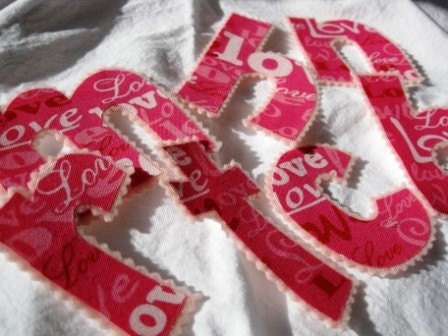
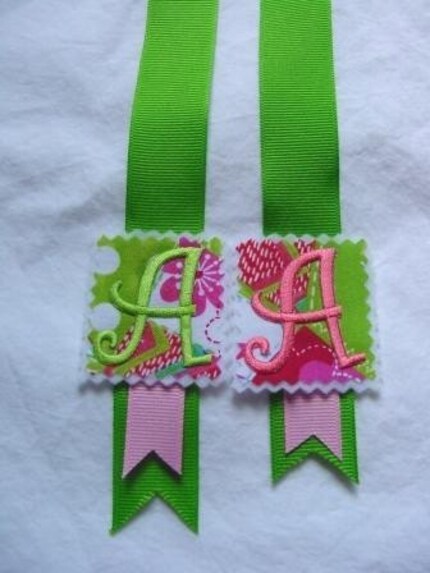
We couldn't wait any longer to feature our fabulous new sponsor--Alphabulous! What is Alphabulous you ask? It's adorable iron-on letters, numbered brag books for each year of your child's life, monogrammed bookmarks, and more! Everything is created with beautiful fabrics and lots of care. We asked Alphabulous's creator, Sheppard Homan, about this fun home-based business.

I started my business about 6 years ago with hand painted items and handmade pillows for children. It has since evolved into iron-on patches, picture frames, gifts and photo, baby and scrapbooks. I create stock and love doing custom orders because I know I am creating a one of a kind piece for my customer.

I have two shops - one on Etsy, www.alphabulous.etsy.com and the other, my on-line boutique, www.thedizzydaisy.com that carries Alphabulous and other artists.

I have always wanted to do both - create special gifts and art and own a shop. Now I can do them especially with the wonderful networking and blogs that are available. This community is so nice and helpful. Everyone wants to help you succeed! I have had great luck so far! I hope to do both for a long time.

We hope she's doing them for a long time, too! Here are a few of our favorites from her Etsy store. Darling!


Without our wonderful sponsors supporting this blog, our husbands probably would not support us running it. Creating all these crafts costs money, people! So we appreciate all of you supporting our sponsors so that we can continue to bring you fabulous ideas and tutorials almost every day. And remember, buy handmade!

share this on »
{Facebook} {Twitter} {Pinterest}
7 Comments

Monday, November 10, 2008

baby boy diaper change cone tutorial


I laughed out loud when I heard the name of this cool product: Pee-Pee Teepee. Can you guess what it's for? I didn't have this happen to me many times, but once is one time too many! These are a great product, but we decided to try making our own for a friend's baby shower.

If you haven't guessed what these are used for yet, you probably haven't had the privilege of changing a baby boy's diaper. This cone-shaped cloth product gives you a fighting chance to stay dry in the event of a little unexpected shower. Just put it over his little wee-wee as soon as you open his diaper and it goes to work. It's a must-have accessory for baby boys, and a set of four or five of them would be great as part of a baby shower gift. This cowboy-themed teepee is especially hilarious because the fabric has the words "giddy up" printed on it! (Yeah, we think we're pretty funny.)

Diaper Change Cone Tutorial

What you'll need:

*Flannel
*Scissors
*Sewing machine and coordinating thread

1. First, make a template out of paper and cut out two half circles of your flannel (or cut one big circle and then cut it in half). You could try tracing the bottom of a bowl or plate. Mine was 7 inches in diameter (7 inches across the straight part for you geometry-haters).


2. Sew the two halves right sides together, starting halfway down the straight side. Sew around the arc and then stop.


3. Turn inside out and iron flat, being sure to tuck in the unsewn opening.


4. Fold in half and sew down the straight side.


5. Turn inside out. Place on baby boy's wee-wee to prevent pee-pee sprinkler!

share this on »
{Facebook} {Twitter} {Pinterest}
49 Comments

Saturday, November 1, 2008

baby wear from old t-shirts


One of my favorite baby clothing items has to be the sleep sack. Not only do babies look adorable in them, but they make diaper changes so easy! We are loving the pattern for these newborn gowns made from mens t-shirts. Check out the free pattern download from This Mama Makes Stuff. Thanks for sharing with us!


Homemade by Jill has a simple tutorial for this sweet baby hat made from an adult t-shirt sleeve! You could easily make a gown and matching hat out of a large t-shirt. It's a great way to restyle and be kind to the earth. So hold on to that bag of clothing for Good Will--there just may be a few "vintage" t-shirts in there that would be perfect for your rock-n-roll baby. Thanks for sharing, Jill, and congrats on baby Oscar! He's adorable!

share this on »
{Facebook} {Twitter} {Pinterest}
6 Comments

Wednesday, October 29, 2008

baby legs tutorial (make your own leg and arm warmers!)

I am always cold. My husband loves it when I'm pregnant because it's the only time I'm warm and therefore on the same thermostat level as him. I own lots of sweatshirts to put on in my house in the winter because I'm cold even when the heater is on.

That's where BabyLegs come in. I have a pair for myself that I wear, even under long-sleeved shirts and jackets, to keep me warm and toasty. My kids are adorable in them--they love the skulls, flames, and bones on theirs. The Little Birdies have spent plenty of money with that company. (And I'm sure we will continue to do so in the future--they make cute gifts!) However, we wanted to try to make a pair of simple BabyLegs-esque arm and leg warmers to take advantage of all the totally cool knee-high socks out there right now. I love all the funky colors and textures. I've found so many at Target this season that it's been hard to exercise restraint and not buy one of each! So here's a simple tutorial on how to make your own arm or leg warmers for you, your baby, or anyone you think might be cold!

Leg and Arm Warmer Tutorial

*1 pair knee or thigh-high socks (knee highs are great for baby and kids, and the thigh-highs are great for adult arm warmers because they reach all the way up to a short sleeve!)

*Rotary cutter or scissors
*Needle and thread


1. Lay your socks flat and cut off the foot, just above the ankle.


2. Turn them inside out and fold over a small hem on the raw edge.


3. Take a needle and matching thread and whip stitch around the hem. Tie a knot, turn right-side out, and you're done! Seriously, I think that's the shortest tutorial we've ever done.

(Oops! Forgot to take a final picture! I'll add it later today. . .)

Here is another tutorial with lots of pictures to make your own BabyLegs with cuffs on both ends. It was too complicated for me, but they may look a little closer to actual BabyLegs.

These are so cute on babies with skirts, or little ones learning to use the potty. But I have to say they are my favorite on ME because they keep me so cozy!

share this on »
{Facebook} {Twitter} {Pinterest}
25 Comments

Tuesday, October 28, 2008

crafty weekend report


While Stacy and Jessica were boogieing down at Baby Loves Disco, I was having a crafty weekend with my sister. A craft extravaganza if you will. She flew to Seattle from Utah to do nothing but craft, and craft we did. It was fabulous! We visited several local craft stores (some of them twice!), stayed up way too late watching chick flicks and trying to figure out patterns, and ate tons of crafting fuel (i.e. M&Ms and other junk food). It's so good to have a sister! It felt like we didn't get much done, but when we put all the projects together, we were amazed at what we accomplished! Here is our report.

Thursday I picked my sister up at the airport and after a bite to eat, we headed to Stamp Camp at Anne Beale's (my Stampin' Up! demonstrator--check out her new blog). We made all these fun cards, including a gift card holder and a card that holds a packet of spiced cider! That would make a great card to go along with our cup cozy.


Later that night we got creative with ribbon and flowers, making baby hair clips and collars for my sister's two chihuahuas. That's right--those are not bracelets, they're little ribbon collars for the cutest tiny pups you've ever seen!


The next morning she joined Stacy and me for our Bath Bombs class at Tot Spot Cafe (watch for our next class update soon!). She ended up helping the class attendees so much that she didn't get to make any for herself! So she got to keep the samples. We're so glad you were there, Lind! You saved us!


This message board project was a little trying, but it turned out so cute! First, I think I picked out the wrong size canvas for the fat quarter (from Amy Butler's Daisy Chain line), and then I cut the funky green ribbon the wrong length (it had been a long day!). So much for me helping her with it. We improvised with some pink taffeta ribbon from Stampin' Up! and we actually thought it turned out better that way!


Next were two nursing covers. I won't say who they're for, but two people she knows will be getting one soon! We fell in love with these fabrics from Heather Bailey's Pop Garden line (left) and Amy Butler's Midwest Modern line (right).


The piece de la resistance was this adorable bag, made with more of Heather Bailey's Pop Garden fabrics. It only took us six hours to make, but it really wasn't that hard. We're just not that pattern savvy. We love how it turned out! If you're interested, the pattern is called Frenchy Bags by Amy Butler.


We added this fun felt flower to give it a little flair. It's just made from felt, a simple fabric yo-yo, and a papercrafting embellishment, glued together with E6000.


It is so hard for me to find time to create, so this weekend was so fun for me. Not only did I get to spend time with my favorite sister, but we made time to do something that truly makes us happy.

I love this quote:

"The desire to create is one of the deepest yearnings of the human soul. No matter our talents, education, backgrounds, or abilities, we each have an inherent wish to create something that did not exist before. . . .Creation brings deep satisfaction and fulfillment. We develop ourselves and others when we take unorganized matter into our hands and mold it into something of beauty. . ."
~Dieter F. Uchtdorf

That about sums it up. Thanks for a beautiful, productive, fulfilling weekend, Linds!

share this on »
{Facebook} {Twitter} {Pinterest}
8 Comments
LinkWithin Related Stories Widget for Blogs