


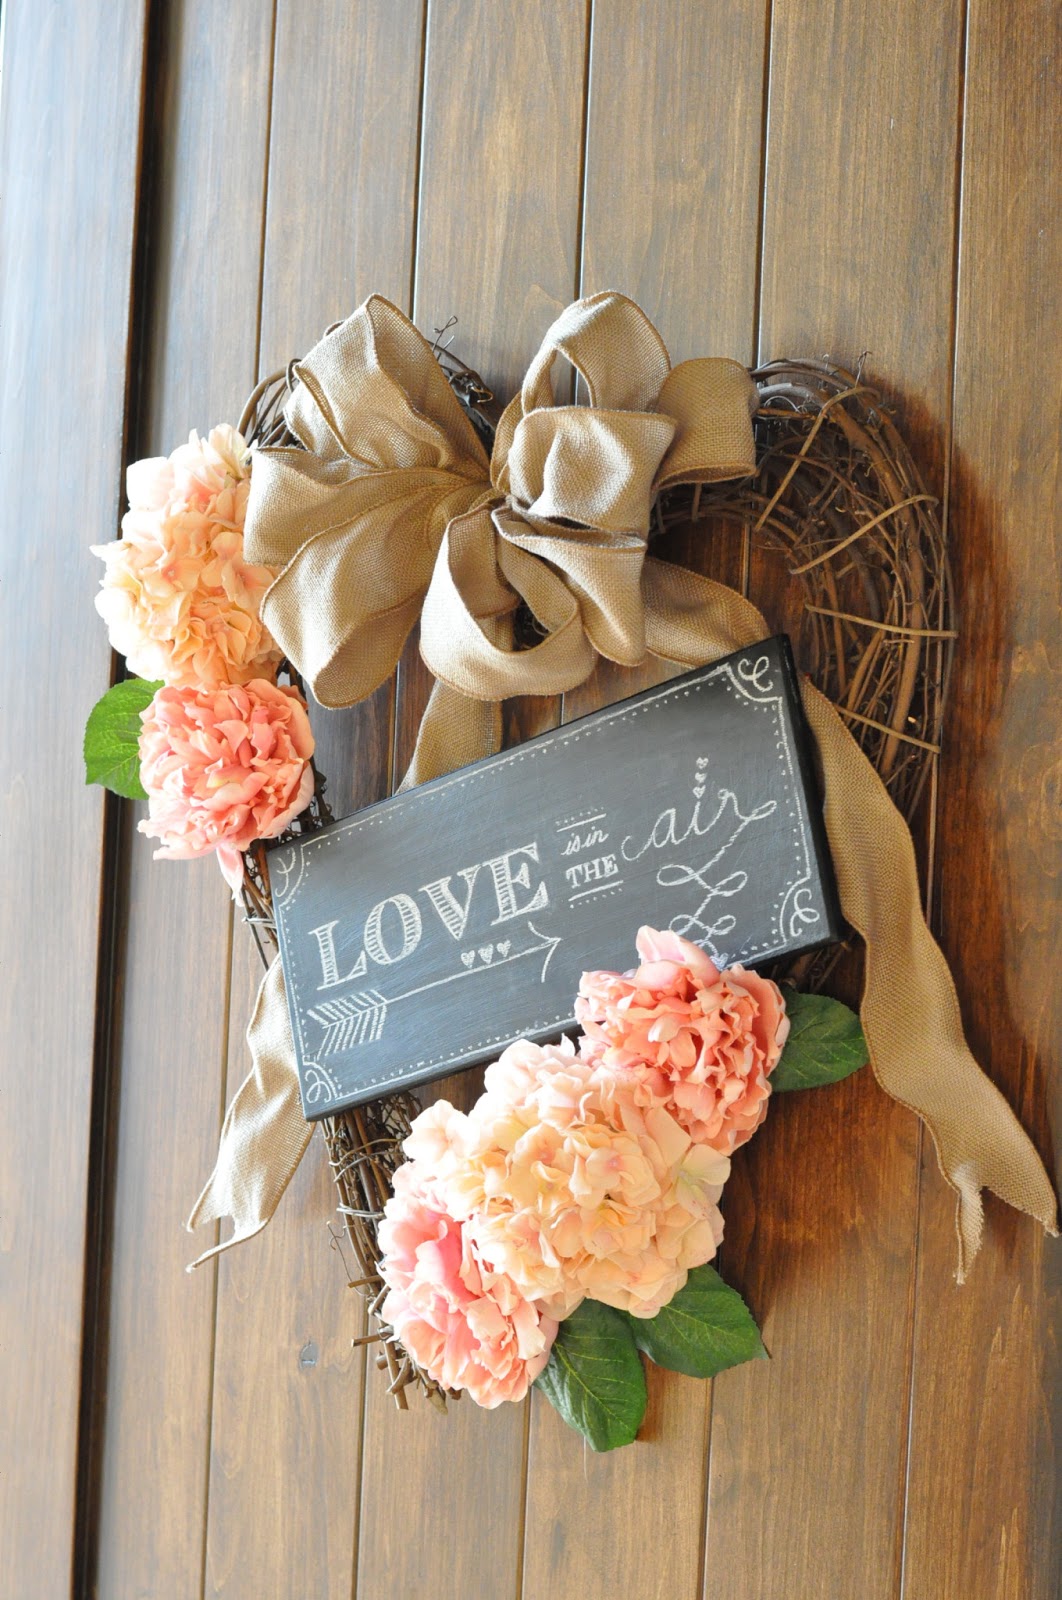
Valentine Heart Wreath with Chalkboard Message Board {Tutorial}
First for the chalkboard, which is easy as pie. Even the creating the beautiful text is easier than you'll believe. I've done a few chalkboard projects over the years (like the travel chalkboard, chalkboard speech bubbles, and the faux chalkboard labels, to name a few), but this one is my new favorite.
Chalkboard Sign Supplies:
*Wooden board or sign
*Chalkboard paint (I like Martha Stewart's)
*Foam brush
*Chalk
I started with a hanging sign that I found at Hobby Lobby on clearance, but didn't really like. First I sanded it lightly, then I applied two coats of chalkboard paint (wait an hour between coats, then cure 24 hours).

Next I covered it with a layer of chalk to prime it.

To get a clean, professional looking text, I cheated by printing my main word out on printer paper. Then I covered the back of the paper (behind the word) with chalk.

Tape your paper in place to ensure it doesn't move while you're working.

Using a pencil, trace the letters on the front of the paper, transferring the chalk on the back to your chalkboard.

Next, remove the paper. The word has been transferred, but it is not as dark or clear as I'd like. So I traced over the text with my stick of chalk.


Another trick for professional looking results: sharpen your chalk to a point. I used the side of a pair of scissors to shave the end of the chalk to a point.

Erase any mistakes with a Q-Tip. I also rubbed some chalk dust around to make my blackboard look more authentic. Then I added some other elements free-hand to pretty it up.


Here is my finished chalkboard--I was going to use it as a wall hanging. . .

. . .until I got working on my wreath. When it was done it just needed a little something.
Heart Valentine's Wreath Supplies:
*Heart grapevine wreath
*Silk flowers, I used pink hydrangeas and peonies
*Burlap ribbon
*Craft or floral wire and wire cutters

Originally I wanted to cover this wreath with hydrangeas, but I couldn't justify the cost for that many hydrangea picks, even at wholesale. So I chose five flowers and bunched a few at the bottom and a couple more on the opposite side.

Remove the stems and wire the flowers onto the grapevine wreath.

I made a big 10-loop bow with my burlap ribbon (it is wired ribbon, which makes shaping it much easier) and wired it to the top of the wreath.

I added my chalkboard sign with wire as well. If you need something to attach the wire to, try hammering picture hanging hardware to the back.

And that's it! I hung my wreath with a 3M Command Strip hanger, which is totally removable and won't hurt my door.
share this on » |
{Facebook} | {Twitter} | {Pinterest} |


17 Responses to “valentine's heart wreath & chalkboard art {tutorial}”
Wow - nice work. The tutorial on the chalk board was great information. Great post.
I'd never have thought of tracing the letters - what a brilliant idea! Thanks :)
Heel mooi, dank voor je beschrijving Tineke
bollies53.blogspot.com
So glad the "Little Birdies" are back- missed your blog. Hope everyone is feeling better by now.
Beautiful! Thanks for showing how to transfer an image onto the board using chalk. I would have never known how to do that. Awesome.
This is so lovely and love the chalkboard! The turorial is so easy to follow (always are!) and the ideas for using the chalkboard paint, and transferring the words are great! Thank you so much for sharing with us! and hope you are all feeling better soon. HAPPY VALENTINES DAY!
Oh my! That is so smart. I was wondering how people made incredible chalkboard signs and you have unlocked the mystery. I am featuring this at somedaycrafts.blogspot.com.
Love the chalkboard! Great instructions!
Thank you for showing us how to do this. Love your wreath.
Rosezeeta.
Lovely wreath! The big bow and those flowers add beauty to your message board! Beautiful idea!:-)
wow... very nie work love the look and might be doing something similar to put in my bedroom door ;) or maybe the wall..... hum still have to think on that one ***
Wow - what a cool project! Loved the tutorial on the chalk board - such a great idea! Can't wait to try it!
Beautiful!! Where did you get your stools? Love them as well (and am in the market for some!)
Our church just remodeled the cafe. They put a huge chalk board wall up. They went to Ben Franklin and got caulk pens . It is caulk in a pen, and boy does it do a nice job. One of the guys caulked out faces of people on the board. We are using the cafe to fund missions.
What font did you use? And how did you get the lines in the letters?
Love your wreath! I need to try to make a chalkboard now. I always buy my wreaths at a little store in our town called Curious Cargo. Your way of decorating the chalkboard is a really cool. Here is a link to my favorite store. I love sharing it with everyone. www.facebook.com/CuriousCargo
Wow, that's a very beautiful craft. I love the chalkboard idea where you can put your sweetest Valentines Day messages on it. Cheers to you!
Happy Valentine's to all!
Anne Walker @
http://messages.365greetings.com/holiday/valentines-day/valentines-day-messages.html
Post a Comment