Friday, February 4, 2011

CHA winter 2011 review and pictures {my super amazing weekend}

Okay, my laundry is finally under control so I can get down to uploading the hundreds of pictures we took at CHA. Are you ready for this? Or are you asking, what the heck is CHA?

CHA - the Craft and Hobby Association - puts on a trade show for craft retailers twice a year. What does that mean? Tons of craft manufacturers in one room (well, two floors, actually) showing off their new lines and products to your local (and online) craft retailers. Oh, and did I mention tons of gorgeous samples? Well that's what I went for anyway. A once-in-a-lifetime chance to experience all the best of the craft world (and all the best designers) in one place. I know!

As a first-timer, the entire show was magical for me. I soaked in the creativity every moment. I did make and takes and scored a little swag. We even spotted a few celebrities (like Tim Holtz, Stacy Julian, Margie Romney, Rhona Farrer, Heidi Swapp, and Lizzy Kartchner with Lola!). And I had a great time seeing it all with this girl and this girl.

It was overwhelming and inspirational and wonderful. But I was also surprised that there were very few new or different ideas between scrapbooking/papercrafting vendors (where I spent most of my time). It almost seemed the same ideas (some of them from previous years) popped up in each booth, just made over in that manufacturer's style. Although I have to admit I was happy to see many of the trends from last year had endured. Here are what I think the trends are for 2011 (some old, some new):

Trends
*silhouettes

Jenni Bowlin Studio

Maya Road

*paper garlands

Pebbles

October Afternoon

*framed quotes and accessories


Tim Holtz

*printer trays

7 Gypsies

Tim Holtz

Maya Road

*zippers


Maya Road

*dress forms

The Girls Paperie

DCWV

*canvas art

The Girls' Paperie

EK Success

*mustaches

My Cute Stamps


*flowers


Cosmo Cricket

*cupcakes

Pebbles, Inc.

Silhouette America

*birds / birdcages

EK Success

Jillybean Soup

The Girls Paperie

*banners / pennants

Pink Paislee


*paper wreaths


Cosmo Cricket

*vintage themes

October Afternoon

Cosmo Cricket

*sewing notions

My Little Shoebox

Cosmo Cricket

*felt


EK Success

*embroidery hoops

October Afternoon

*doilies
*bottle caps (we did multiple bottle cap necklace make and takes!)

My favorite booths and new product lines:

*Smash books by EK Success. This was one product that really did seem new and original. Check out this video. But beware--you're going to want one (or four).


*Everything by Crate Paper. They nailed it with all four of their new lines. Even if they weren't totally new ideas, the designs and accessories were a home run. I need them all. And I'll need multiples of the vintage buttons. Gaaa!


This little album was spectacular. Look for pics of all the pages in the slide show at the end!


*My other favorite new item was Silhouette's fabric stabilizer. That's right--we can now cut fabric with our Silhouette machines! You know there are going to be some good tutorials coming up. . .I can't wait to get my hands on some!


*October Afternoon was also fabulous (as per usual). Loved the new Rocket Age line for boys, and the vintage 5 & Dime! Plus their Sprinklers opaque ink sprays were very cool.


*Cosmo Cricket, in addition to their awesome new lines (Upcycle was my fave!), had an innovative new product called Gloobers. These are going to be a must-have in my flower supply arsenal!


My Mind's Eye is still in my top 3 favorite companies. They've expanded the Lush line to include new colors (love the orange!), and their Stella & Rose line is absolutely delicious (I need the doily stamps!).


*Jilly Bean Soup's Blossom Soup was completely adorable. We got to use it for the make and take and I'm in love! I was also blown away by this cool thread spool wreath.


*7 Gypsies' booth was over the top. It was completely decked with vintage goodness. Loved the Lille collection and the printed tissue paper (they decoupaged the walls with it!) There are tons of photos in the slideshow of this booth!


*Graphic 45 was total eye candy. I could hardly take it all in!


*Loved The Girls' Paperie booth, too. It was over-the-top amazing. Gorgeous, sweet, innovative. Margie had an altered book that made my heart skip a few beats.

Check out this kite! Amazing!


*Studio Calico not only had pretty papers but AMAZING samples! They always have great designers.


*Pink Paislee's Daily Junque and Soiree were to die for! It's designed by the three cool cats at House of 3.


Other favorites: Bella Blvd's Mr. Boy, Little Yellow Bicycle's Elizabeth Park, and Basic Grey's Sweet Threads. Among so many others!

Here's the slide show of our photos. I made them move semi-quickly, so click pause if you want to linger on a photo a little longer. Enjoy!

share this on »
{Facebook} {Twitter} {Pinterest}
30 Comments

Thursday, February 3, 2011

nook or kindle case {crochet pattern}

CHA pics and info coming soon--as soon as I can get my laundry under control! It was a GREAT trip! Until then, here's another fun crochet pattern.

My siblings and I went in on Nooks for our parents for Christmas this year. They read a ton, so we knew they'd enjoy them. My mom called me last week and said she is always worried it's going to get scratched in her purse, but the cases in the store were way too expensive. She thought there might be other readers out there with the same problem, so she suggested I do a tutorial for a Nook case! This crocheted version is for my dad (watch for the fabric version for my mom, coming soon!). So if you're looking for a more manly handmade gift for your Valentine, this may be it. It's similar to my cell phone/iPod case, so try that pattern if your love doesn't have an eReader!


Crocheted Nook or Kindle eReader Case Pattern

Supplies:
*Worsted weight yarn
*Size I crochet hook
*2 buttons
*Yarn needle

Stitches used:
*Single crochet (sc)
*Double crochet (dc)
*Moss stitch (explained in pattern)

Row 1: Ch 20. Sc in 3rd ch from hk. Begin moss stitch: Ch 1, sk st, sc in next st, *ch 1, sk st, sc in next st*. Repeat from * to * to end of row. Ch 2, turn.

Rows 2 - 56: Continue moss st: Sk 1st sc, *sc in ch-1 sp, ch 1, sk next sc, sc in ch-1 sp, ch 1* across. Sc in last st. Ch 2, turn.

Row 57: Dc in 1st sc, dc in next st, dc in ch-1 sp, ch 1, sk next sc, dc in next 9 sts (both sc and ch-1 spaces). Ch 1, sk next sc, dc in next ch-1 sp, dc in next 2 sc. Ch 1, turn. (Two buttonholes made.)

Row 58: Sc in 2nd st from hk and in ea st across, including ch-1 spaces. Ch 1, turn.

59: Sc in 2nd ch from hk and in ea sc across. Fasten of and weave in ends.


To finish your case, fold the bottom end up 8 inches. Fold flap with buttonholes over the top. Your case should measure approximately 5" wide and 8" high.


Lay buttons on top of buttonholes. Make sure they'll fit through the opening (it will stretch a little).


Sew buttons to main piece under the flap with a yarn needle. I usually cut a length of the yarn I used for the project and separate it out into several strands, then use that to sew on my buttons. Perfect matching thread every time, and you only have to do a couple passes through the button to get a really good hold!

After your buttons are in place, fold the long piece backwards up 8". Imagine you have just turned it inside out. Using your yarn needle and a length of yarn, stitch up the two sides of the case. I use a whip stitch. Then turn your case right-side-out and button closed. That's it!

share this on »
{Facebook} {Twitter} {Pinterest}
31 Comments

Tuesday, February 1, 2011

baby blvd giveaway

Today we want to introduce you to our new-found friend, Baby Blvd! This shop has all sorts of amazing items. They have really sweet baby items.

Look at these shoes!!


And this adorable vest...


The designer of the shop, Jen is excited about some new items. She tells us, "I am very excited about my new patterns I just started selling last week. I have more patterns coming, but I now sell patterns for my LDS scripture covers, for my reversible headbands, and for my LDS hymnal covers. I will continue to sell things I make as well for those who don't want to make their own. I sell scripture covers, scripture totes, headbands, appliques, a few baby clothes and shoes and a lot more!"

Aren't these great?

You definitely want to visit Baby Blvd. There is also a blog for Baby Blvd, so be sure to check that out too. Jen was nice enough to offer a discount to you! The coupon code for 10% off your order is "SECRET10" that will last until the end of February!! But that's not all...lucky for you readers, Baby Blvd is giving one of you the chance to win a $30 gift certificate to the shop! All you have to do is visit the shop and find your favorite item. Then come back and tell us what it is. The giveaway will end Sunday, February 6th at 11:59pm PT. Good Luck!

share this on »
{Facebook} {Twitter} {Pinterest}
151 Comments

Monday, January 31, 2011

we meet again...with csn.com


Remember a while back we posted about how CSN Stores helped makeover a bedroom? Well, it's time for us to partner with them again. We love them! I have been wanting to get some new items for my home and they have everything you can imagine. Did you know they even have swing sets for kids? I didn't until recently, but I am not surprised because honestly, what don't they have?

I am in the process of making over my family room. I feel like it might be quite the process because I am so indecisive. With the help of a couple friends, and CSN Stores, I am sure the finished result will be a beauty.

Look at this poor room. It really needs some love! We haven't done a thing to it since we moved in (should I admit the fact that it was three years ago?).

Stay tuned because I plan on taking you through the process with me. There might even be a CSN Stores giveaway along the way!

share this on »
{Facebook} {Twitter} {Pinterest}
5 Comments

Saturday, January 29, 2011

family motto 2011

It's still January, so I'm still thinking New Year's resolutions! Each year I pick a word to live by, but this year I decided to extend it to our little family in the form of a family motto. When I found this framed embroidered quote while visiting Utah for Christmas, I knew this was our theme. It's a life lesson that my husband and I feel is especially important for our children to learn now, while their mistakes are still relatively inconsequential. It's just on their level, but it is so crucial to their success in life.


Of course when I saw this piece I though, I could make that! But I also knew I probably wouldn't get around to it for six months and by then it would be too late. Plus it was only $9.95. My time is worth that much at least.


That said, I will definitely be making one like this for next year's theme, whatever it may be. The quote is stitched on muslin, wrapped around a batting-covered piece of cardboard, and framed. Easy peasy. If you want to make something like this but need help with your hand-stitched letters, check out this awesome tutorial from Studio Calico for using printed letters as a guide.


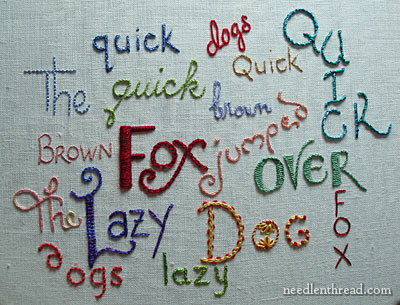
Or this index of 15 tutorials for great hand-stitched letters from Needle 'n Thread!


I'm headed to CHA in LA in a couple of hours and I'm too excited to sleep! If you don't know what CHA is, you'll want to check back over the next few days to see what my lucky eyes will be seeing. If you do know what it is, you'll really want to check back! Ta-ta for now. . .

share this on »
{Facebook} {Twitter} {Pinterest}
16 Comments

Friday, January 28, 2011

homemade box of chocolates


I love chocolate. Every year when Valentine's Day comes around I get excited to see all the chocolate that permeates the aisles at the store. There are so many boxes of chocolate, but I often find that unless you spend a large sum of money to get the good stuff, most of the heart shaped boxes just don't satisfy. You don't get much bang for your buck. This year I thought I would make a few of my own mini boxes of chocolate to give to some friends.

The process was really simple, and much cheaper than buying a box of chocolate. First, find yourself a box and some decorative paper you love.


Next cut a piece of paper that is big enough to fit your box. I picked two papers. One for my box and one for the lid. I then cut slits at each of the four corners so you can easily fold the paper up to glue one side at a time. Use a brush to apply mod podge to the sides of the box.


Pull the paper up and press it on the side of the box to cover it completely. Smooth any bubbles out. Repeat the process until every side is covered, trimming any excess paper as needed. Follow the same process to cover your lid.


I filled my box with my favorite chocolates. Oreo balls! They are so delicious and easy to make. I am not promising any health benefits, however. You can find the recipe at the bottom of a past post HERE.


Tie on a pretty ribbon and you are finished! A pretty, delicious, homemade box of chocolates for you to surprise someone with (it can even be for yourself, I won't tell!).

share this on »
{Facebook} {Twitter} {Pinterest}
15 Comments
LinkWithin Related Stories Widget for Blogs