I wanted to post this before Mother's Day because it would make a great gift for mom, but it's a great thing to make for yourself if you love to make cards. I love sitting down and making a bunch of cards at once to have on hand, and this is the perfect way to store them. Then the next time I am in a card making mood, I can see what occasions I'm getting low on. Some friends and I had a girls' night and made these together--it was super fun. Next get together we'll have to make some cards to put in them!
Oh how I am going to miss you girls!
I made these tabs with my Silhouette machine, just because it was quick and easy to cut them out. But you could make this with pre-cut tabbed dividers, or cut them by hand. I used a photo storage box that I found at Michael's and measured the inside to see what size I needed to make my cards. I wanted to make sure they were tall enough for the tabs to stick out above the cards as well. (Oh, and these would make great recipe card dividers, too!)
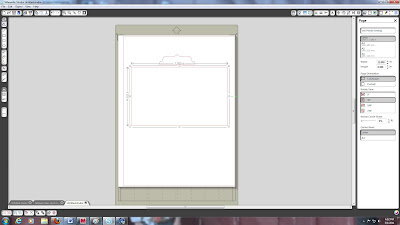
If you're using you Silhouette machine to cut tabs, here's a quick how-to. I started with the "7 borders, tabs, corners" image by Lori Whitlock from the Silhouette online store and deleted the parts of the shape I didn't need ("ungroup" the image first, then click on each individual piece and delete them until only the one you need is left).

Next I resized the tab piece to 2.5" x .75". To do this, select the shape and hold down the shift key while you drag one of the corners. The bounding box will give you the dimensions as you go. Let go of your mouse button when it reaches your desired size.

Then I used the rectangle shape option to draw a 4.25" x 7" rectangle for the base of my card.

You will need to "weld" your shapes to make them one image. To do this, line up the bottom of the tab with the top of the card. I made one in the middle and one to the side.

Select one of the shapes, then hold down the shift key and click on the second shape. Right click and select "weld." This should make your shapes become one (you shouldn't be able to see the overlapping line anymore).


To fit two on a page, I right-clicked and selected "duplicate", then rotated the shape 180 degrees. I put two middle tabs on one page, and two side tabs on the other. This gave me right and left tabs since I was using two-sided paper and could turn one over. But if you're using one-sided paper, you would want to flip the shape horizontally and then rotate the shape.


I cut the cards out of Stampin' Up!'s Love Letters Designer Series Paper. I love this paper pack. I saved every scrap after cutting them out. I also cut a second piece out of black card stock, which I glued to the back of each, just for a little sturdiness. Now all you have to do is decorate them!
I used mostly Stampin' Up! products to embellish my cards, like the Butterfly punch, crochet trim, and Hodge Podge Hardware set. A little ribbon, some buttons, and the Tim Holtz mini attacher (stapler) and I was done! They really came together quickly, mostly because the paper was so cute on it's own.
For the categories, I printed out the following on card stock using the 1942 Report font:
*Thank You
*Birthday
*Wedding
*Get Well
*Sympathy
*Baby
*Holiday
*Just Because
I cut each word into a strip, rolled the edges with my fingernail, and stapled them to the top of the tab. Easy peasy.
Here's my organizer with a few cards in it. I have a lot more room to go--better getting going on some cards!
share this on » |
{Facebook} | {Twitter} | {Pinterest} |


15 Responses to “tabbed card organizer {silhouette machine weld shapes tutorial}”
What a great idea I need to have a better system
Super cuuute!! I just featured them on my blog:
simplyjenna.blogspot.com
Great job!
:)Jenna
These turned out so lovely!!
so, so pretty! I love everything about this!
Thanks for sharing this tutorial. The Silhouette has so much to offer, and I only know how to use a fraction of it.
Cute, cute, cute!!! Love these!!
xoxo,
Amy
Excellent! Love the papers and it is an adorable project. Might make one for my Mom. Thanks for the super "tute"
I love this idea! I really need to be more organised with my card making and have a stockpile rather than hurriedly making a birthday card an hour before I'm due to meet the recipient! I'm definitely going to give this a try!
I LOVE Stampin' Up! You did a great job with this awesome project! My Silhouette should be arriving in the mail anytime, so this is a great inspirational project for me!
It turned out super cute, Miss Mandy! Can't wait to make one of those...
Oh I just love this! I wish I had a silhouette..everyone I know would get a box of these card organizers!
This idea is adorable!
Thanks for posting- I'd love to see more silhouette tutorials. I am so excited to know how to weld shapes!
This would work well as a coupon organizer! i am going to make a some today!
Love this post!!!! The photos will serve as my inspiration as I set up my home filing system. Why not have cute file folders to hold my stuff!? Thanks for sharing!
Post a Comment