Thursday, August 18, 2011

back-to-school ideas {collection}

We've added all our favorite Little Birdie Secrets back-to-school ideas in one place to make it easy to find great ideas for your little ones. Many of them are great for teacher appreciation gifts as well. You can click them here, or find them anytime at the top of the page. Enjoy!

share this on »
{Facebook} {Twitter} {Pinterest}
1 Comment

magnetic bookmark for back-to-school or teacher appreciation {tutorial}

READ THE REST OF THIS POST -->>>» |

This morning my little cuties started school--don't they look handsome? Kindergarten here is full day, and I have to admit I'm a little anxious for my little one to be away from me all day long. He's my shy-guy; he likes to hold my hand or follow big brother into uncertain situations. He hugged me and kissed the baby (in my belly) about ten times, but then he was fine! He found his seat and sat quietly while I walked away. I made it all the way home before I lost it (a whole 2 houses down the street). Then I remembered I have a whole six and a half hours to myself! Now what to do first?

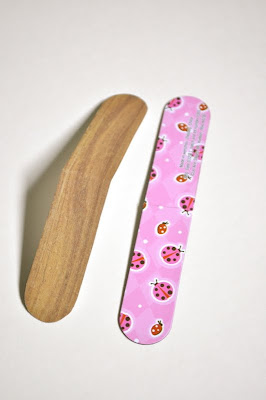
Anyway, during our last week of summer I managed to squeeze in one more back-to-school project for us to do together. But these aren't just for school kids--they're perfect bookmarks for grown ups, too (like teachers!)! I love that they're magnetic and stay put in my book. My good friend Kalli of Sister Secrets showed me this project when I visited her in Minnesota recently. (More on our crafty weekend later!) Thanks for the great idea, Kalli!
 
I took my kids to the library the other day and the boys got their own library cards and picked out about 20 books each (that I got to carry out). I even picked out a book from the Young Adult section that I've had on my list for a couple of years. We couldn't wait to get home and start reading so we could use our new bookmarks!

Magnetic Bookmark Tutorial
 Supplies:
*Magnetic bookmarks (Kalli found a pack of 4 for $1.00 at Joann in the dollar section!)
OR make your own by cutting pieces from magnetic sheets (found at the craft store by the magents/wood items)
*Patterned paper
*Spray adhesive or other strong paper glue (I like Tobow's Mono Liquid Glue)
*Embellishment for top (buttons, paper flowers, crocheted flowers, covered brads, etc.)
*Glue dots or hot glue gun for embellishments
*Mod Podge and foam brush (optional)

1. Start by opening one of your magnetic bookmarks. Take a file or sanding block and roughen up the slick surface a little.

 2. Trace the open bookmark on the back of your patterned paper. Cut it out.

3. Apply glue evenly to top of magnetic bookmark. Place the paper on top and fold the bookmark in half. Smooth out any wrinkles or bubbles. 

share this on »
{Facebook} {Twitter} {Pinterest}
8 Comments

Wednesday, August 17, 2011

share your back to school money saving advice

My son only has two weeks until school starts! This summer has really flown by and I cannot believe it's time to start shopping for school supplies!


He will be entering 2nd grade and will need quite a few new items. I always like to stock up on lunch items as well so I am set for the first bit of packing lunches. Buying all these items can add up quickly, and I like to save wherever I can. I am sure you fellow parents out there have some great tips for me. What do you do to save money on school supplies?

One thing I do is scour the Sunday ads. Office supply stores always have great deals this time of year, and often times I will buy large quantities of items so I will have them on hand all year. Then when my son needs to replenish his supplies at school, I don't have to go back to the store and pay full price. I even have some items saved up from last year that will save me money for this year! I have also noticed that many companies put out a lot of coupons on snacks and lunch items this time of year which is a big help to building cheaper lunches for my son.

Share your back to school money saving advice below for a chance to win a $500 Back to School Shopping Spree from BlogFrog!

Want to exchange more tips and ideas with other moms about back to school topics such as healthy snacks, school supplies and saving money? Visit the Horizon® Healthily Families Back to School Community!

This is a sponsored conversation written by me on behalf of Horizon. The opinions expressed by me do not necessarily reflect the view of the Horizon Organic brand.

share this on »
{Facebook} {Twitter} {Pinterest}

Tuesday, August 16, 2011

gather love baby quilt tutorial {riley blake fabrics}

I was completely floored (and ecstatic!) when Riley Blake Designs asked me to be a course instructor for their online Cutting Corners College! Riley Blake produces some of the cutest quilting fabric in the industry, often taking scrapbooking lines and turning them into fabric. Um, yes, please!


Today my first quilting course was posted, featuring this sweet baby quilt using Riley Blake's Sew Cherry line. I love this fabric! Here's to hoping my little bun is a girl so I get to keep it! Check out the full tutorial with tons of pictures on Riley Blake's Cutting Corners College site, and don't forget to take a few minutes to drool over their other fabric lines. Just don't tell you husband I told you about them. . .

share this on »
{Facebook} {Twitter} {Pinterest}
1 Comment

50+ blogger cookbook {to benefit the red cross and earthquake victims in japan}

It's here! It's here!

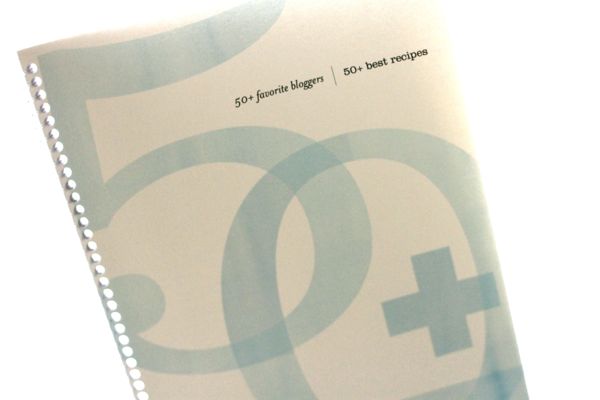
After literally MONTHS of creating, the "50+ Top Blogs All Time Favorite Recipes" cookbook is HERE!!! You may have seen a sneak peek of this gorgeous recipe book this past month. We hope you have been anxiously awaiting it. :) Now, until the end of August, it's available for purchase. But wait, scratch that, it's not a purchase. The best part is...

it's a donation!

100% of your donation will go to the American Red Cross to help the many people who have been affected by recent natural disasters around the world.
After seeing the devastation in Japan, several top blogs teamed together wanting to somehow make a difference. More than 50 blogs--including Little Birdie Secrets--donated one of their favorite recipes to be complied into an incredible cookbook designed by chickabug (design talent was 100% donated as well). Basically a lot of people worked really hard to make something extraordinary. Now, it's in your hands to make a difference.

This one-of-a-kind cookbook was originally only going to be offered as an E-book for a $10 donation. But after receiving feedback from readers, we realized that many of you want a physical copy. We approached our favorite publisher, Paper Coterie, who was willing to donate 100% of the supplies, and 100% of the cost of printing for this amazing cause. Are you feeling the warm tinglies yet?! We are!!! This started out as one person having an idea. Now over 50 blogs and an amazing publisher are involved and now it's YOUR turn.

Together we can will make a difference.

The E-book is for sale here for a $10 donation. If you have a computer in your kitchen or an electronic reader, (ipad, kindle,etc.) this is the copy for you. You can just click on the recipe you want from the table of contents and it will take you right there. It's sweet.

The hard cover cookbook is also available, (wait for it...) for only $10.
You will be amazed at the quality of this book. The only extra expense you will have will be for shipping ($4 or more depending on where you live and how many copies you order).

Thank you, thank you, thank you. You can smile knowing you made a difference to someone, somewhere. And you can smile because you will have a beautiful full color recipe book with gorgeous pictures and delicious recipes to try. We truly hope you love the cookbook. We think you will. You might just want to buy one for your mom, sister, and mother-in-law for Christmas. ;)
Please share this post with your friends and family on your blog, facebook, and twitter. Let's make this go VIRAL! How cool would that be?
Here is a button to put on your blog:
and the link:
http://recipestohelp.bigcartel.com/

Remember 100% of the proceeds will be benefiting the American Red Cross.

*The American Red Cross name is used with its permission, which in no way constitutes an endorsement, express or implied, of any product, service, company, individual or political position. For more information about the American Red Cross, please call 1-800-HELP NOW or email info@usa.redcross.org.

share this on »
{Facebook} {Twitter} {Pinterest}
3 Comments

Monday, August 15, 2011

back-to-school backpack tags & toy organization tags {tutorial}

Yes, I'm still on a back-to-school kick. Only 3 more days until school starts for us! Hallelujah! Today I made backpack name tags for my boys, and the idea spread to their toy baskets in their room. A little back-to-school organization never hurt anyone, right?


I shouldn't have been surprised when my boys picked the exact same Mario Bros. backpack for school. They're obsessed. But I knew there would be fights over which backpack belonged to whom (at least until school started). I was right. I was inspired by Emily's darling beach bag tags and decided to make them name tags to tell their backpacks apart! I think this will also come in handy at school, because I'm sure there will be a few more of these backpacks in their classes.

I found these plastic badge holders while back-to-school shopping and thought they would be easier than dealing with the self-sealing laminating pouches (which are pretty easy to begin with). I found these for about $2.50 at Walmart.

You could easily cut patterned paper to the size of the badge holder, but I have been loving all the digital papers I've been finding on Jessica Sprague's site lately (she has tons of Cosmo Cricket and Echo Park!). I watch out for my favorites to go on sale on One Buck Wednesdays each week. This is Cosmo's Joy Ride collection. I used Photoshop to size the paper to fit the badge holder, then added a text layer with "this belongs to:" and their names. Easy peasy! You could also stamp the name like Emily did, or use alphabet stickers.


I couldn't help myself--I added a coordinating piece of paper from the set on the back! It was all I could do to stop myself from tying them on with a cute gray ribbon. I went with orange and white baker's twine instead, to preserve the boys' dignity at school.

Once I figured out how easy these were to make, I decided to make a few for the boys' baskets on their bookshelf. I recently found these drawer/box/basket things at Target (on sale!). We use them to keep stuffed animals, electronics, and random toys off the floor. Their playroom is in the basement, but a few things always seem to end up in their room anyway. I tied them on with a little ribbon and voila! No more excuses for a dirty room!
 

share this on »
{Facebook} {Twitter} {Pinterest}
4 Comments

Friday, August 12, 2011

chalkboard cookies for back-to-school {reader feature}

There's nothing I love to eat more than "cute" food! I about died when I saw these darling chalkboard cookies, perfect for fall and back-to-school teacher gifts. They're made with fondant and icing, and you could write any message you wanted on them. Check out this awesome tutorial from The Sugar Turntable for the full instructions!


share this on »
{Facebook} {Twitter} {Pinterest}
11 Comments

Wednesday, August 10, 2011

back-to-school crocheted apple scrubbie and dishcloth {free pattern}

Back-to-school fun continues this week! I fell in love with this little apple scrubbie pattern by Lion Brand, so I created a coordinating dishcloth pattern for a great fall or teacher gift. Isn't it adorable?
 

Here's the link to the crocheted apple scrubbie pattern. I used Lily Sugar n' Cream cotton yarn in Red and Warm Brown, with Lion Brand's Cotton Ease yarn in Almond for the apple center and Lime for the leaf.
 

I stamped a quick "thanks so much" using the Tiny Tags set from Stampin' Up! (order here), and punched it with their Jewelry Tag punch. Then I clipped it on with a mini clothespin (like the ones I used here--I'm obsessed with them!).
 

Here it is in apple green. Or Lime to be exact. I used Lion Brand's Cotton Ease yarn in Lime for the green and Almond for the cream, and Lily's Sugar 'n Cream in Warm Brown for the stems and seeds.
 
If you want to make a cute dishcloth to go with it while practicing a new stitch, try my free Fall Apple Dishcloth pattern!
Fall Apple Dishcloth Pattern

Supplies:
*Small ball cotton yarn (about 100 yards)
*Size G crochet hook

Pattern stitch, Hdc Bud Stitch: (Hdc, ch 1, hdc), sk st, (hdc, ch 1 hdc) in next st across.

Row 1: Ch 37. (Hdc, ch 1, hdc) in 3rd ch from hk. Ch 1, hdc in same ch. [Sk 2 ch, (hdc, ch 1, hdc) in next ch] to end. Ch 2, turn.

Row 2: Sk 2 sts, (hdc, ch 1, hdc) in next st, [sk next 2 sts, (hdc, ch 1, hdc) in next st] to end. Ch 2, turn.

Repeat Row 2 until desired length (approx. 22 rows, or until it looks square).


Next you'll work scallops evenly around edges. Because you'll be working in the ends of rows, you won't necessarily have stitches to work in. Work them into the end of the rows and the spaces in between, approximating where the stitches would be. Experiment until the spacing looks right. You should have about 8 scallops on each side. I did not work a scallop around the corners, but you could if you wanted. Just add a couple of stitches to help it make the turn.

Edging: After finishing the last row, turn cloth 1/4 turn. Work 3 dc in 1st st, (sk 1 st, sl st next st, sk 1 st, 3 dc in next st) to end of row. Turn 1/4 and continue scallops around remaining three sides. Fasten off.

Fold your discloth up and tie it with a cute ribbon, then tuck the apple scrubbie underneath and add a tag. Voila! A cute and thoughtful fall thank you gift!

share this on »
{Facebook} {Twitter} {Pinterest}
12 Comments

heal my sole {giveaway winner}

It's time to announce the winner of the Heal My Sole giveaway! If your name is not listed below, don't despair! You can order any Heal My Sole product your heart desires and get 10% off any order over $10 until 8/31/11! Just use code Birdie10. Yay!
Congrats to our Heal My Sole giveaway winner, who is about to get the pampering set of their choice! And the winner is. . .

Alex, aka IrishBelle318

Shoot us an e-mail, Alex, so we can get you in touch with Heal My Sole. Thanks to everyone who entered!

share this on »
{Facebook} {Twitter} {Pinterest}
Add a comment

Tuesday, August 9, 2011

easy magnetic clips tutorial {and our such sweet tierney giveaway winner}

If you love back-to-school shopping like I do, you'll love our mini magnet clip tutorial we're guest posting over at Make and Takes today! Check it out. . .


We're also excited to announce the winner of the Such Sweet Tierney giveaway! Our winner said she would choose the Woodland tags if she won. Good choice! Congrats to. . .

Dueteronomy 6 Mom
Hooray! Send us a quick e-mail so we can get you set up with your gift certificate!

share this on »
{Facebook} {Twitter} {Pinterest}
4 Comments

Monday, August 8, 2011

back to school sales {from our affiliates}

Two of our favorite affiliates are having great sales today! Back to school shopping's not just for kids!

Tiny Prints is having a sale on greeting cards for teachers! Use them to make special recognition cards for students, thank you cards for parents, and more. Aug. 8 and 9, 2011, get $ .49 Cent Greeting Cards for Teachers. Code: APPLE11 | Expires: 8/09/2011


Today only, Monday, Aug. 8, my very favorite apron from Flirty Aprons is 50% off! Remember how I gave mine a little bling-bling? Get 50% off the Sugar & Spice Apron using code SUGAR50 today only!
 

share this on »
{Facebook} {Twitter} {Pinterest}
Add a comment

back to school quote banner {tutorial}

READ THE REST OF THIS POST -->>>» |

I am my kids are really excited for school to start, so we decided to make a count-down to the first day of school. I wanted it to be more than a chain, so I came up with a back-to-school banner with a quote behind each letter. Quotes that fit what I felt my kids need to hear before starting in a new grade at a new school. Each day we'll turn a letter over and read the quote on the inside, and be one day closer to backpacks and recess!
 

I am proud to say that I limited myself to only supplies I had on hand (which you know are extremely limited right now!).  It was fun to 1. challenge myself, and 2. keep it simple. At least simpler than I would if I had gone to the scrapbook store first! For me, simpler = cheaper.

Each of the 12 days before school we'll turn over another letter. On the inside is a quote, and the front side of the card can be flipped over to reveal it. Then the quote will replace each day's letter so we can read them over and over again.
 

I've included close-ups of each letter, as well as each quote, to get you started.

share this on »
{Facebook} {Twitter} {Pinterest}
11 Comments
LinkWithin Related Stories Widget for Blogs