PAGES

Monday, August 30, 2010

bedroom makeover sneak peek with csn.com


We had a relaxing last-weekend-before-school-starts with my in-laws. My favorite part was our day trip to Vancouver. What an amazing city! Here we are in front of the aquarium.

But I have to say, having my mother-in-law in town to go shopping with was almost better. We're trying to sell our house, so I've got a few little home decor projects going on, and it's always nice to have someone to bounce ideas off (especially when they have great taste!). Here's a sneak peek of what we put together for my bedroom makeover--a few new things and some handcrafted details. More details coming soon. . .


Our friends at CSN.com are giving me a nice gift certificate to help round off the room. I'm going to need new sheets, a curtain rod, pillow shams, and maybe a mirror or new lighting. Or maybe I should be looking at updating my dining table. I admit it--I freely craft on my dining room table, and recently I noticed how bad it looks. I have to keep a tablecloth on it constantly to hide the dents, scratches, and patches of glue. I'm terrible. Good thing it was inexpensive to begin with. This would be a fine replacement. Perfect for my little place.

What would you use a gift certificate to CSN.com for? You can search over 200 stores on one site, so make sure you have more than a few minutes to browse! Leave us a comment and maybe we can convince CSN to offer a gift card to one of our readers next!

Friday, August 27, 2010

penuche frosting - reader submission

Our sweet reader, Danielle emailed us her mother's recipe for penuche frosting. It looks absolutely divine. I love that not only can you use it as a frosting, but Danielle told us you can also eat it like candy. Delish!


Penuche Frosting
Ingredients:
1/2 cup butter
1 cup packed brown sugar
1/4 cup milk
3 1/2 cups powdered sugar

Directions:
In a saucepan, melt butter and stir in brown sugar. Cook until bubbly, stirring continually. Remove from heat. Add milk; beat vigorously till smooth. Add powdered sugar. Bear by hand till of spreading consistency. Immediately frost on cake, or drop by spoonful onto parchment paper for eating. Yum yum! Just like candy!

Thursday, August 26, 2010

a card a day at berry stampin'

We're trying to enjoy our last week of summer and what happens? It's 65 degrees and pouring rain! Boooo! Perfect weather for indoor crafting, though. Like maybe cards? My stash is getting seriously low. Here's a new card blog called Berry Stampin' that I subscribe to. She posts a new card every single day (sometimes two a day!) using Stampin' Up! products. If you like what she shows, you can order the supplies through her (she lists them below each card), or you can scraplift her style using your own supplies. I just loving having good ideas to copy. Here are a few of my faves:


Check out these almost identical cards that she did in two different color combos--one for baby girl and one for baby boy! Brilliant! I love making cards--it's a project I can finish. Counting down the days until school starts so I can build up my stash again. . .

Wednesday, August 25, 2010

more refinished tables

Remember my post a while ago about my refinished side table? Well, if you remember, it was a set of three nesting tables. The red one is the largest and then I have two smaller ones. I loved my red one so much that I had to change the other ones too. My bedroom follows a brown and blue theme, so I painted the two tables to fit in with that. One was painted blue to sit by my bed and one was painted yellow to add a pop of color between two chairs. I just love them! I followed the exact same steps as my red table and they turned out great. I love that they look brand new and they add so much to my now not-so boring room.

Tuesday, August 24, 2010

how to can peaches

I spent most of the evenings last week canning 50 lbs. of peaches and spiced peach jam, and I am exhausted. Canning is hard work! I cannot imagine how my grandparents, who are in their late 70s, still can peaches, pears, green beans, salsa, pickles, and various other produce items from their garden each year. Maybe I'm just a wimp. But the sweet peach halves in the middle of winter make it worth all the hours on my feet, getting splashed with boiling hot water.

A friend of mine complained the peaches she canned a couple of years ago didn't turn out--they had discolored and didn't taste good. So she asked if she could come watch me this year. I was thrilled to have some help, until I remembered that I can at night. I'm talking after 10:00 people, which means I'm not usually done until after midnight (or later!). It's too hot during the day, and I have to wait until my kids are in bed. Too many distractions otherwise.

Since she's not a crazy nocturnal canner like me, she asked if I'd post the process here. I'm thinking there are a few more of you out there who would love to try canning peaches, but don't know where to start. Well here you go. It's really not difficult, just time-consuming. And scorching, but don't let that deter you! It's kind of like hot glue gun burns. They are the curse of the crafter, but you get over it pretty quickly for the end result.

Canned Peaches Tutorial

Ingredients:
Ripe peaches (2-3 lbs. per quart)
Sugar
Water
Fruit Fresh or other powder fruit preservative

Equipment needed:
Clean quart canning jars
NEW matching canning lids
Canning lid rings
Water bath canner
Magnetic lid wand
Jar tongs
Funnel
Large pot
Small pot
Non-metal spatula

Before I do anything else, I always fill my canner with water (about 3/4 of the way) and put it on a burner on high heat. It takes a while to boil, so you might as well get started now!

The next very important step that I don't have a picture for is to heat/sterilize your jars. I put mine in the top rack of the dishwasher and run a sanitize cycle with heated drying. This will heat the jars so they won't crack, and clean them so no bacteria will be in with your peaches. I leave them in the dishwasher until I'm ready to pull one out so they'll stay hot.

Next, wash your peaches. I start with a small group of about six at a time.


In your large pot, heat some water to boiling. Drop about three peaches in the hot water for about 60 seconds. While these are blanching, wash your next six peaches.


Remove the peaches and submerge in cold water. I add ice cubes to my bowl of water so it will stay cold (the hot peaches warm it up after a few). You'll have to add more ice after every 2-3 batches.


Gently slip off peel with your fingers. If it doesn't come off easily, you may not have blanched it long enough. Put skinned peaches in a large bowl. Discard peels in another bowl.


I like to put the next three peaches in the hot water while I skin the previous three.
If you're doing a large batch like I did, sprinkle the peaches with some Fruit Fresh now.


With a knife, cut the peaches in half along the indentation.


Pull out your pit and scrape out any fibrous flesh with a spoon.


If you have pits that are broken in half, use a spoon to dig each half out.


After slicing about six peaches, I sprinkle them with more Fruit Fresh to keep them from browning and preserve the flavor.


Make a syrup from water and sugar. You can do a light, medium, or heavy syrup, but I always do light. My measurements are 2 1/4 c. sugar to 5 1/4 c. water, which makes 6 1/2 c. syrup. I usually make 3 batches for my 24 lbs. of peaches, but start with smaller increments if you aren't sure how much you'll need. Heat them in a large pot until the sugar is dissolved. Keep it hot.


Layer peach halves with the pit cavity side down. This could possibly the hardest part of canning. Those darn halves want to fall in cavity side up every single time, and it can be hard to turn them over with a spatula with these narrow-necked bottles. But it is important to help prevent bubbles. Leave at least 1/2" headroom from the top of the last peach to the top of the rim of the jar.


Using a funnel, ladle hot syrup over peaches. Fill to 1/2" headspace between top of syrup and rim of the jar.


Take a spatula (non-metal) and put it in the jar, pressing against the peaches around the perimeter of the jar. This will release air bubbles and is very important to ensure your food is safely stored.


10. With a wet cloth, wipe off the rim and sides of the top of the jar. This is important to ensure proper sealing of lid.


11. Oh yeah. Before you start ladling syrup, heat some water in a small pot and put your NEW lids (not last year's) in to soak.


12. Using your magnetic lid wand, lift a lid from the pot and place it on the jar.


Screw a lid ring on tight.


If you have a wire rack that came with your canner, suspend it over the boiling water and put bottles on it.


Once you have a group of bottles (my canner fits about 7 quart jars at once), lower the rack into the boiling water. Cover and boil for 30 minutes. Remember, your water should completely cover your jars by 1-2". If it doesn't, add more water and wait for the water to return to a boil before staring your timer.


Being extra, super careful, use lid tongs to remove bottles from canner and place on a dish towel on the counter. Pretty soon you will begin to hear the lids "pop" or "ping" loudly. This tells you the seal is good and your peaches are ready to store. If you don't hear a ping after 24 hours (and you can press down the center of the lid and it pops back up), refrigerate and use your peaches soon. I only had one bottle out of 25 that didn't seal.

Enjoy the fruits of your labor all year long. Ahhhhhh. . .

Thursday, August 19, 2010

mexican bowtie pasta recipe

It's not our normal recipe day, but I have been canning peaches the last few days and haven't had time to finish the posts I have in the works. Since so many of you asked for the recipes shown on my recipe board, I thought we'd have a bonus recipe this week! The others will follow soon. Enjoy!


Mexican Bowtie Pasta

1 can black beans, drained and rinsed
1/2 c. frozen corn, run under cold water for a minute
1/4 c. diced red onion
1 avacado, diced
1/2 c. diced tomato
Juice from 1 lime (I used 2 Tbsp. bottled lime juice in a pinch)
1/2 c. mayonaise
1 c. salsa of your choice
2-3 c. bowtie pasta (cook 2 min. less that directed)
1 c. or less chicken or steak, booked and cut into bite-sized pieces
1/2 c. shredded colby-jack cheese
1/2 c. chopped cilantro

Combine first six ingredients (through lime) in a bowl. Chill.

Mix mayo and salsa together and pour over cooked pasta. Chill.

Before serving, add veggies to pasta. Toss with cheese, meat, and cilantro. Serve cold.

*You can also omit the pasta and serve as a yummy dip with tortilla chips!

Wednesday, August 18, 2010

covered bead necklace tutorial - reader submission


I host a monthly crafting group at my home each month for my friends from church. Last month a friend was working on a copy of a gorgeous necklace she saw at Ann Taylor. She graciously offered to let me take pictures so we could share it with you (she knows me too well!). We'll just call it this week's reader submission. It's similar to the covered wooden bead bracelet we posted last summer, with a little twist. Enjoy!

Covered Bead Necklace Tutorial

Supplies
*Chiffon or other fabric
*Plastic or wooden beads
*Needle and coordinating thread
*Decorative beaded chain
*Sewing machine (optional--you could hand sew!)


1. Start with a piece of fabric (she used chiffon) about 36" long (or longer or shorter depending on how long you want your finished piece--remember to leave some to tie a bow) and 2.5" wide, or wide enough to fit your beads plus a 1/4" seam allowance. Fold fabric in half lengthwise with right sides together. Machine stitch or hand sew up long side, leaving ends open. Turn tube right side out.


2. Insert a bead into tube and center. Tie a knot in the tube on either side of the bead. Continue adding beads on either side and tying knots after each to secure, leaving about 12" on either end to tie in a bow.


3. Wind beaded chain around beads. Stitch in place randomly at knots to secure.


To wear, tie around your neck and be prepared to look like the most elegant, and craftiest, girl in the room!


Tuesday, August 17, 2010

flashcard rings = good, clean fun

More back-to-school today--I guess I'm a little excited. I really don't want summer to end, but I love shopping the back-to-school sales! I went to Target today and loaded up on the new flashcards in the Dollar Spot. My kids love them. But I don't love the 52-million-card-pick-up game that ensues each time we have a study session. So flashcard rings were born. Easy enough you don't need a tutorial, but I'm going to give it to you anyway, because I'm cool like that.

Flashcard Ring Tutorial

Supplies:
*Flashcards
*Book rings from the office supply store
*Crop-A-Dile or other heavy duty hole punch

1. Make sure all your flashcards are facing the same way. This is a good "game" for the kids to play. Punch a hole through a small stack of the cards in the upper left-hand corner, being careful to keep them straight and not cut off any words or important information.


2. Lay one of your punched cards on top of another small stack of flashcards. With a pen, mark where your hole was punched.


3. Punch the next stack of cards where you traced your hole. Repeat with remaining cards.


4. Open book ring and slide through all the holes of the punched cards. Close ring.


5. Never play 52-card pick-up again. Unless you want to. Oh, and these are perfect for car trips!

Monday, August 16, 2010

travel clipboard chalkboard tutorial


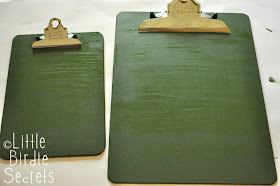
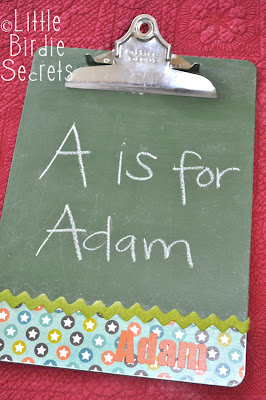
It's almost time for my kids to go back to school! Such a bittersweet feeling. Summer has been too short, but it will be nice not to have to come up with activities for the boys 24-7. So in the spirit of back to school AND looking for a fun summer activity, we came up with these fun clipboard chalkboards. You can also clip some paper to them to make drawing on-the-go easier. They're perfect for road trips or church, or for practicing those ABCs!


Clipboard Chalkboard Tutorial

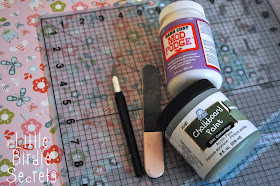
Supplies:
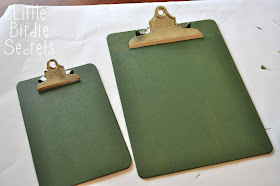
*Wood clipboard, any size
*Chalkboard Paint (we like Plaid's Chalkboard Paint that comes in lots of colors)
*Foam brush
*Embellishments (optional) - patterned paper, ribbon, buttons, letters, etc.)
*Mod Podge and foam brush
*Exacto knife and cutting mat
*File or sanding block

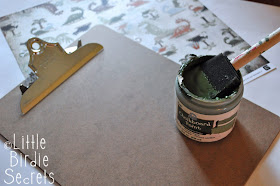
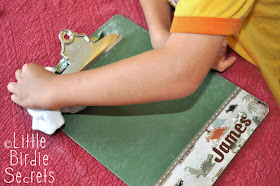
1. Paint the entire wood area of the clipboard with chalkboard paint, following the manufacturers instructions. Lift up the metal clip to get underneath. If paint gets on the metal parts, simply wipe off with a paper towel while still wet.


The Plaid chalkboard paint says to paint a layer in one direction and allow to dry for one hour.


Then paint a layer in the opposite direction and allow to dry for 24 hours.


2. Once your paint has cured, you can embellish your chalkboard with paper, ribbon, buttons, etc.


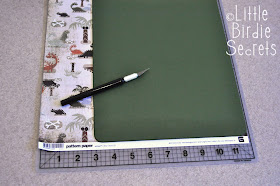
I laid my chalkboard on top of my patterned paper, on top of my cutting mat, and cut around it. You could also trace it and cut around, but that's just one more step!


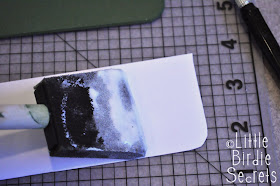
3. Apply a thin layer of Mod Podge on the back of the paper and glue it in place. Smooth out any wrinkles with the side of your hand.


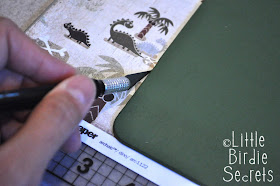
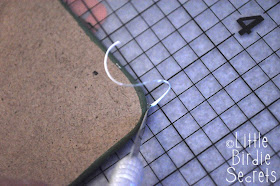
4. Lay your chalkboard face down (you'll have to let the top edge with the clip hang over the side of the table to do this). Using your craft knife and cutting mat, trim any excess paper from the edges.


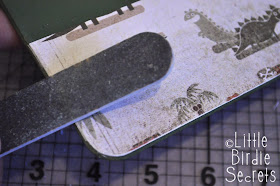
5. Turn your board back over and sand the edges with a paper file or sanding block.


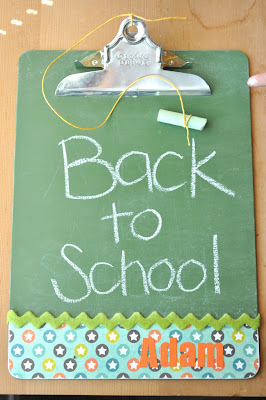
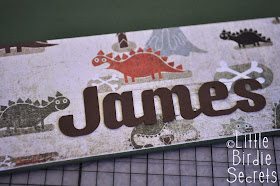
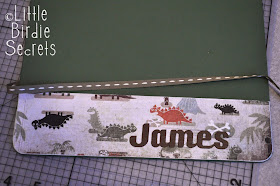
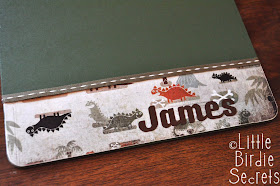
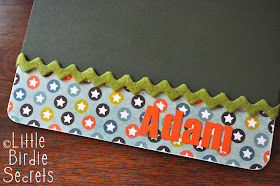
6. Next I cut my boys' names out of card stock using my Silhouette. I love this font from Creating Keepsakes called CK Racer because almost all the letters are attached--you don't have to glue on individual letters! (Man, I sound laz-y, don't I?)

First I Mod Podged them on,


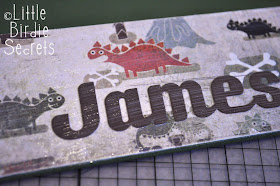
then I put a thin layer of Mod Podge over the entire paper section to seal the letters and the paper.


7. After the Mod Podge dried, I hot glued a piece of coordinating ribbon to cover the seam between the paper and the chalkboard.


8. Before you use your chalkboard, you must season it. To do this, cover the entire chalkboard surface with chalk, then erase.


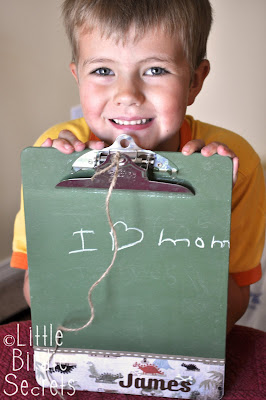
Later we also tied a piece of chalk to piece of jute and tied it on the clipboard so it's always handy (see cute pic below). I've found the colored chalks work a lot better on these than white for some reason. I think they're softer.


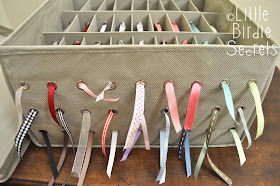
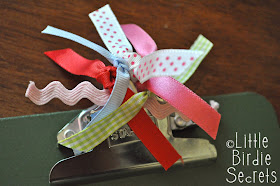
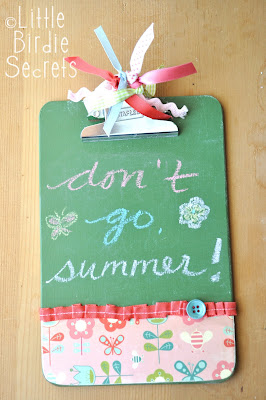
I couldn't help but get a little crazy with the girl version I made. I pulled out my Scrap Box ribbon organizer and cut 4" pieces in several colors.

Then I tied them in the hole in the center of the clip. For some reason the boys didn't want any ribbons on theirs. Go figure.

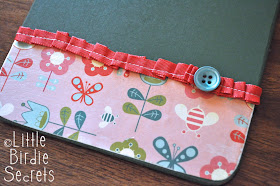
I also used my favorite ruffled ribbon technique to make the ruffle on the girly chalkboard.


That's it! Get those little ones ready for back to school with a little chalkboard fun!