Now that you have all used up your cherries with our cherry pie filling ideas, it's time to move on to apricots. My family and I recently returned from a trip to my parents' place in Oregon. They have 7 apricot trees on their property and lucky for us, many of the apricots were ripe for the pickin' while we were there. We came home with a box of apricots and the first thing I did was make my favorite apricot pie. I found this recipe a couple years ago from Better Homes and Gardens when I was trying to find new apricot recipes for my mom. It was an instant hit and now we make it all the time whenever it's apricot season. Well, in most places the apricots are ripe and ready, so head to your store or find a place to pick your own and make this pie!
Apricot-Almond Pie
1 pastry crust (the recipe I use is below)
3/4 cup sugar
1/3 cup flour
4 cups sliced, pitted apricots (about 1 3/4 lbs)
1/2 tsp. almond extract plus 2 T. water
1/4 cup slivered almonds, optional
Crumb Topping:
Stir together 1/2 cup flour and 1/2 cup brown sugar. Using a pastry blender or a fork, cut in 3 T. butter until mixture resembles coarse crumbs.
1. Prepare and roll out pastry and line a 9 inch pie plate with it. Prepare crumb topping and set aside.
2. In a large bowl combine sugar and flour. Add apricots and almond/water. Gently toss until coated.
3. Transfer apricot mixture to pastry-lined pie plate. Sprinkle crumb topping over the filling. Sprinkle with almonds (I usually don't add these since my husband is not a fan of nuts, but I have had it with them before and it is YUMMY.)
4. Lightly tent the pie with foil and bake at 375 for 25 minutes. Remove the foil and bake for an additional 20-25 minutes or until top is golden and bubbly. Cool on a wire rack and ENJOY!
Pastry Recipe (from Betty Crocker):
1 cup flour
1/2 tsp. salt
1/3 cup plus 1 T. shortening
2-3 T. cold water
Mix together flour and salt. Cut in shortening with a pastry blender or fork. Sprinkle with cold water, adding more (1-2 tsp. if necessary) until all flour is moistened and pastry almost leaves side of bowl. Gather into a ball and roll out on floured surface. If you have time you can refrigerate the pastry in plastic wrap for 30 minutes to make it easier to roll. Transfer to pie plate and cut off any excess. Sometimes I will 1 1/2 the recipe if I want a thicker crust.
PAGES
▼
Friday, July 31, 2009
Thursday, July 30, 2009
bleachy keen - turning your bleach accident into a fashion statement
Our friend Lee Ann is one of the most positive people I know. Talk about turning lemons into lemonade. Recently she was cleaning her bathroom and got a spot of bleach on her new gray t-shirt. Instead of banishing it to the sleepwear drawer like I would, she decided to make the most of her "mistake."
Adding a little chlorine bleach to a spray bottle, she lightly sprayed the t-shirt with bleach. The resulting spots were a cute shade of pink that matched this pink lace tank and cardie perfectly! I know, it brings you back to the '80s when you tried the same concept on your favorite jeans, but really, her shirt looked like she bought it that way. Dar-ling. (I had a better picture of this example, but I accidentally deleted it and can't get it back! Oops.)
The shirt was only $7 at Target, and they of course had other colors. How fun to experiment with each color and a little bleach to see what color combos you can get!
Wednesday, July 29, 2009
calling all designers - it's a wall decal contest!
I feel like I'm a creative person. Even an artsy person. But I can't say I can really draw. Too bad, because I think this is the coolest contest! I wish I had a snowball's chance to win something like this.
This vinyl decal company, dezignwithaz.com, is running a contest for people like you to design their own wall decals. They post a new batch on their Web site each month, then they let other consumers vote for their favorite. Each design is judged over a period of 30 days, and each selected design wins a $150 check plus 5 wall decals of the design. That way you have a copy of your artwork for your wall, and enough to share it with family and friends. After that the design will be sold through the Dezign With a Z Web site in the limited edition category. So, your artwork could be turned into a top-selling wall decal! Check out the current voting here.
If you're not an artist, they also have another cool contest. After buying a wall decal from Dezign With A Z, apply it to your wall, take a nice picture, and send it in. You can submit pictures once a month for a chance to win a $200 gift certificate to their online store. Hmm. So it looks like you don't have to be an artist to win after all!
Tuesday, July 28, 2009
home spa recipes
I’ve been looking for some good homemade “spa” recipes. Unfortunately, most of those I’ve come across require a trip to the natural food store or an online purchase (like soap supplies). I was thrilled to find in the May 2009 Better Homes and Gardens Magazine recipes for treatments that used things I already have in my house. Hooray!
Yogurt Face Mask
1 cup of yogurt
1 Tablespoon of Tumeric powder (used in Indian cooking)
Mix well and brush evenly on your face. According to BH&G, yogurt is a “natural source of lactic acid, which organically dissolves dead skin and leaves your face feeling smoother”. The tumeric is used as a brightener.
Avocado Hair Mask
Half an avocado, mashed
1/2 tsp. olive oil
1 egg yolk
Combine all ingredients and mix well. Brush on wet hair paying attention to the ends. Let it sit a minimum of 30 minutes. Shampoo out.
We've seen lots of great home recipes out there, like pomegranate sugar scrub, honey bath, even a chocolate facial mask. Gather a few recipes and a few girlfriends--make your own spa girls' night in!
Monday, July 27, 2009
micro-macrame winners!
Congratulations to TWO of our lucky readers who will be getting their macrame on with this cool new book, Micro-Macrame. The winners are. . .
Hooray for you! Please shoot us an e-mail with your name and address so we can send you your book. And thanks to everyone who entered the contest! If anyone ends up making something from this book, we want to see it!
Friday, July 24, 2009
when life gives you cherries...
...make Cherry Pie Filling!!
I was thrilled to order some organic cherries from a local farmer. The order came in when I was out of town, but I thought for sure they would be fine until I got back. Unfortunately, I was wrong. It's been so hot here that the cherries barely made it. They were so ripe. I was sad that I wouldn't have any for my salads or just to eat--they needed to be dealt with right away. Not one to cry over over-ripe cherries, I decided to roll up my sleeves and with the help of Mandy, we turned those super ripe cherries into yummy cherry-almond pie filling. (PickYourOwn.org has a great recipe with pictures!) Now I have pie filling to last me through the year and with a little paper and ribbon, a few housewarming gifts on hand, too. Thank goodness for wonderful friends like Mandy and Google for instant cherry pie filling recipes.
Thursday, July 23, 2009
how to make wool felted soap
This is the coolest concept. You cover a bar of soap with this fabulous wool fiber, then felt it, and you have a soap and washcloth in one! I love this for my kids because the soap doesn't get slippery and slip out of their hands, and I don't have to have a separate cloth or scrubby in the bath. And it really is an easy project.
Wool Felted Soap Tutorial
What you'll need:
*Bar of soap (check out Bath & Body Works for great fragrances--they often go on sale for $1!)
*Wool fibers
*Wool felting needles or tool (optional)
*Nylon sock (optional)
*Washboard (optional)
*Wool felting block (optional)
I found these lovely wool fibers from the local yarn store. It was super reasonable (only a couple of dollars per ounce and look how much I got!).
1. Place your wool felting block on a flat surface. Lay a piece of paper on top of the wool block and lay your fibers on the very top layer. We used a piece of paper to prevent our fibers from getting stuck in our block. If you are using a different type of block, one that is similar to foam, you may not need the paper. This block is like a brush, and without the paper in between, we would've been picking out fibers for days.
2. Using your wool felting need or tool (be careful--these babies are sharp!), punch out a design. Move your needle up and down to secure the fiber in place. Use contrasting fibers so your design really stands out. We chose a simple star shape for one soap and polka dots for another. (Hint: you could probably use a plain old pin or needle to do this, but it will take longer than using the felting needles.)
3. Continue to punch the contrasting wool shape (in our case, a star) until the contrasting fiber (star) is thoroughly intertwined in the bottom wool fiber. You want this contrasting fiber to hold its shape when you felt the fibers, so make sure it is really on there.
4. Gently separate the wool fiber from the paper. It will stick a bit, but a steady hand and patience should give you great results. Don't worry if you have small pieces of paper in it. They will eventually dissolve and paper will not harm your body so don't pull your hair out getting every last piece.
5. Wrap your fibers tightly around your soap. This is where this craft moves into "art-rather-than-science" mode. Don't use too much fiber or you will have excess after felting that will hang off your soap like little wool fingers. If you use too little when you felt, you will have areas of your soap thatare exposed. Don't worry too much if either of these things happen. We had soap that turned out each of these ways and they are still useful in the shower. They just have "character".
6. Once your soap is completely covered and you feel happy with it, prepare it for felting. It helps to put the soap in a nylon stocking, but you can achieve the same results without it. We used a trouser sock and it was a little too thick for what we needed, but still worked. It just took longer to felt because the wool fibers were not getting agitated enough.
We scrubbed the soap in the sock on my washboard using HOT water. If you don't have a washboard, you can rub the fibers with scrub brush or even your hands.
7. After we felted the wool soap in the sock (until the wool shrunk up around the soap), we removed it from the sock and shaped it by squeezing the soap. Our star needed a little tweaking in order for it to look right, but not much else. Don't worry if your soap starts to suds up a little (ours did).
8. Squeeze dry. It was a really sunny day, so we set these out on the back porch for a quick dry, and in a matter of minutes they were dry and ready to go.
Creating detailed images will take a lot of practice, but don't let that stop you. Get creative with simple shapes or dots. Our "dinosaur skin" soap was a huge hit with the kids. If you don't want to go to the trouble of needle felting an image, just wrap your soap with various wool fibers to get the tie-dyed look like the pink and purple one below.
Wool Felted Soap Tutorial
What you'll need:
*Bar of soap (check out Bath & Body Works for great fragrances--they often go on sale for $1!)
*Wool fibers
*Wool felting needles or tool (optional)
*Nylon sock (optional)
*Washboard (optional)
*Wool felting block (optional)
I found these lovely wool fibers from the local yarn store. It was super reasonable (only a couple of dollars per ounce and look how much I got!).
1. Place your wool felting block on a flat surface. Lay a piece of paper on top of the wool block and lay your fibers on the very top layer. We used a piece of paper to prevent our fibers from getting stuck in our block. If you are using a different type of block, one that is similar to foam, you may not need the paper. This block is like a brush, and without the paper in between, we would've been picking out fibers for days.
2. Using your wool felting need or tool (be careful--these babies are sharp!), punch out a design. Move your needle up and down to secure the fiber in place. Use contrasting fibers so your design really stands out. We chose a simple star shape for one soap and polka dots for another. (Hint: you could probably use a plain old pin or needle to do this, but it will take longer than using the felting needles.)
3. Continue to punch the contrasting wool shape (in our case, a star) until the contrasting fiber (star) is thoroughly intertwined in the bottom wool fiber. You want this contrasting fiber to hold its shape when you felt the fibers, so make sure it is really on there.
4. Gently separate the wool fiber from the paper. It will stick a bit, but a steady hand and patience should give you great results. Don't worry if you have small pieces of paper in it. They will eventually dissolve and paper will not harm your body so don't pull your hair out getting every last piece.
5. Wrap your fibers tightly around your soap. This is where this craft moves into "art-rather-than-science" mode. Don't use too much fiber or you will have excess after felting that will hang off your soap like little wool fingers. If you use too little when you felt, you will have areas of your soap thatare exposed. Don't worry too much if either of these things happen. We had soap that turned out each of these ways and they are still useful in the shower. They just have "character".
6. Once your soap is completely covered and you feel happy with it, prepare it for felting. It helps to put the soap in a nylon stocking, but you can achieve the same results without it. We used a trouser sock and it was a little too thick for what we needed, but still worked. It just took longer to felt because the wool fibers were not getting agitated enough.
We scrubbed the soap in the sock on my washboard using HOT water. If you don't have a washboard, you can rub the fibers with scrub brush or even your hands.
7. After we felted the wool soap in the sock (until the wool shrunk up around the soap), we removed it from the sock and shaped it by squeezing the soap. Our star needed a little tweaking in order for it to look right, but not much else. Don't worry if your soap starts to suds up a little (ours did).
8. Squeeze dry. It was a really sunny day, so we set these out on the back porch for a quick dry, and in a matter of minutes they were dry and ready to go.
Creating detailed images will take a lot of practice, but don't let that stop you. Get creative with simple shapes or dots. Our "dinosaur skin" soap was a huge hit with the kids. If you don't want to go to the trouble of needle felting an image, just wrap your soap with various wool fibers to get the tie-dyed look like the pink and purple one below.
Tuesday, July 21, 2009
covered wood bead bracelets
I guess we're really on a jewelry kick this week! That was unintentional, but fun. Here's a very simple bracelet or necklace idea that is great for little girls and bigger girls. The best part is that you can make one out of a pretty small scrap of fabric or a leftover piece of ribbon, so it's cheap, too!
Covered Wooden Bead Bracelet Tutorial
We made two of these--one using a fabric scrap (easy) and one using a piece of ribbon (super easy). That's why you'll see us using the supplies for two different projects.
What you'll need:
*Wooden beads (found at most craft stores with the jewelry supplies)--enough to go around your wrist
*Length of fabric or ribbon that can hold all your beads, plus about six inches extra for the ties (more if you want to tie your ends in a bow)
*Sewing machine (if using fabric)
*Cooordinating thread
*Fray Check (to keep your ribbon or fabric from fraying on the ends)
1. Cut a strip of ribbon or fabric. You will want to be sure it is wide enough to wrap around your beads and long enough to wrap around your wrist with extra length for the ties.
2. If using fabric strip, fold the strip together lengthwise and sew down the long end. (We didn't sew our ribbon and it worked fine.)
3. Using a dowel, turn your sewn strip inside out.
4. Iron the strip.
5. About 5 or 6 inches from one end, wrap a piece of thread or embroidery floss around the tube and tie a knot. Insert your first bead.
6. Using your thread, tie another knot to keep this bead in place. Add another bead. Repeat.
7. Continue repeating until you have enough beads to wrap around your wrist comfortably.
8. When you are done and the bracelet fits your wrist, tie the last bead off with thread. Apply fray check to your ends, and tie them in a knot or a bow. That's it!
Wouldn't it be fun to make a coordinating bracelet for a little girl's dress or skirt with the leftover fabric? Or, try bigger beads to make a long necklace. You could even tie a knot in the fabric between beads if they were a little bigger, making the process even simpler!
Monday, July 20, 2009
win a copy of micro-macrame!
Macrame. If you were a child of the 60s or 70s, you probably remember the knotted plant hangers, handbags, and wall decor like I do. Macrame is the art of knotting strings of fabric or cording, combining them with beads and other trinkets, and weaving them into works of art or just fun personal items. It's actually a few centuries old. Too bad the more recent decades gave it such a bad name. Until now. Have you heard of mirco-macrame? We hadn't either, but we were so impressed by this local gal's amazing book, we got TWO copies to giveaway to our readers!
Annika deGroot's book Micro-Macrame: 30 Beaded Designs for Jewelry using Crystals and Cords features some of the most beautiful and intricate jewelry we've ever seen. Using gorgeous techniques and sparkling crystals, she's created bracelets, necklaces, earrings, key fobs, brooches, even chopsticks with the art of micro-macrame. Check out her blog to find out more about Annika's discovery and journey that has brought us this beautiful book.
So, if you're into jewelry making at all, you're going to want to win this book. We're giving away TWO copies this week. Just leave us a comment and tell us if you've ever tried macrame, you want to try it, or even that you just remember an old plant hanger in your great-aunt's home as a child, and you'll be entered to win one. Please leave your comment by Saturday, July 25 at 11:59pm PDT. Good luck!
just be jewelry WINNER
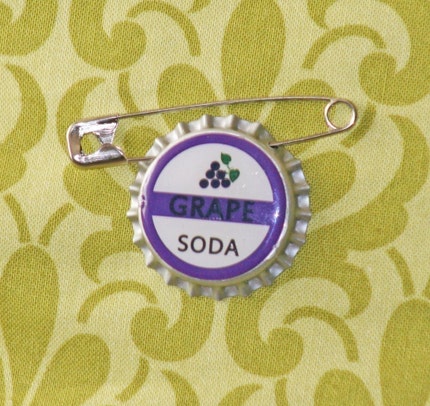
Thanks to everyone who entered the Just Be Jewelry giveaway. The winner of a Grape Soda pin from their store is...
Janna of Sew Me Some Love
Congrats! Please email us at littlebirdiesecrets@gmail.com so we can put you in touch with Just Be Jewelry gals.
Friday, July 17, 2009
Italian Vegetable Hoagies
It's Friday--which means it's time for another yummy recipe. I thought I would stay on the theme of fresh and summery recipes. I have a recipe that is quick and easy (you know I love that) and perfect for a hot day since you don't have to turn on the oven! I found this recipe for Italian Vegetable Hoagies at eatingwell.com and they are de-lish! As much as I want to love vegetables, there just aren't a ton of them that I do. I am always looking for ways to get more veggies into my diet, and this recipe was a perfect way. I bet you could substitute any of your favorite veggies and it would still be great.
Italian Vegetable Hoagies
1/4 cup thinly sliced red onion, separated into rings
1 14-ounce can artichoke hearts, rinsed and coarsely chopped
1 medium tomato, seeded and diced
2 tablespoons balsamic vinegar
1 tablespoon extra-virgin olive oil
1 teaspoon dried oregano
1 16- to 20-inch-long baguette, preferably whole-grain
2 slices provolone cheese (about 2 ounces), halved
2 cups shredded romaine lettuce
1/4 cup sliced pepperoncini (I added a little more since I love these little guys)
1. Place onion rings in a small bowl and add cold water to cover. Set aside.
2. Combine artichoke hearts, tomato, vinegar, oil and oregano in a medium bowl. Cut baguette into 4 equal lengths. Split each piece horizontally and pull out about half of the soft bread from each side. Drain the onions and pat dry.
3. To assemble sandwiches, divide provolone among the bottom pieces of baguette. Spread on the artichoke mixture and top with the onion, lettuce and pepperoncini. Cover with the baguette tops. Serve immediately.
Thursday, July 16, 2009
VIP chair cover
We love to celebrate and thought it would be fun to make a special chair cover for the "VIP" we are celebrating. This cover is so simple to make and sure to make the Very Important Person in your life feel like they are king or queen for the day.
First, measure your chair around the back with a tape measure. Add one and a half inches to that measurement and cut out two pieces. If you have a square back chair you can use the fold of the fabric as your top edge so you only have to cut one piece (doubled) and sew down two sides. If you have a curved chair, you may want to lay your chair down on the fabric and trace it to get the shape.
Second, you can either hem the bottom of the cover or do like we did and just serge it so it doesn't fray.
To add letters, follow our tutorial for simple machine applique, and check out this explanation of how we used a personal die cutting machine to cut the letters. Easy peasy.
You can personalize these any way you want. Here are some ideas:
Bride To Be
Mom To Be
Child's Name
Thinking Chair
Time Out
Superstar
Birthday Boy (or Girl)
Happy celebrating!
Tuesday, July 14, 2009
just be jewelry giveaway
Just Be Jewelry specializes in cool custom jewelry, and we're hosting a giveaway for one of their cute bottle cap pins today! This grape soda bottle cap pin was inspired by the Disney-Pixar movie "UP." The message like in the movie is simple. . ."Now go have a new adventure."
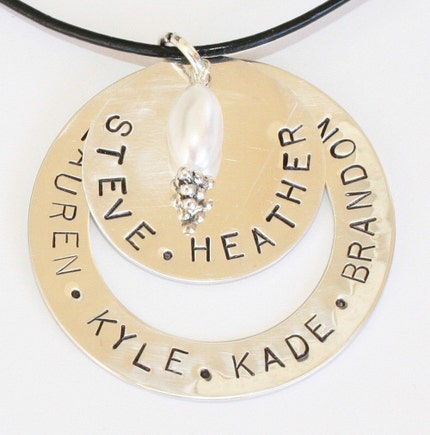
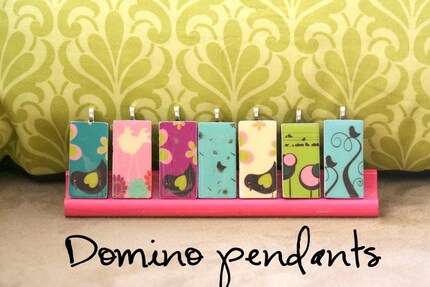
Isn't that cute? This would be so cute pinned to just about anything. Just Be's creators, Jen and Amber, are two best friends that love making jewelry. We also love their hand-stamped metal family circle necklace and their domino pendants.
So, if you want to win this darling Grape Soda pin, just leave us a comment telling us your favorite item from Just Be's store! Oh, and for an extra entry, become one of our Followers! Don't forget to let us know in your comment if you are now following us (or if you were already!). Be sure to leave your comment by Saturday, July 18 at 11:59pm PDT. Good luck!
Monday, July 13, 2009
super simple summer skirt
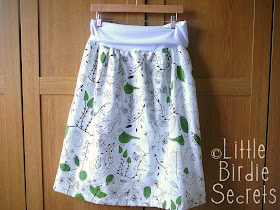
It's getting hot up here in the Pacific Northwest! I wanted a new summer skirt and was looking for a way to use up some of this gorgeous fabric I found at Ikea. It’s called Cecelia and it was only a little over $4 a yard. I just couldn’t pass it up. Inspired by this tutorial over at Altered Cloth, I whipped up my own version of their Gathered Skirt with Knit Waistband. This skirt is super easy to make--I did it during my little one’s afternoon nap. That’s how fast it came together. Love it—instant gratification and I can wear the skirt tonight if I want. I lined the skirt with just plain white cotton fabric too. I actually went back and shortened my waistband a little, but it will just depend on your personal preference. It's really comfortable and would even work as a maternity skirt, I bet. We definitely recommend this tutorial!
Friday, July 10, 2009
Sara's Salad
We have had several hot days already this summer. When it's hot, I usually don't feel like anything warm to eat. Salad is so quick and easy and really hits the spot on those hot summer days. This particular salad is perfect because it has bacon, peas, and cheese which makes for a great main dish salad.
Sara's Salad
1 head of iceberg lettuce
6 pieces of bacon
1/2 of a 10 oz. package of frozen peas
1/4 tsp. sugar
1/2 tsp. salt
1/4 tsp. pepper
1/2 cup shredded swiss cheese
2/3 cup chopped green onion
1/4 cup mayonnaise
1/4 cup miracle whip
Wash, drain, and dry lettuce. Cook and crumble bacon. Run hot water over peas. Layer lettuce pieces into bottom of a large bowl. Sprinkle sugar, salt, and pepper over lettuce. Add peas, cheese, onion, mayo, and miracle whip in layers.
Do NOT mix. Refrigerate overnight. Garnish with bacon. When you serve the salad make sure you scoop all the way to the bottom of the dish, so you get each layer.
Cooking Light also has a ton of wonderful salads that are quick to make. Click here to get the recipes. They are all so different that you would never get sick of salad! Take a peak and try out some new salads this week.
Wednesday, July 8, 2009
almost handmade - jewelry
None of the Three Birdies really know much about jewelry making. So when we found these cool pendants from Plaid's Fresh line, we thought, hey, we could do that! Any of their pendants would be beautiful just on a plain chain or piece of ribbon. They look really fancy, but they take about two seconds to put together. So even though you didn't make the pendant, you still technically made the necklace. We like to call this method "almost handmade." We're actually kind of pros at "almost handmade." You know we like simple!
However, knowing that some of you like things a little more elaborate, we got Stacy's cousin Megan to help us dress these pendants up a little. She knows her stuff when it comes to making jewelry. She already had a ton of beads to choose from, so we just started by picking out some coordinating beads. Check out her bead design board that helps you lay out the beads so you can see how they'll actually look (without trying to keep them from rolling away!). Very handy.
Megan did the fancy footwork on the chain and clasp. Definitely something you could learn in a beading/jewelry class at your local bead store. And here's our finished product! Cool, huh?
The Fresh line has so many other cool resin pendants to choose from, like these.
We have some other great ideas for the Fresh jewelry line, so watch for more "almost handmade" soon. . .