
Paper Flower Tag Tutorial

What you'll need:

*Patterned paper
*Scallop punch or die cut
*Brad
*Adhesive (I used Tombow's Mono Multi Glue)
*Stamped or handwritten sentiment
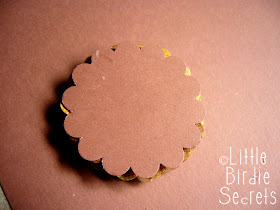
1. Punch or die cut 4 scalloped circles (or other flower shape).

2. Scrunch up your flowers. If needed, spritz them with water to make the scrunching easier.

3. Un-scrunch and fold flowers in half with patterned side on the outside.

4. Layer folded flowers, turning flower 1/4 turn after each addition.


5. Put a dot of glue or adhesive on the back of each petal to hold them all together.

6. Punch another circle out of the same or a coordinating paper. Glue on back to finish the flower nicely.


7. Insert a brad through the center of the flower and open prongs. I used a fabric-covered brad from K&Co.


8. If you want, stamp or print a sentiment and glue it to the flower. That's it! Now attach it to a ribbon on a jar of jam or around a loaf of bread and everyone will think you're such a thoughtful guest!


Cute, cute idea! Hope you and your family have a Happy Thanksgiving!
ReplyDeleteThis is so cute, I had to bookmark it since I don't have time to try it right now.
ReplyDeleteYou girls are just too cute.
ReplyDeleteLOVE LOVE LOVE!
ReplyDeleteI have that puncher too so you can bet I'm going to be making some of these flowers and I'm so excited to try it!
Thank you for the idea!!! :) :) :)
Oh so very cute! I love that. I need to find a flower punch now! I love it, thanks for sharing!
ReplyDeleteI am having a giveaway, you should go check it out!
http://holly-aitken.blogspot.com/2009/11/meet-me-under-mistletoe-giveaway.html
Cute!! Good idea! You are very creative!
ReplyDeleteThanks for share!!
ale
I adore this! So simple yet so chic!
ReplyDeleteThats's SO pretty - I love your blog!
ReplyDeletehttp://puppydogtails-marybeth.blogspot.com/
WOW!! Just found your blog and I am so glad I did! A wonderful bunch of tips and ideas that I can't wait to try - TFS!!!
ReplyDeleteI love it! I am making it right nOw!
ReplyDeleteDonna
yum and beautiful!My favorite combination!!!
ReplyDeleteI love this! Would you mind if posted a link to your tutorial on my blog?
ReplyDeleteThank you!!
Rhonda
Thanks for tutorial.
ReplyDeleteVal
www.crieartezzanato.blogspot.com
Lovely! they are really cute idea <3
ReplyDeletei love them. thank you for your very nice inpirations, :)