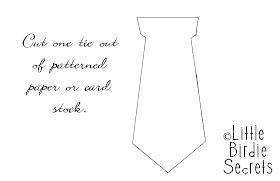

What you'll need:

*Solid color paper cut to 4" x 12"
*Coordinating paper for the tie
*The tie template offered here (see special printing instructions below)
*2 small buttons (try raiding your "extra button" collection)
*Scissors
*Adhesive

1. Fold your 4"x12" paper in half for the card.
2. Click on the tie template above. Go to File, Print Preview in your browser's menu. Go to where it says "Scale" on the menu bar of the Print Preview screen and select 50%. Click Print. (This should work for most of you, but I'm not positive it will work for everyone--your tie should be about 4 3/4" long when printed correctly). Trace the template onto your coordinating paper and cut it out.

3. Adhere the tie to the center of your card about 1" from the top.

4. Measure 1" down from the top on the top corners of the card. Measure in 3/4" in from each edge at the 1" mark.

5. Cut a notch 1" down and 3/4" in (using your marks) on each top edge.

6. Fold the strip points in at a slight angle so the points meet. They should resemble a shirt collar. Glue down.

7. Glue buttons on bottom points to look like a real shirt collar. What a handsome card!


Isn't that the cutest card! Thanks for the quick tutorial! Jenn
ReplyDeleteThis isa super cute (and easy!) card! Nice.
ReplyDeleteThat is so cute! Thanks for sharing!
ReplyDeleteWe made these a year or two ago...I think we saw them in Family Fun. Way easy and WAY cute. I'm considering making them again this year, actually. Grandpas won't remember, will they?
ReplyDeleteFun card! What dad wouldn't like that??
ReplyDeleteI made 5 of these yesterday with my toddler. To make it more personal I had her color a piece of card stock and then cut the ties from that. They turned out cute.
ReplyDeleteI read this earlier and imediatly packed up my kids to go get the stuff!! Thanks a TON! My 2 yr old even helped me make it.
ReplyDeletecute. thank you for the tutorial. i have that paper packet, love it!!!
ReplyDeletecute card.
ReplyDeletethanks for the tutorial.
ReplyDeletei will be linking
mypetitepurse.blogspot.com
thanks!
wow,
ReplyDeleteThis is so great and so creative...
:D
Fathers Day Gfts
wow,
ReplyDeleteTHis is so great and so creative.. I like the way it has been made..:D
Fathers Day Gifts
Wow great work. This is very cool stuff. I never imagined that we can make a tie out of this type. Thanks for sharing these steps with us. I admire your work.
ReplyDeleteCustom Essays
PLease HELP. Okay Perhaps I am not that smart lol. Once you have the flaps of the shirt pulled over and glued down ho win the heck do they open the card? obviously part of the top is still attached since we only cut 3/4 of an inch in to make the flaps of the shirt. hmm.. I am confused!
ReplyDeleteHi! You can see this post on my blog, I writed about the Father’s day! Your ideas are so beautiful!Thanks, Marta
ReplyDeletehttp://leideedellamarta.blogspot.com/
I love this card, however I wanted to include a message. So I adjusted the collar a bit and cut the folded side so that I could open it up from the bottom to write a note. Just a thought....Very simple and looks fabulous though!!
ReplyDeleteIsn't. 4×12 inch a little too small?
ReplyDelete