PAGES

Friday, December 30, 2011

cinnamon streusel dessert pizza

I found THIS scrumptious recipe on Pinterest a few weeks ago and knew I had to try it! A pizza? And it's dessert? Perfect. We shared it with some friends and it was gone in no time! Hurry and make it before you have to start on your New Year's resolution!


Cinnamon Streusel Dessert Pizza
(from: Rumbly In My Tumbly)

Pizza dough (You can make your own, I just bought some refrigerated dough at the grocery store)
1 TBSP butter, melted
Cinnamon

Streusel:
1/2 cup plus 1/3 cups all purpose flour
1/3 cup white sugar
1/4 cup brown sugar
2 TBSP vegetable shortening
2 TBSP oil

Icing:
1 cup powdered sugar
1 TBSP milk
1/2 tsp. vanilla

DIRECTIONS:
Mix together streusel ingredients with a fork, or your clean hands, then side aside.

To make pizza, pat dough into a 12 inch pizza pan that has been sprayed with oil.  Perforate pizza dough with a fork (this keeps bubbles from forming), then brush with 1 TBSP melted butter. Sprinkle cinnamon all around buttered crust. Top pizza crust with streusel mix.

Bake at 460 F for 8 to 9 minutes depending on the thickness of the pizza.  Mix icing ingredients until it is of a drizzle consistency. If it is too thick, then thin with a small amount of milk until you have reached your desired thinness.

When finished baking, top with icing in a circular pinwheel pattern. Cut up and enjoy!

Wednesday, December 28, 2011

petticoat skirt tutorial

We have a great tutorial that our sweet friend, Shelley was kind enough to share with us today. I love this skirt! So adorable that I wish one for myself! Take it away, Shelley...

So it's time for family pictures again and I wanted something super cute for my daughter to wear. I've been looking for a while and still didn't find anything. I decided I needed to make the skirt I wanted for her and it only took less than an hour and a half. Here's how.
 

I used a twin size bedsheet in tan. Trim the seamed edges off. I used 3 strips lengthwise. Cut a little at the end and tear the rest of the way. So quick and easy. Each strip was about 4 inches wide.

I tore another strip about 3 inches wide for the flower. Fold the 3 inch strip in half and gather. I love my gathering foot for my sewing machine!

It's not one continuous strip but you could sew it that way if you wanted.

Make a simple A-line skirt to fit your little girl. Sew the sides of the front and back together.

Next I pinned the ruffles in place. One goes all the way around the back and makes kind of a V in front.  I added a small piece of ruffle under the V.  Stitch the ruffles down.

After you have added all the ruffle, I used a cereal bowl to loosely mark a large circle to use as a guide for the flower.

Here's the flower loosely placed to make sure I had enough ruffle for the space.

 After the flower is sewn down, cut a casing for the waistband.


Cut a piece of elastic to fit and pin the four corners.

Pin the elastic in place and serge or zig-zag.

Fold over the casing and stitch down.  And Done!


What a fabulous, inexpensive, skirt!


Thursday, December 22, 2011

magnetic perpetual calendar {tutorial & printables}

Another great tutorial from Kalli of Sister Secrets while I madly sew last minute burp cloths and blankets! This perpetual calendar would be a great project to work on with sisters or friends during the holiday break. She's even provided free printables for the calendar pieces! Thanks, Kalli!

I recently purchased the We R Memory Keepers Corner Chomper.  I love the Crop-a-dile, and have been eyeing the Chomper for some time.  After buying the Chomper, I had to come up with a great way to use it, so my husband wouldn’t roll his eyes (as much) at my purchase of “another unnecessary crafty tool.”  I came up with this adorable perpetual calendar, a project that would put my Chomper to good use!  Let me show you how to make one yourself.

Perpetual Calendar Tutorial & Printables

Supplies needed:
*A piece of sheet metal trimmed to 16 x 12.5 inches
*Fabric of your choice (approx. 20 x 16.5 inches)
*Printable fabric sheets (mine came from JoAnn)
*Free calendar printables (or make your own)
*Spray adhesive (optional)
*Glue gun
*Crop-a-dile
*Corner Chomper (optional—shhh, don’t tell my husband!)
*Scissors
*Ribbon
*Magnet Sheet
*2 pieces of white 12 x 12 cardstock

1. After trimming your sheet metal down to 16" x 12.5", grab that Chomper and round the corners.  I used the ½ inch corner rounder.  If you don’t have a Chomper, you can round the corners with a pair of heavy duty scissors.  Be careful—the edges of the sheet metal can be sharp!
 

2. Now lay your sheet metal on top of your fabric and cut around the edges so you have approximately 1-2 inches fabric all around the sheet metal. 
 
3. Now print your perpetual calendar and calendar topper on printable fabric. You can get the printable files here for free. I love using printable fabric! It’s so easy to run through your printer, and gives any project that extra special touch.  Printable fabric comes in many colors and can be found on Etsy or most fabric stores.  I bought mine at JoAnn; I like the Colorfast brand because the directions are clear and you can heat set your image making it washable! This project would work great too using paper, if that is more your style.

 4. Center and pin the calendar and topper on your fabric and sew around all the edges.  If you are using paper, using the longest stitch length works best.

5. Time to put your fabric on the sheet metal. In a well-ventilated area, spray your sheet metal with spray adhesive. This part is totally optional, but I found it keeps your fabric from moving around when gluing it down on the other side. Center your calendar over the sheet metal and smooth down.  Don’t worry if you don’t get it centered on the glued metal the first time, you still have a minute or two to peel off and reposition.

6. Flip the  calendar over and hot glue the edges down, pulling the fabric tight as you glue.

7. Round two corners of your 12 x12 cardstock; spray adhesive (Mod Podge works great too) one side of the cardstock and use both pieces to cover the entire back side of the calendar, hiding the glued edges. Again, this step is optional, but really makes the calendar look finished.

8. For the Month, Day and Number markers, cut two 2 x 1.25 inch rectangles and one 1.5 x 1.25 rectangle out of the magnet sheet.  I covered the non-magnetic side with some extra pieces of scrapbook paper I had on hand, just because I’m crazy like that!  Now cut a window with the craft knife out of each rectangle leaving 0.25 inch boarder.  

9. Punch holes at the top and thread a piece of ribbon or wire through to hang. Embellish it any way you like! I used a ruffled ribbon like Mandy shows in this tutorial and some buttons and vintage earrings.


There you have it! A cute fabric perpetual calendar! These are great gifts that can be used all year long. Oh, and little Merry Christmas present to you, you can get your FREE perpetual calendar and topper here at the Little Birdie Secrets downloads page. Enjoy and Merriest of Christmases to you!

Wednesday, December 21, 2011

yarn wrapped holiday wreath {tutorial}

Baby #3 is coming this Saturday (whether he likes it or not!), so I've enlisted the help of my crafty friend Kalli to give you a few more fun holiday tutorials this week so I can get ready! Enjoy!

Hello!  I’m Kalli from Sister Secrets.  I’m so excited to share an easy last minute wreath with you here on Little Birdie Secrets.  Ever since Mandy got me “hooked” on Pinterst, I can’t stop pinning wreaths.  They are everywhere!  I’ve been dying to try a yarn wreath, but was always afraid they would take too long to wrap with all that gorgeous yarn.  After 2 ½  episodes of Modern Family, I’m happy to say, the wreath was wrapped and embellishing is easy!  Let me show you how easy.

Yarn Wrapped Wreath Tutorial

Supplies needed:
*Wreath Form (any size you like, mine was 9 inches)
*Worsted weight yarn
*Scissors
*Felt in assorted colors
*Hot glue gun
*Buttons, pearls, gems for flower centers
*Ribbon for hanging

Now, turn on that T.V., grab your wreath form and yarn, and start wrapping.  Try to go around the form uniformly, but don’t worry too much about it; the goal is to cover the form in yarn not letting any part of the form peek through—in the end, the yarn looks near perfect!  I did mine in about 3 layers using about half a skein of yarn.  Secure the ends of your yarn with a tiny bit of hot glue. 
Now embellish with felt flowers, ribbon and berry picks. I made my felt flowers in two sizes following this tutorial from My Heart Is Yours. You can get your free printable copy of my felt rosette pattern here! Add buttons to the center of your flowers, then add them to the wreath with a little hot glue.

Now hang with a ribbon and top with a bow.  Perfect way to get through all those TiVo’d shows, if I do say so myself!  
Happy Holiday Decorating!

Tuesday, December 20, 2011

christmas card display board {tutorial}

Without any of my Christmas stuff with me here in Iowa City, I had to find a new way to display all the cute Christmas cards we've been getting! Last year I made this easy Christmas card hanger that I shared on Make and Takes, but I thought I'd try something new this year. Especially because I had this cute frame from the thrift shop just hanging out in my craft closet, begging to be re-purposed.

Christmas Card Display Board Tutorial

Supplies:
*Large frame, glass removed
*Spray paint (if you are re-doing your frame--or leave it as is!)
*Sheet music pages, book pages, or patterned paper
*Paper glue or spray adhesive
*Either use the original cardboard in the back of the frame, or find a piece large enough to fit in your frame. You could also add a piece of cork board instead.
*Optional: berry wreath and ribbon
*Pins

1. If your frame needs a little work, remove the glass and backing and spray paint. For a less-toxic option indoors during the winter, try Martha Stewart Crafts Spray Paint Kit and turn ordinary acrylic paint into spray paint! Distress with sandpaper if desired.

2. Cover the cardboard backing with paper using paper adhesive. I chose vintage sheet music.

3. Hang a berry wreath from the frame with a wide piece of ribbon. Replace the paper-covered cardboard in the back of the frame.

This makes a beautiful piece for a mantel, even without Christmas cards! You could even change the wreath and ribbon to something less-Christmasy and keep it up all year!
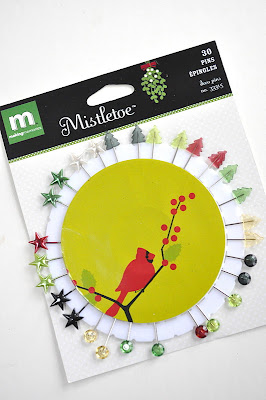
When you do start receiving cards, use a decorative pin to pin the cards to your cardboard. I had these leftover from a couple of years ago. I'm not sure if you can still find them, but they are from Making Memories. Even regular old pearl head sewing pins would be cute though!

Start pinning those cards for all to see! 
 

Monday, December 19, 2011

handmade ornaments in about 5 minutes each {tutorial}


This is the first time we've had a real tree in 11 years. The first year we were married we had one, and it was such a disaster that we bought a fake one the next year to save our marriage. But this year we got a real one (out of necessity) and it has been so fun! I mentioned a while ago that I was making all the ornaments for my tree this year since my real ornaments are in storage. Well, except for a few glittery snowflakes from Hobby Lobby, I did it! Here are a bunch of quick and easy ornaments you can make to decorate a tree or use as gift tags, gift toppers, etc. this year, or pin them for next year! Read on!

The Vintage "Tag" or "Greeting Card" Ornament