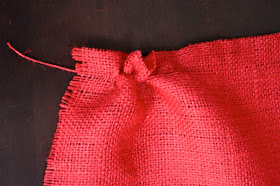
I found this
pretty red burlap at Hobby Lobby the other day and couldn't resist
buying a couple of yards! It's perfect for a quick and easy Christmas
table runner with lacy snowflakes. I put this together in under half an hour! This tutorial
is for a 90" long runner, which fits my 56" long table beautifully. But you can adjust the length for your table by adjusting the main part of the runner. I'll also show you how to cut burlap so you don't have wonky edges!
Supplies:
*2 yards burlap (I used red, but it would be cute in regular burlap or green, too!)
*Variety of shapes and sizes of crocheted doilies (you can buy them at antique shops or at JoAnn like I did. I've also heard you can find them at dollar stores, although mine didn't have any)
*Fabric glue (I like Fabri-Tac)
*Scissors
*Sewing machine & coordinating thread
1. Before starting, be sure that your burlap has been cut straight. To do this, lay it out on your table and examine the cut ends. If it's not, even it out. Here's a little trick I learned at the cutting counter. To ensure your burlap is cut straight, pull a thread where you want it cut. Pull it all the way out. This will leave a gap in a very straight line that you can use as your cutting guide. Brilliant, right? I had burlap cut at another store where they did not use this method, and I was horrified at how badly it was cut! I lost a lot of fabric trying to straighten it out.
Once
your ends are straight, cut your burlap to be 21" wide by 70". Turn the
raw edges under 1/4" and hem (so your edges won't fray, because they
will!).
2. Cut two pieces of burlap 13" x 35" each for your ruffles. Hem raw edges 1/4".
3.
(Pretend I hemmed the raw edges before taking this picture!) Ruffle the
long edge by pulling a thread one inch from the top of the 13" side. Be
careful not to break it! When you're ruffled half of the length, pull
the same thread from the opposite end. Ruffle it to match the width of your main runner piece (about 20.5")
Pin your ruffles to each end, about 2" from the bottom.
Sew your ruffles on about 1/2" from top of ruffle. If you sew along the line where you pulled the thread, you should have pretty straight stitching!
4. Now for the fun part! Arrange your doilies on the runner. I left the center a little open since I will be putting a centerpiece there and they'll just get covered up anyway.
Using
fabric glue, dot glue on the back of the doily in the densest areas (so
it doesn't go through too many holes). Glue in place. Repeat for all
doilies.
Ta-da!
That's it! I just need to finish one more project and then I'll show it
to you again fully decorated. I love how cheery it makes my dining
area!


Super cute! Love the way the doilies look like snowflakes!
ReplyDeleteThe runner looks gorgeous, I never would have thought doilies could look so lovely!
ReplyDeleteI was just going through my stash yesterday and found some red burlap I bought awhile back. I was trying to figure out what kind of runner I wanted to make and now here is your post... thank you so much!I can't wait to get started.
ReplyDeletelove the burlap cutting tip! looks really nice.
ReplyDeleteBeautiful! I've been looking for a new table runner and this might solve my problem. :)
ReplyDeleteSo pretty! I love Burlap and I love it in Red. Gorgeous! The doilies look fabulous too:)
ReplyDeleteVery pretty! I have some natural burlap that I've never done anything with because I knew I'd never get it nice and neat. No worries now!
ReplyDeleteThis looks beautiful!
ReplyDeleteI'd love for you to link up and share:
http://tutusandteaparties.blogspot.com/2011/11/pinteresting-linky-party-week-fifteen.html
I LOVE THAT!! Glad I have burlap and old fashion doilies!!
ReplyDelete