iPad Case Tutorial
My husband and I are Mac fanatics, so when the iPad first made its appearance I knew it was only a matter of time before it made its way into our home. The only problem... the cases are not my style. So I decided to make my own.
What you need:
2 pieces of 9 1/2 X 12 1/2 inch outer fabric
2 pieces of 10 X 13 inch batting
2 pieces of 12 1/2 X 20 inch inner fabric
11 1/2 inch zipper
Sewing machine
Needle & thread
1 binder
Directions:
Cut the binder as shown.

Cut the binder pieces to 8 1/2 X 11.
Place outer fabric with right sides together. Add batting on top and bottom of outer fabric.
Pin the pieces together.
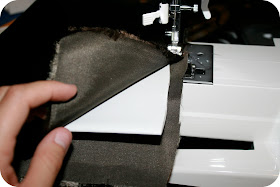
Start 1/2 inch from the top of the outer fabric (shown), you will need the extra space for to attach the zipper at the top. Sew 1/4 inch (remember to backstitch) from the edge of the outer fabric. You will need to lift the batting as you sew, to make sure you are still sewing the outer fabric. Sew down one side, across the bottom, and up the other side. Leave 1/2 inch at top. Backstitch.
Do not remove the excess material around the stitches. It will provide padding for the edges of your ipad case.
Cut off the corners.
Turn inside out. Use pin to pull corners out.
Sew along the outer edge of the case.
Attach the zipper as shown. Sew down the middle of the zipper (where the pins are located in my picture). Remember to backstitch.
Turn right-side out. Sew below zipper on the outer-fabric.
Take inner fabric and wrap around the binder piece. Sew the two edges of the inner fabric about 1/8 of an inch from where the binder ends. Repeat for the other piece.
Take the two pieces pin & sew together. End product should look like this. Don't remove the excess fabric. It will help protect the ipad.
Insert lining into outer shell. Using a needle and thread sew lining to the outer fabric or zipper. Do not push all of the way through the outer fabric, you don't want your stitches to show.
Add any accessories and voila! A very cute case for your iPad.


That is a very cool tutorial! Thanks for sharing!
ReplyDeletees precioso , me gusta mucho. MUy bonita la tela y las flores. queda muy elegante. Enhorabuena
ReplyDeleteThough it sounds like a lot of work...its very pretty indeed. I regret giving my machine away.
ReplyDeleteWOW! this is so pretty and such a clever idea! you should make these to sell, I would definately be interested! I currently have the black slim case for my iPad but it is so .... boring! Not clever enough to make one myself!
ReplyDeleteThis is too cute. I might try to adjust this to fit my laptop.
ReplyDeleteBeautiful! Can you tell us how to make those fabric flowers (or include a link). Thanks!
ReplyDeleteGorgeous! My aunt has a kindle I may try out your tutorial on!
ReplyDeletethat is amazing!!!!!!!!!! who would have ever thought of making your own in a million years?! and it is beyond GORGEOUS.
ReplyDeleteI am in total awe =)
GORGEOUS! I looooove it! Thanks for the inspiration...I now know that fate of some ill-fate bound binders ;)
ReplyDeletehttp://findingmyaloha.blogspot.com
beautiful!!! i am hosting a giveaway of my rosette necklaces actually! (kind of related!) check it out!
ReplyDeletehttp://elliceinspired.blogspot.com/2010/06/enter-ellice-inspired-necklace-giveaway.html
That is beautiful!! TFS!!
ReplyDeleteWhat a great tutorial! You directions are so clear and the illustrations make it clear what you should do. I'm all ready to make one, except for a small problem. I don't have an iPad, but being another Mac enthusiast, I'd like to think that it's just a matter of time and/or money.
ReplyDeletei'm just learning to sew -- but this makes me really really want to be better!! i want to carry my iPad in one! =-) it's really lovely.
ReplyDeleteim hosting a free giveaway of one of my fabric flower necklaces!! please check it out and enter to win!
ReplyDeletewww.elliceinspired.blogspot.com
(they are also made of fabric rosettes! )
this is awesome! cannot decide if i want to get an iPad or not.
ReplyDeleteNice! I love this idea. I need to find a great case for my 17" laptop, so this just might be my answer. Thanks for sharing!
ReplyDeleteNow I want a tutorial on the fabric flowers ;)
ReplyDeletehttp://shanty2chic.blogspot.com/2010/05/flat-rolled-rosettes-no-sew-baby.html
ReplyDeleteThere's one I know of...
Anyhow, this tutorial couldn't have had better timing. My cousin is in the hospital getting bunches of rounds of chemo, and my bro-in-law bought her an iPad...and we've been trying to figure out what to get her to go with it, wanting to do something a little more than a generic gift card. PERFECT! I can't wait to finish it and send it to her this week. :) Thank you thank you!
Love this!! Thanks so much for the tutorial! I've just finished an iPad case (http://beinginspired-blog.blogspot.ie/2012/09/day-24-ipad-3-cover.html) but this is definitely next on my to do list!! :)
ReplyDelete