If you couldn't make it to our crafty meet & greet, here is the tutorial for the LOVE garland we made. This would be cute out of so many different papers and colors! We do have one kit available in Mandy's Etsy shop that includes everything you need to make it (except glue).
Love Garland Tutorial

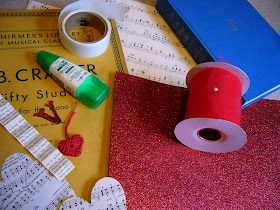
Supplies:
*4 hearts cut from sheet music or patterned paper
*Two 3/4" wide strips cut from a page out of a book
*5" pieces of red tulle or ribbon
*Two 12" pieces of baker's twine, crochet thread, or ribbon
*Crocheted heart
*Die cut or hand cut letters: L, V, E (we used red glitter paper, but any paper would work!)
*2" circle, punched from same paper as letters
*Glue dots
*Liquid craft or scrapbooking glue
*1/4" and 1/16" hole punches
*1 " circle punch
*Stickles red glitter glue or other glitter (optional)
1. Die cut or hand cut four hearts from sheet music. We found a book of vintage-looking sheet music for $1.00 at the thrift store. There are also several lines of scrapbooking paper that looks like pretty sheet music (try October Afternoon or American Craft's new "Deary Lizzy" line--she has pink and white sheet music!). I cut these hearts using the die cut center at my local scrapbook store, Lasting Memories. Punch holes in each near the top so you can tie them together later. We used a 1/4" punch for the inner circles, and a little bitty 1/16" punch for the two outside edges so the hole would be just right for our baker's twine.

2. Cut a page from a book (look for an old book while you're at the thrift store!). Trim off all the margins so you have a full sheet of only text. Cut two strips that are 3/4" wide.

3. Fold your strips accordion-style. I told our crafters to make their first fold at about 1.5 lines of text, but it might depend on how big your text is. Basically you don't want your folds too big or your fan will be too tall.


4. Using liquid glue, glue your accordion strips together, end-to-end, to make a ring.

5. Holding a fold on each side of your ring, use a flat surface to flatten your ring into a little round fan.


6. Punch two 1" circles from the margins of your book page. Apply liquid glue and glue the circle in the middle of your flat fan. Hold 30-60 seconds to make sure it is pretty dry and will hold your shape. Turn the fan over and do the same with another circle on the back.

7. Use glue dots to apply your crocheted heart to the middle of the fan.

8. Punch a 2" circle from the same paper you cut your letters out of. Glue your heart/fan combo on top. This will be your "O".


9. Die cut or hand cut letters L, V, and E. I used the Slice machine and the Vintage Findings design card for our letters.

10. While making this tutorial, Stacy decided she wanted to dress her hearts up a bit. She applied a thin line of red Stickles glitter glue around the edges of her hearts and let them dry. Optional, but super cute!

11. Glue your L, V, and E on your hearts. Spell LOVE and tie your hearts together using your tulle or ribbon. Tie your baker's twine or thread to the outside hearts for hanging.

That's it! Happy Valentine's Day! I hung mine at the top of a mirror in my family room, and it may just stay there all year long!


I love how this turned out. So cute, I think I like it better than my banner. It would fit my house better.
ReplyDeleteI swear I love everything you make.. Im so in Valentines mood.... I wonder If I could add this to my list before our party tomorrow... its so so sweet!
ReplyDeleteSo cute! What a great tutorial!
ReplyDeleteLOVE! This is awesome -
ReplyDeleteLove this! Thanks for the tutorial!!
ReplyDeletethat's soooo cute! i love the "o" especially. i also like the hearts cut out of paper with musical notes.
ReplyDeleteBeeeeautiful!
ReplyDeleteBeautiful - love that sheet music! :)
ReplyDeleteThe garland turned out so cute! When I came home, my husband liked my garland so much, he asked if he could put it in his office! Made me giggle!
ReplyDeleteWow, Amanda, that's a real compliment! I can't imagine my own husband ever saying that! It was so fun to meet you at the party. Thanks again for coming all the way from Ventura! ;)
ReplyDeleteI hung mine from a mirror in the dining room right next to the living room, ha. Hopefully I'll get around to taking a picture of it and posting it on my blog soon ;)
ReplyDeletenow this I love!
ReplyDeletehappy valentine's ...
rose
http://www.finecrafguild.com
ooppps...
ReplyDeleteit's Rose from http://www.FineCraftGuild.com
anyhow, now that I am back clarifying who I am, let me also add that I like your use of different textures in your garland.
i make simple garlands, mini garlands, as i like it that way... however, there is time and a place for embellishments.
Thanks for the tutorial on the circle fans! Just gorgeous. I am going to use it for Halloween
ReplyDelete