PAGES

Saturday, October 31, 2009

how to get free rolls of paper

Happy Halloween! We hope you all had a spooky but safe night. I'm sorry I didn't get a recipe post up this week--I even promised Jessica I'd do it so she could have a bit of maternity leave! I was just way too busy putting together last minute Halloween treats. So fun!

I transformed this tea tin into a gift tin with Making Memories Spook Alley papers and embellishments. We'll do a tutorial using Christmas paper for you soon!

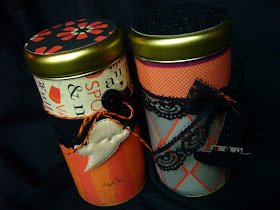


Then I used the rest of my supplies to make up little treat bags for my friends at work. I love the Spook Alley line. How are they going to top it next Halloween?


Okay, enough Halloween. On to today's post. Did you know you can get free blank newspaper from your local newspaper printing plant? Well, at least you can at the Seattle Times printing facility in Bothell, WA. I'm sure it's the same in many facilities around the country. When they print newspaper, they don't usually get to the end of the roll before they have to replace it. There is actually quite a bit of excess paper on those rolls, and they'll give it to you for free. Recently Stacy stopped by the facility near us and asked for any end of rolls they had. They gave her several, and she shared the love with me and our kids' preschool. So why in the world would you want the end of a roll of newspaper?

Here are a few ways I've used it:

*Table cover for craft night
*Table cover for kids craft activities
*Tablecloth for informal meals (plus you can let the kids color on it with crayons while they're waiting for their food like they do at some restaurants!)
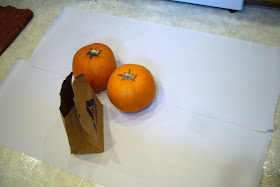
*Floor cover for pumpkin carving (or other messy activities)
*Tracing kids' body shapes for various activities
*Blank paper for kids to color on
*Making your own sewing patterns
*"Green" gift wrap (let the kids paint it, first!)

I love that it's free, and that it's recyclable! We pulled it out more than once this Halloween season:


Thursday, October 29, 2009

love this chair cover

We just had to give a shout out to the talented ladies over at Nannygoat. Have you seen this yet?


They created their own version of our VIP Chair Cover and it is fabulous! They were even gracious enough to put together a tutorial on how to make this cute cover. Go to their site and check it out. While your there be sure to give them some comment love.

top ten and a discount for you!

We are so excited to be in the top 10 of our category in the Divine Caroline "Love This Site" Awards! We only have 32 votes--we're pretty sure we have more than 32 readers out there, right? So if you love us, please go vote for us! Just think how many great tutorials and projects $250 could bring you. Vote now! (Pretty please?)


Oh, we have a treat for you, too. After all the great comments on our Sugarhouse Ink giveaway, Sugarhouse Ink is offering an awesome discount to our readers, just in time for the holidays!


Get 20% off any purchase
(Etsy or full-service shop - even sale items!) with the discount code LILBIRD (valid thru 11/2). You can also sign up for their newsletter to get news about specials and new designs!

Wednesday, October 28, 2009

sugarhouse ink giveaway winners!


Thanks to everyone who entered our Sugarhouse Ink giveaway for free photocards and designs! They were nice enough to let us choose two winners, so here are our lucky friends. . .

The winner of the $30 gift certificate to Sugarhouse Ink is
Carrie of Enjoy Your Lemonade!

The winner of the free design from the Sugarhouse Etsy shop is
Robin of Hall Farm!

Congrats, ladies! Enjoy your prizes, just in time for the holidays! Shoot us an e-mail and we'll get you in contact with Sugarhouse to work out the details of your prize.

Tuesday, October 27, 2009

dusting off the crochet hooks

Our crafting is sometimes influenced by the seasons. Fall is here so we've been in the mood to crochet and make quilts. We've been busy working on some cute projects. One of these projects are these adorable children's slippers. We found the pattern on Etsy in the Knot Sew Cute store and whipped up a pair. They were easy to make and super warm. We added a few dots of fabric paint on the bottom to prevent slipping on the hardwood floor.


Next, we tackled the cute monkey hat. We found this great pattern on Etsy and we've been whipping a few of these too.


Our church has been working on handmade items to send with some church members to Central America. One thing they asked for was crocheted dishcloths. Usually humanitarian groups give you very specific guidelines for handmade contributions, but this group was a little less formal and said we could use any pattern and color of yarn we wanted. The only guideline was that we use 100% cotton yarn, like Sugar n' Cream.

We've made several dishcloths so far and they've been so much fun! Dishcloths are a quick and easy project, and the best part is they give you the chance to practice lots of different crochet stitches. For example:
This is the textured dishcloth from CrochetMe, which helps you practice crocheting in back loops or front loops only.


This one uses the seed stitch. I found the pattern at Bron's Fiber Stuff. I was so exicted about the way the variegated yarn made this cool pattern! You never know what kind of pattern variegated yarn is going to make.


I can't find the pattern I used for this pretty one! I loved it because the stitches formed the pretty edging without having to go around the cloth at the end. If I find the pattern I'll post a link later.


Here's a pretty one from Call Her Blessed. I wonder if I did something wrong because mine is more lacy than hers. Oh well--I still like it! I added a little scalloped border by crocheting three dc's in every other stitch around the edge.


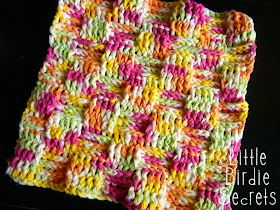
And this one is my particular favorite. It's the basket weave stitch. My pattern didn't have an explanation of a couple of the stitches, so I was doing it from memory and it was a little tricky to figure out. Once I remembered how to do it it was easy! Here's a pattern that explains the fpdc and bpdc stitches.


If you're looking for different patterns, try searching "crochet dishcloth patterns". You'll find thousands of them. I found many of my favorite patterns on Tip Nut's round up. A lot of them were more my style than the other stuff I was finding.

Do you also save some crafting for particular seasons? If so, what are you working on now?

Monday, October 26, 2009

every king needs a crown


Feeling a little misunderstood? Need a kingdom to rule? Well, before anyone can be a proper king, they must have a proper crown. In honor of one of our favorite books, Where the Wild Things Are, and the newly released movie, we've whipped up our very own crown. This crown would also make a great addition to a dress up box, a nativity scene costume, Halloween costume, or for your hubby to wear around as he rules the house.

King or Queen Fabric Crown Tutorial

Supplies:
*Sewing machine
*Peltex or very thick interfacing
*Outside fabric-I used this great shiny fabric found in the clearance section at Joann. If you browse the current costume fabric you will probably find something that would work.
*Velcro strip-about 1 1/2 to 2 inches long
*Wide double-fold bias tape in coordinating color

Let's make a crown!

1. I cut out a pattern first using some freezer paper I had on hand. It's basically a long rectangle, long enough to wrap around a child's head plus 2" overlap (for the Velcro). Mine was 24" long and 4 " high, but adjust according to your child's head. It's topped with small triangles that are 3 inches tall and 3.5" wide. (See dimensions in photo below.) I used my quilting ruler to help me with the points.


2. Using your pattern, cut one piece of the Peltex and two of the fabric. Lay the Peltex down first, then one of the fabric pieces right side up, and then the other fabric layer right side down (my fabric was shiny silver on the right side, black on the wrong side, if that helps). Sew the sides and all the points. Leave the bottom section open.


3. Snip off the tips of the crowns and add a short little snip between each point to help your crown turn better. Slowly turn your crown right side out. Use a dowel or chopstick to help push out your points.


4. Using the bias tape, bind along the bottom edge of the crown. If you are not a fan of bias tape or do not have any, you can just try to fold the fabric in and sew a nice little hem. I had a bugger of a time doing this so this is why I switched to using the bias tape.


5. Attach your Velcro by sewing around the edges of the rectangles.


Done!

Friday, October 23, 2009

candy corn sugar cookies


I got this recipe a few years ago from a cookie recipe exchange, and they are so much fun! Way easier than you'd think, too.

Candy Corn Cookies

1 package (18oz.) refrigerated sugar cookie dough
1/2 c. flour
1 tsp. grated lemon zest (optional)
1 1/2 tsp grated orange zest (optional)
yellow and orange food coloring
1/2 c. white chocolate chips
decorating sugar

Step 1. Preheat oven to 350°. Using an electric mixer on low, beat cookie dough and flour until combined. Divide dough into three equal portions.

Step 2. Add lemon zest and yellow food coloring to one portion of the dough. With the mixer on low, beat until blended; set aside. Add orange zest and orange food coloring to another portion of the dough; beat until blended. Leave remaining portion plain.


Step 3. Divide each dough section in half. Roll 1 piece of each color into 12-inch long rop. Transfer dough ropes to a lightly floured surface, side by side, with the orange rope in the middle.


Step 4. Place parchment paper or wax paper over dough; gently roll into a 15x4-inch rectangle. Remove parchment paper. Using a knife, cut dough into 12 equal triangles.


Step 5. Transfer triangles to an ungreased baking sheet, about 1 inch apart. Push a ruler against sides of triangles to straighten edges (I skipped this step as you can see). Bake until lightly browned, 9-11 minutes; let cool for one minute then transfer to a wire rack to cool completely.

Step 6. In a small microwave-safe bowl, microwave white chocolate on high until melted, about 1 minute. Stir. Dip wide end of cookies into chocolate then into decorating sugar. Let stand until set. (I was out of white chocolate when I made these, so I just dipped them in white frosting--it was still yummy!)


Enjoy!

Wednesday, October 21, 2009

photo card giveaway from sugarhouse ink!


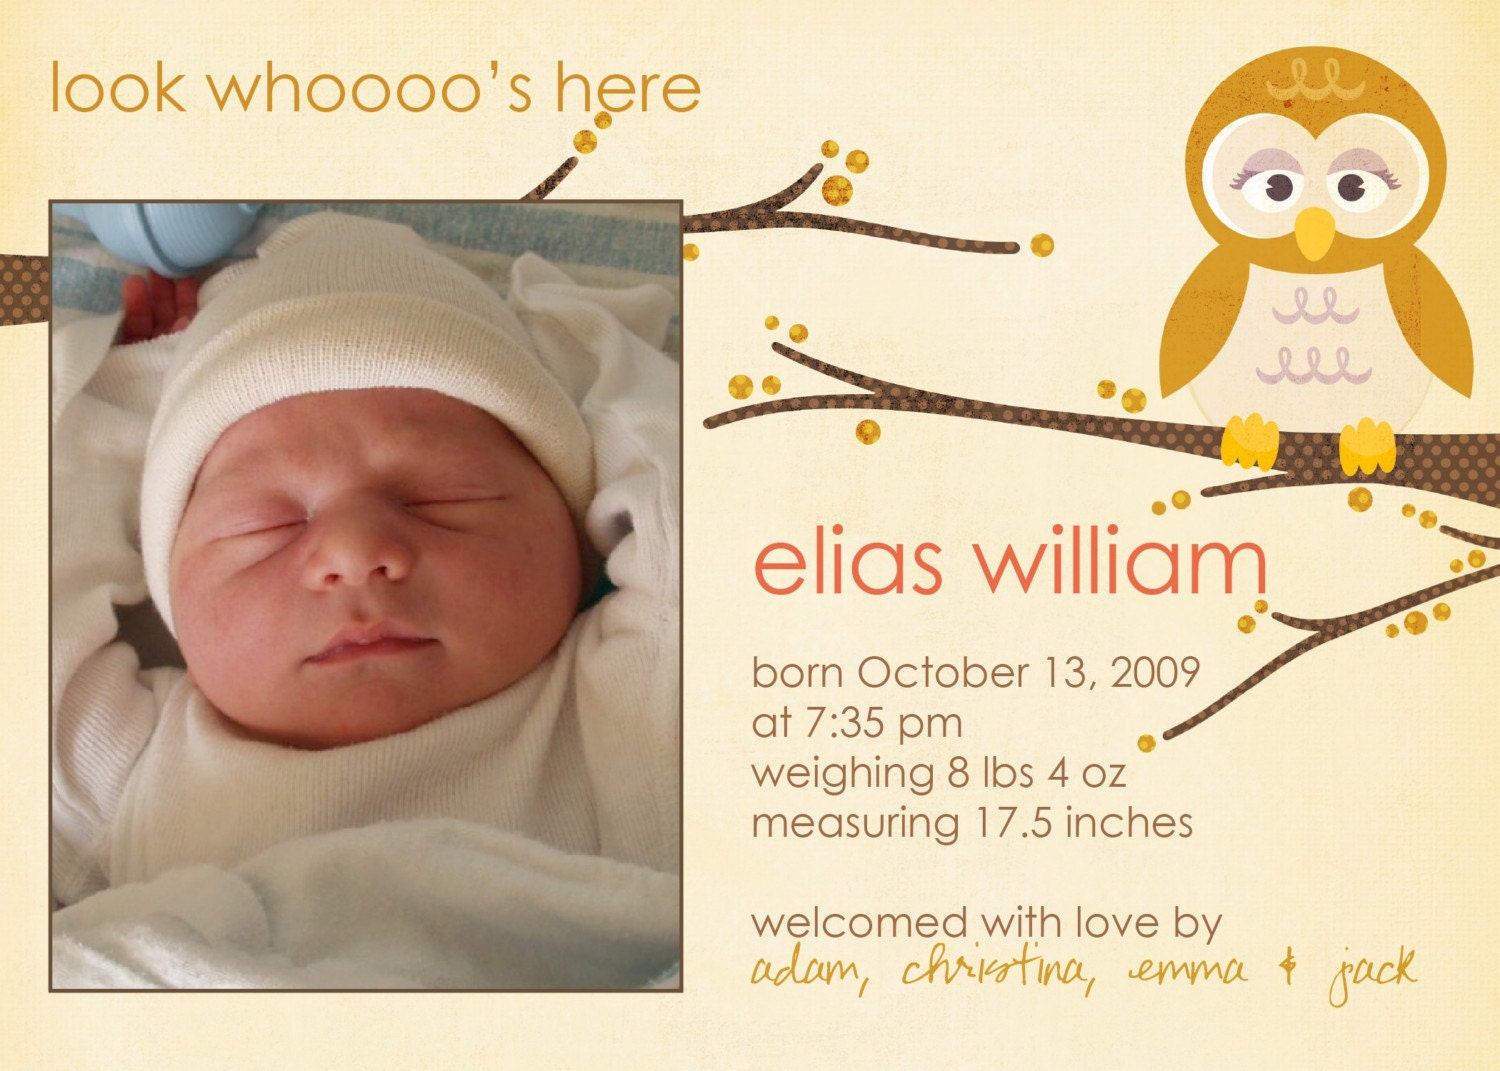
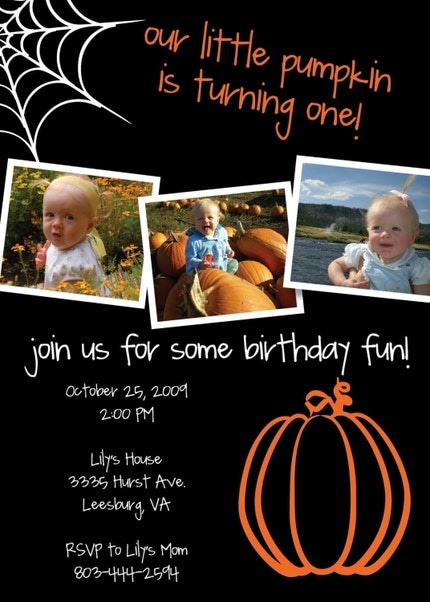
We're so happy to welcome Sugarhouse Ink back as one of our sponsors! Sarah does amazing work, and she's just opened an Etsy store with print-you-own designs! That means you can choose your designer photo card, and then receive the high-resolution image to have printed at Costco or wherever you like to have your prints done. Awesome! Here are are a few of her current designs that we are loving, from baby announcements, to birthday invites, to holiday cards. . .


We love to host giveaways for our sponsors, so here's your chance to win! Actually, we have TWO great prizes to giveaway!

Our first winner will receive a $30 gift certificate towards Sarah's full-service shop. Our second winner will get a FREE design from the Sugarhouse Ink Etsy shop. Both are great giveaways! Want to win a little Sugarhouse love? You have two ways to enter. 1. Leave us a comment telling us what occasion you'd use your Sugarhouse Ink for, and 2. Leave Sarah a comment on her blog, then leave us another comment letting us know you've given her a shout out. You'll have two chances to win one of two great prizes! Be sure to leave your comments by Tuesday, October 27 at 11:59pm so we can post our winner on the 28th. Good luck!

Monday, October 19, 2009

getting creative with digital photo editing

A while ago you may have seen buzz on different blogs about a free digital photography class offered by Jessica Sprague. Our curiosity was piqued so we signed up. We thought it would be fun to expand our crafty skills and try something new.

Wow. That is all we have to say. The classes were amazing and we had so much fun going through them.Take a look at some of our projects.

Remember this picture?


Look at what Mandy was able to do with it. She softened it up and used it on this sign. Isn't it lovely?


Here's my attempt at softening up a photo.


Here is a picture that is distressed a little. I also added some text so it looks like a postcard.

Here is another fun technique. I really enjoyed "painting" the color back into this picture.


Mandy loved this one so much she had it printed on blank cards to send as birthday cards.

Whether you're a complete photography novice, or know a little something about photo editing, Jessica Sprague's classes are easy to follow and so inspiring. We {heart} Jessica!