Sorry for the break in our regular quilt-along series. Hope you had fun with all our great giveaways last week while you were waiting!
So now on to the final part of our
denim blanket project. I did make a modification to the supplies list to ensure the vinyl tablecloth would hold the bottom part of the snap. There is more than one way to reinforce the edges, but I'll show you how I did it and you can do it however you want to. I wish I would've seen
this article on Martha before I started this project--it would've saved us all some time! If you don't want to take the time to make a denim blanket, you can really use any blanket and attach the vinyl tablecloth for the same effect.
I used about 9 yards of twill tape and sewed it around the edges on the back side. I found it for .37 a yard.

I stopped, backstitched, and broke off the thread, then folded the edge over at the corners. Then I started sewing again around the corner. I did this on all the way around, then on the inside of the twill tape all the way around again.

When I got to the end I just overlapped the tape and backstitched a few times.

You could easily just use a small piece of twill tape where you will have your snaps to save money (and time). Or, a reader suggested using a small piece of a denim patch, like you use to patch the knees in a pair of jeans, under each snap. This would work great, too.
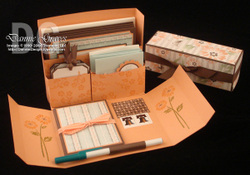
On to the snaps. Here are the supplies you'll need:

*Heavy-duty denim snaps (since it's only one layer of denim, these might not be necessary, but it's what I used)
*Snap setting tool (to match the size snaps you bought)
*Fabric marking pen
*Pencil with eraser
*Hammer (don't use a wimpy one like the one pictured here--I endedup switching to a full size hammer because the little one was too weak)

These are the four pieces of snaps. The first two (from left to right) are for the top (blanket). The second two are for the tablecloth.

These are the tools to set the snaps. You can use the instructions on the back of the package, or follow along with me below.

1. Lay out the tablecloth on the floor with the waterproof side down. Lay your finished blanket on top. Mark on your blanket where each snap will go, then make a corresponding mark on the tablecloth so you can match up the sides of the snap. I did the four corners plus a few in between on each side.

2. Put the snap head on your mark and press the prongs down through the denim.

Using your eraser, press down on each prong. This will help the prongs go through the denim without poking you!


3. Set the corresponding piece over the prongs.

4. Place the protective cover on the top of the snap (so it doesn't get dinged up when you hammer it).

5. Hold it there and turn that part of the blanket over. Place on a hard surface (don't do this on the carpet--the pieces won't set right). Protect your hard surface if you need to (I used a cutting board on my tile). Put the other tool over the top of the back side of the snap. Hit it with your hammer 2-3 times. This should set it.

6. Find your mark on the tablecloth. Repeat the steps for setting the bottom side of the snap using the other pieces. Put a snap on each place you marked.


That is it! Now get out there and have a picnic!

Just joining us? Here are the other parts in this series:
*
Invitation and supplies*
Part 1*
Part 2*
Part 3